General battle advice
Here's some general advice on fighting the dustbowl megabattle.
- Types of defence
- Safe spot for gathering enemies at the passage
- Safe strip for gathering enemies in the first corner
- Other remarks
Types of defence
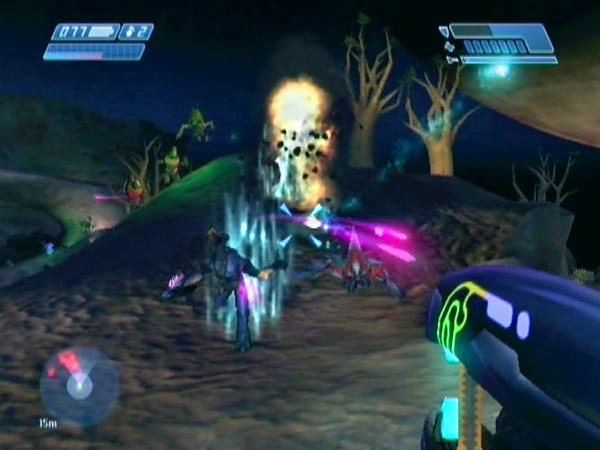
Except for Grunts on Shades, enemies will chase you around freely, having lost their earlier territorial limitations once you triggered the outer passage checkpoint. This lets you lead them to fun places to defend from, do a progressive defence on the move, or whatever. It can also make things quite chaotic. If you like mayhem, this is the battle for you! With all the enemies around, often bunching into confined areas, it's also excellent for setting off lots of chain reactions.
Defence on the move
Defending on the move can be an engaging option. Keep moving around the area, picking off enemies as you go. Maybe some will be behind you, maybe some are coming up in front of you; it can vary nicely between defence and offence. The basic idea is to keep in control, avoiding hectic situations. Er, unless you want hectic situations of course! You could maybe keep the sniper rifle so you can pick off distant enemies when you've got the time; or maybe you'll prefer to just focus on the close and personal stuff.
Fixed defence
Alternatively, run to a defence position somewhere while still cloaked. Enemies will tend to drift your way even though you're still invisible. Watch out that you don't brush against anyone or it can trigger a lot of wild shooting, which could be the end of you! Anyway, once you lose your cloaking, prepare to fight for your life as the mob spots you and converges. Could be nasty! I list some specific defence spots later that work nicely if you've got the enemy approaching in the right manner, but I suggest you explore for yourself first. Look for places that give you a decent chance of keeping things under control, either by giving you good cover or limiting enemy approach routes, or both.
Ramshackle brawl
There's always the possibility of just wading into the enemy and having a right old brawl somewhere without worrying about such things as cover. You'll probably need to be on one of the lower difficulty levels though, and perhaps not have too many Elites to deal with. If you've got a large enough area to move around in, one thing you might like to try is to circle a group of enemy while firing and throwing grenades. Much of the return fire will miss you and I expect quite a bit of it will be doing your job for you. Those covies just love friendly fire!
Safe spot for gathering enemies at the passage
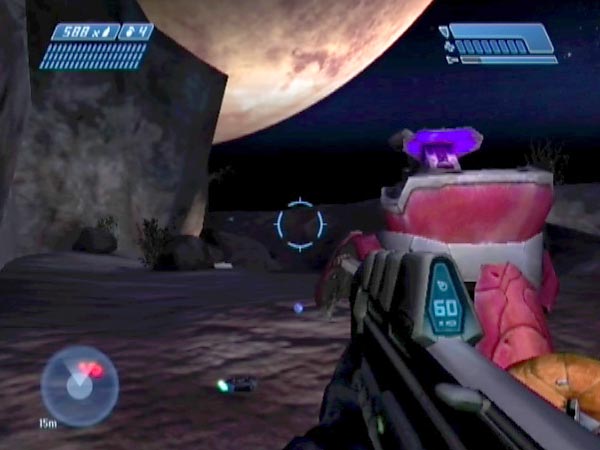
On the right of the passage entrance to the grav-lift area there's a raised path along the cliff, sometimes with a Shade on it. If you go near the end of that 'side path', enemies tend to gather down below; they don't come piling up the path after you. I call this area the 'safe spot'. It's useful as a way of forming a concentrated mass of enemies near the passage entrance, to then lead somewhere for some defence plan or other. If you want to try and ensure that everyone gathers, I suggest first going somewhere down in the dustbowl and maybe firing a shot into the air (it's not always needed) to draw the more distant enemies into the main area, where they're more readily influenced. If you then move to the safe spot, you should get everyone.
Incidentally, if you're heading out of the passage there's a handy shortcut to the safe spot. Jump onto the vertical slab of rock sticking out along the side path (land about halfway along it) and run up the edge, doing another jump to help get you onto the path.
Counting enemies
The safe spot is also useful for counting how enemies you managed to get in your megabattle. If you move down the path a bit, they'll start to flock around and come part way up. With a sniper rifle or plasma weapon you can kill them one by one as they appear, keeping a tally. You can always back off if too much fire comes your way.
Mischief from the safe spot
Obviously you could also exploit this spot as a way of having some mischief with a crowd. For example you can peer over the edge to pick them off one by one, or lob grenades down into their midst. If you make sure there are plenty of loose grenades down there before you throw one, you should get a nice chain reaction! It's also good fun to blast Shades down onto their heads. If you manage to squash an Elite, you can enjoy seeing and hearing the Grunts panic.
Another safe spot
If you jump across from the safe spot, you're in a spot that's almost as safe, except that enemies may sometimes approach along the top path or the bridge.
Safe strip for gathering enemies in the first corner
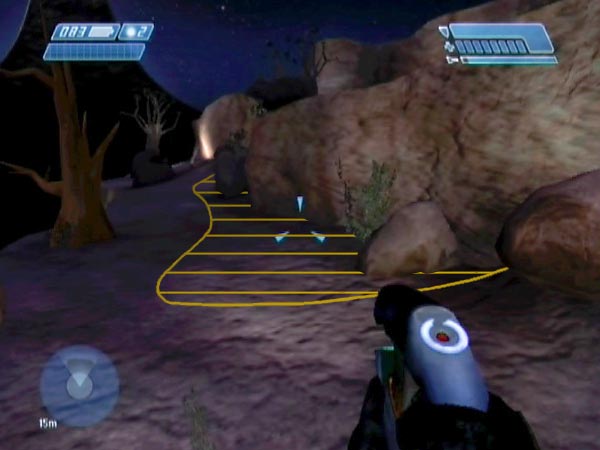
I've already described how you can safely gather enemies near the passage as a preparation for some battle plan or other. Well, there's also a safe way of gathering enemies near the first corner of the dustbowl to do likewise (though some enemies may stay back towards the passage). By the 'first corner' I mean the area to the right as you come up the ramp entrance into the dustbowl area. If you go over there (perhaps while cloaked) enemies will drift your way as usual, but now here's the quirk you can exploit. If you drop over the edge into a certain 'safe strip' along the wall, they'll continue to gather there rather than heading around to get you, even if they know you're there. So, you can wait around as long as you like, until satisfied and ready to initiate a battle plan. In particular you're in a fine place for initiating a cliff path defence.
Let me describe the safe strip now. Imagine you're down on the cliff path, looking at the wall. Off to the left there's a big rock at the near corner of the ramp entrance. Scanning to the right, there are two smaller rocks close together along the wall. To be in the strip, you need to be left of the second small rock and pretty close to the wall. The strip stretches along the wall and continues up the right hand half of the ramp. It's also ok to be standing on the corner rock or the first of the smaller rocks.
If you move out of the strip, enemies start flocking towards the ramp entrance. Moving back into the strip won't make them stop and return; it's like you've opened the floodgates.
If you're interested, you can get a more exact idea of the strip's area by getting a delayed battle start checkpoint while there, and seeing where you can move before enemies start heading for the ramp. Each time you notice them making a move, you'll know you left the strip.
Mischief from the safe strip
Here are three novel bits of mischief you can have with the gathered crowd, from within the safe strip.
Standing against the wall, lob a grenade up almost vertically and enjoy the resulting sounds and sights as enemies get blasted. If you look up, you can enjoy seeing them flying off the edge overhead, hee hee!
Standing on the first of the two smaller rocks, jump up and down. On each jump you get a brief chance at shooting enemies. Have fun working your way through them. At some point you may like to add a grenade to get a big chain reaction.
Edge up the ramp entrance to where you've got a line of fire on the enemy. If you're sufficiently low down they don't have much of a line of fire on you, so you can kill them without too much pressure - maybe even none at all. As before, you may like to add a grenade to the mix at some point, for a big chain reaction.
Other remarks
Here are some remarks on a couple of other matters.
Low difficulty levels
Depending on quite how many enemies you're dealing with, some battle tactics or plans may only be viable on the lower difficulty levels. Certainly don't feel you ought to be using Heroic all the time, or you could end up missing out on quite a bit of fun. The lower difficulty levels allow you to cope with larger mobs close up, hence more chain reactions and general mayhem, if that's what you're after. And take it from me, battles against 40+ covies on Normal are no pushover!
Stop pestering me with that thing!
In battle, Shades are something of an annoyance and personally I wouldn't want them around. Admittedly it's fun grenading them (bye bye grunty!), but usually I want to keep my stock of grenades for defending against the covie horde. You may like to eliminate them in advance. Remember that it's possible to eject the gunners though, so they'll still take part in the battle. On the other hand, it can be quite amusing to leave a Shade intact near the passage, get enemies clustered down below, then blast the Shade down onto them. Note: it seems that only the original gunner will man his Shade; no replacement will hop aboard.
Weapons
In regard to weapons, it's a real shame there's no pistol available; that would've been ideal. Why the heck did Bungie deny us the pistol? Grrrr… On the positive side though, you've got a sniper rifle with enough ammo to take care of everything that moves. When things are close and personal however, you'll surely want an AR or plasma weapon to do the fastest and most effective job. When you've got a bit more time - or when you're in a situation where enemies are obliged to come pretty much straight at you - there's always the glorious needler for some explosive fun. Actually I'm selling it a bit short there, as it can even be viable in more open and hectic situations. Using an enclosure defence against 45 covies on Normal for example, I was surprised to find that I was able to survive just using a needler and grenades if I fought like the devil. And a heck of a lot of fun it was too!
Let there be light
It's pretty dark in that dustbowl. Don't forget that you've got a flashlight (though it doesn't give out light while you're cloaked). I suggest you turn it on as soon as hostilities are about to break out. With most battles it'll last all the way through. It has to be said that the flashlight is a bit glitchy however. In some places you may notice it intermittently failing to cast light, sometimes even blinking on and off when you're not even moving! Er, loose wire somewhere?
Enemies stuck at the overhang
If enemies ever pass near the overhanging plates of rock close to where the active camo was, you'll often find that one or more of them will get a bit stuck there, either underneath or standing on top. Apparently they have problems negotiating that place, and in particular they don't seem to see the overhang when running up the slope, so they just run into it and try to keep going. As such, you'll probably end up having to go and kill them (as seen in BCM10). That can provide a bit of light entertainment (plasma grenades and the needler spring to mind), but I sometimes make an effort to keep enemies away from there so my battle will finish in the place where I actually stage my defence.
"We're directly under the ship now"
Assuming you didn't leave anyone alive earlier in the level, Cortana will eventually say "We're directly under the ship now". This usually comes a few seconds after you've killed everyone, though sometimes the delay is longer, like ten seconds or more. But sometimes you get it when there are one or more covies left, if they're not close to you; so you can't take it as confirmation that everyone's dead. That's fairly rare though.
Challenges
With the battle plan of your choice, you can have fun applying weapon limitations and seeing if you can still survive. For example, can you manage with just an AR and grenades?