Maw Banshee snatch - faster!
Posted October 7th 2015
Associated movies
- Introduction
- Stage 1 - the main work (80+ minutes)
- Stage 2 - finishing off (5+ minutes)
- Alternative plan without weapon counting
- Accumulation tips
- Options and discussion
- Higher difficulty levels
- Notes about the Banshees
Introduction
Back in 2004 Ducain released a video describing how to obtain a Banshee in The Maw in single-player, which you can then enjoy flying around. It's the one which flies low over the bridge at the ill-fated rendezvous with Echo 419. Under the right conditions it can actually be lacking a pilot, which enables you to board as it skims overhead! The idea for achieving this had been raised earlier, namely to overload the game via weapon accumulation. When you handle a weapon, it's effectively marked for retention and won't be removed when out of sight. If you keep handling weapons dropped by the infinitely spawning Flood in Engineering, you can accumulate hundreds of weapons, diminishing the game's capacity for creating new things - such as an Elite to put inside that Banshee!
Faster recipe! Plus overload control
I figured it was high time I tried out this classic trick. And the good news is, I found a way to speed things up massively. Ducain reported taking around 5 hours to do the accumulation work (there was a lot of coffee involved), but I've cut it down to under 80 minutes by working on level 3 instead of the ground floor. The other gameplay is relatively minor, so in total you can get a Banshee in around 90 minutes - which should make things rather less daunting for anyone who wants to go flying!
As well the speed-up, my recipe aims to give you a degree of overload control as conveniently as possible, though the control is only loose and randomness can play quite a part. You see, when you get your Banshee there are various other elements which may or may not be present, depending on just how overloaded the game is (or was). Things such as whether the Banshee can fire, whether there's a manned second Banshee to parry with, and whether there's a Longsword or any personnel in the hangar. So overload control is quite relevant.
My recipe involves doing weapon counting along the way, but there's also a non-counting plan akin to Ducain's method if you prefer. In a separate article I talk about the fun you can have with your snatched Banshee.
Links for Ducain's video
Ducain's release was covered in an HBO news item which also outlines some history. In a follow-up item there's a working link for downloading his video - which is now also on YouTube (in blurrier form).
UPDATE, NOVEMBER 9th 2015: I've now found a way of snatching the Banshee in normal play! It's much faster and has other benefits too, so you're certainly better off using that unless you want to see various oddities caused by overloading - such as weaponless enemies. Those oddities can be fun though, so this overloading business hasn't been made completely redundant.
Stage 1 - the main work (80+ minutes)
This section describes how to reach a point where the overloading has just about got you into Banshee snatching territory. You'll end up saving a checkpoint in as little as about 80 minutes, forming a base save from which you can then finish off in various ways, according to how you want things to turn out. That'll be stage 2. Both stages are demonstrated in BCM159 but there's far more detail in this written account.
Use Easy, because it's easiest. I discuss higher difficulties later. Incidentally, all my experience is with PAL Xbox but I expect things work very much the same on NTSC. Whether the PC version acts similarly in regard to overloading, I'm not so sure.
Reach Engineering with a rocket launcher
Your initial task is to reach Engineering with a rocket launcher as secondary weapon. There's one in a narrow passage just after the cryo bay, but there's also the Armory of course. There's a possibility of having some fun with your launcher after getting a Banshee, so I recommend getting it fully loaded in the Armory - after which you never need return there. To reach Engineering fast, bypass enemies where viable; no need to dawdle for much killing. You can be there in well under 4 minutes.
Go up top and accumulate 440 weapons
Head for level 3 (with full health), because that's where you can do your weapon accumulation most efficiently. Each time you handle a new weapon (anywhere in Engineering), add 1 to a running count; but if you ever cause a counted weapon to vanish by taking its ammo, subtract 1 of course. Your goal is to reach 440, which can take as little as about 75 minutes. If you badly lose count, don't panic: you can switch to a no-counting alternative plan instead.
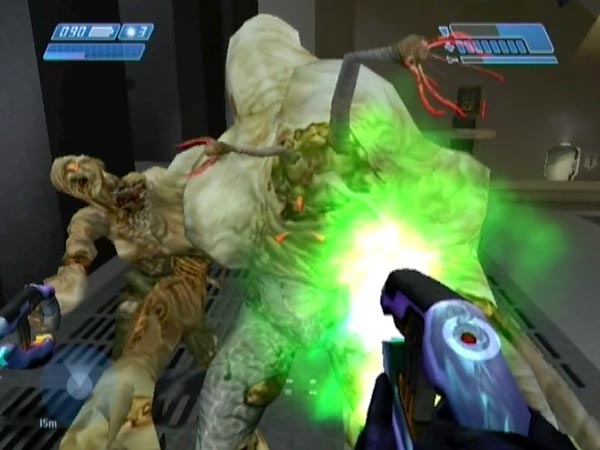
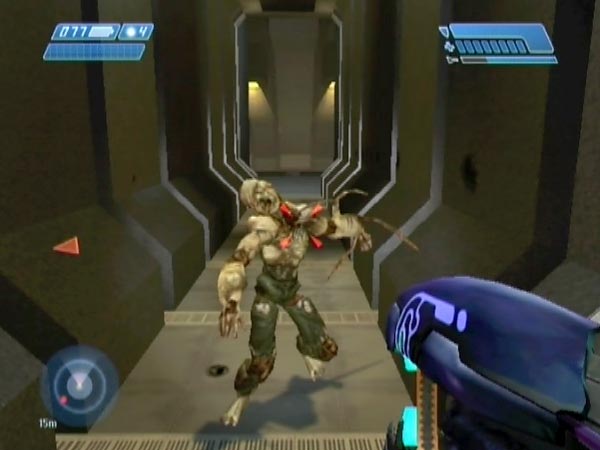
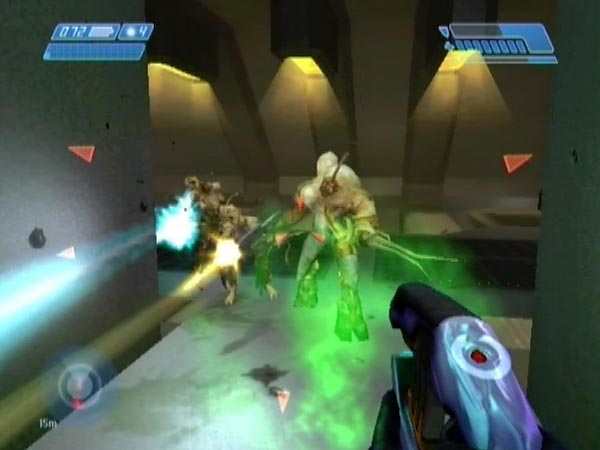
Up top there's a walkway on either side, joined by a cross-way. When you're on one side (including about half of the cross-way), Flood spawn two at a time on the other, out of sight though you can often hear them spawning and also see it on your tracker - something to make good use of. They have pistols, ARs and plasma weapons, but some are unarmed. To get them moving your way promptly, do some firing. Advance to meet them, kill them, handle their weapons, and move weapons clear to avoid clutter building up. In doing this you'll typically have switched sides; so the next pair will spawn on the other side (which can happen once the current Flood count has dropped below 2). As such, you can get into a nice back-and-forth rhythm. A benefit of switching sides is that the game destroys any Sentinels you leave behind - so they rarely get enough time to trouble you. In fact the whole of Engineering has a rather cheap dynamic in which Sentinels get destroyed when you move into another area (e.g. going through a door). Handy to know!
Plasma weapons are the best to use, but see my section of accumulation tips for more on that, and other efficiency advice. With good technique it's possible to average close to 6.5 weapons per minute, though your rate will probably drop a bit as you get towards the end (the game exhibits some slowdown).
During this period but preferably towards the end, I recommend leaving two or three low-ammo ARs in the vicinity of the switch for the vent core nearest the main entry door. See later for the reason.
Maybe cancel some deep music
Mysteriously, some deep foreboding music may eventually start up. Typically I find that it starts around 40 minutes into my work, when I'm about halfway through the weapon count. It makes Flood harder to hear, but if you then retract a first exhaust coupling it'll get replaced by something much quieter; better for working with.
Optional consolidation along the way
If you wish to consolidate progress with checkpoints along the way, vent core destruction is one option. Each destruction triggers a checkpoint which will be granted when you're away from enemy threat (go through a door for a few seconds if needed). Use as many as two, but there's one core to avoid because its destruction starts a fire in the cross-way; a hazard which can lethally set off grenades dropped by Flood! That core is the one nearest the main entry door (the door you'd reach by heading up the right-hand side of Engineering).
The drawback of using vent core checkpoints is that when a first core is blown, loud battle music will start, making the spawning of Flood harder to hear - and just plain making things noisier. If you're confident about staying alive, which should be no problem on Easy, you may consequently prefer to avoid them, as I do.
Besides which, there's another option with no drawback. Occasional checkpoints can occur when you're simply doing your usual accumulation work. I don't know what's causing them but I usually get two or three, starting some while after the aforementioned deep music starts. If you're interested in using these checkpoints, my advice is to wait until you get that music, then after a few minutes, go through a door for a few seconds to see if you can get a checkpoint yet. Going through a door is merely to try and make sure the game doesn't consider you under enemy threat, which would delay any checkpoint. When I tried this once, I was able to get a checkpoint about 2 minutes after the deep music started (I hadn't been able to get any before that music started, despite trying every few minutes).
Do some core blowing and save a checkpoint
To complete your base save, get all but one of the vent cores blown (you may already have blown some for consolidation) and save a checkpoint from the third. The one to leave intact is the fire-starting core I just mentioned - to avoid the hazard later when maybe doing further weapon accumulation. While doing this, it's good to keep killing any Flood up top, otherwise they might leap at Sentinels and end up alive somewhere down below, which could later cause spawning to stall. Also try to avoid having any Flood leaping your way - which is especially dangerous if you happen to be using a rocket launcher!
In regard to getting the checkpoint triggered by the third destruction, you'll need to be away from danger and you won't want any conflict going on between Sentinels and Flood, or the checkpoint will get delayed. Going though a door and getting all Sentinels destroyed in the process should do the job. In BCM159 I went through the exit door and quite far beyond - which seems a relatively reliable way of doing things.
Stage 2 - finishing off (5+ minutes)
With your base save complete, some flight time shouldn't be far off! Here's the procedure for using it.
Maybe adjust the degree of overloading
Banshee snatching should already be a possibility, but there's the option of accumulating further weapons to affect the degree of overloading and thereby affect the outcome, as mentioned in the introduction. However, things seem partly random so it's not like you have full control.
To start with, probably all you want to do is get a Banshee plus a convenient checkpoint so you can do lots of exploring. In that case I suggest accumulating another 15 weapons. Should be a good bet.
On the other hand, if you fancy having the other Banshee present and manned so you can chase it around and whatnot, I suggest not bothering with further weapons at all, or at least, not many. The overloading will be less, so there may be a greater chance of the game creating the second Banshee and putting a pilot in it. That's the idea at least. Likewise, if you're hoping for a Longsword in the hangar, and maybe even some personnel, try things without much further accumulation.
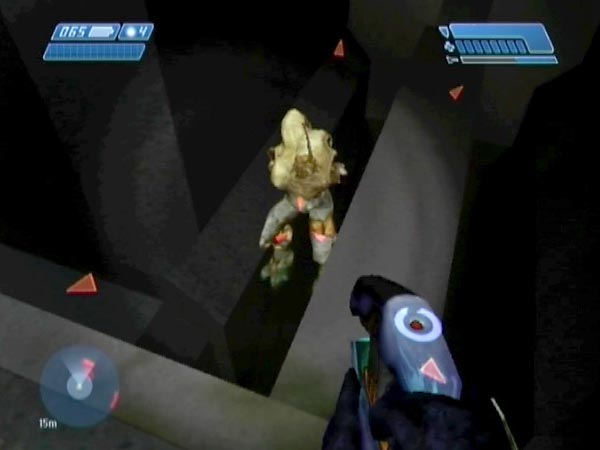
In doing further accumulation you'll be nearing the extreme of overloading, and may find that Flood spawn slower than normal, and in an irregular fashion. Instead of a pair you might get only one. And sometimes a guy who'd normally be armed may be weaponless.
Note: If you got your original weapon counting wrong and actually ended up with significantly more than 440, you might instead need to do some weapon removal to get certain outcomes (such as getting the other Banshee present and manned). Do it by ammo taking.
Blow the last core
Blow the last vent core. If you reached the point of no-projectiles (weapon not firing anything, grenades not appearing), you can undo the condition by getting some things removed. You could get some weapons removed via ammo taking, or melee Flood dead and look away so the weapon and body vanish, or get the game to destroy Sentinels. Probably the easiest way would be if you left a few low-ammo ARs lying around up top like I recommended earlier. You can quickly get one or two removed via ammo taking, which should do the job. In comparison, trying to melee a Flood dead can be a slow pain. In my experience the condition of no-projectiles typically arises in the range of 465-480 weapons.
Get to the rendezvous
Head off to use the elevator, which may be lacking some or all of the usual covies. There's a checkpoint just before reaching it, which is just as well because it's rather prone towards glitchily leaving you behind on an invisible surface!
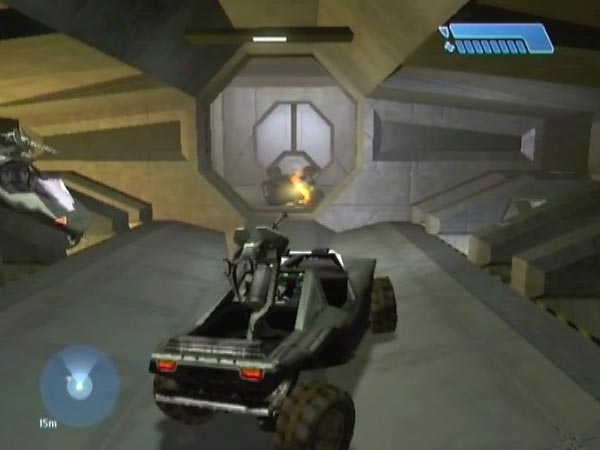
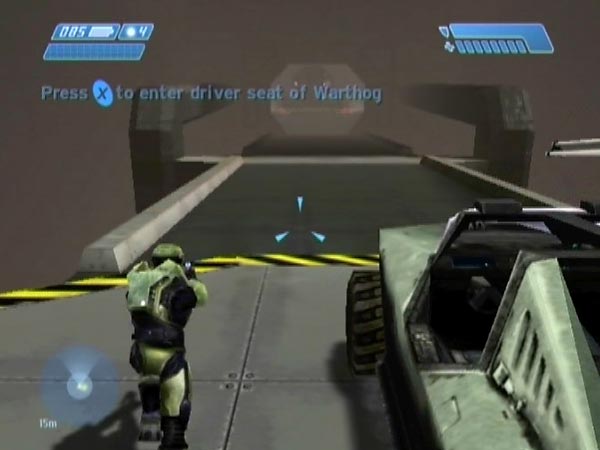
Transfer promptly to the hog and drive to the Echo 419 rendezvous. To have as much flight time as possible, make your drive as speedy as you can. On PAL Xbox a good drive can leave you with over 3:45 still on the timer. Best I've done is 3:50, which I think must be close to the limit; check out BCM160 for a demo and tips if you need any. On NTSC/PC the countdown seems to start several seconds later and maybe the hog drives faster too, so you can do better. Certainly 4:00 is possible. (UPDATE: I've now managed 3:51 - see the end of my written commentary for BCM163.)
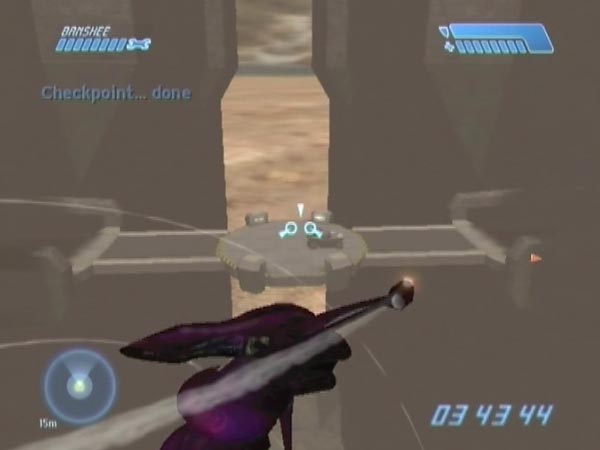
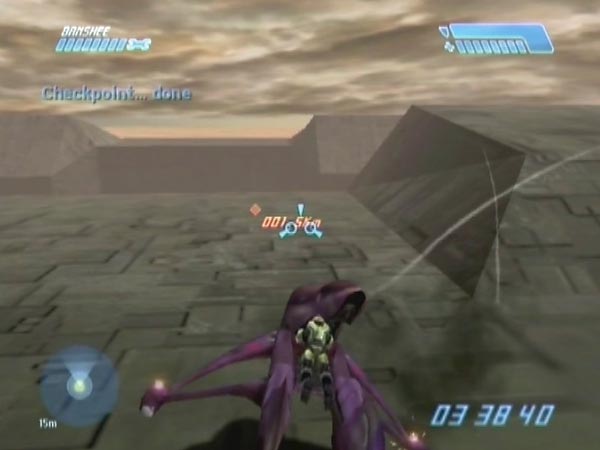
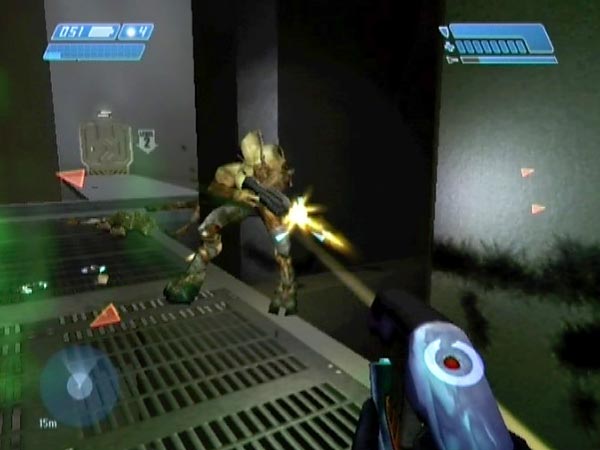
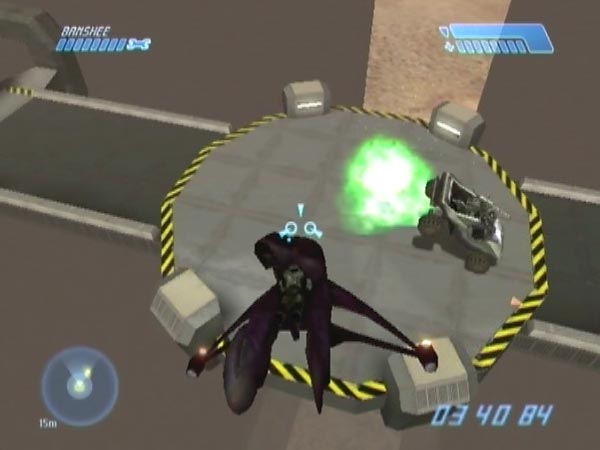
Snatch the Banshee and maybe get a checkpoint
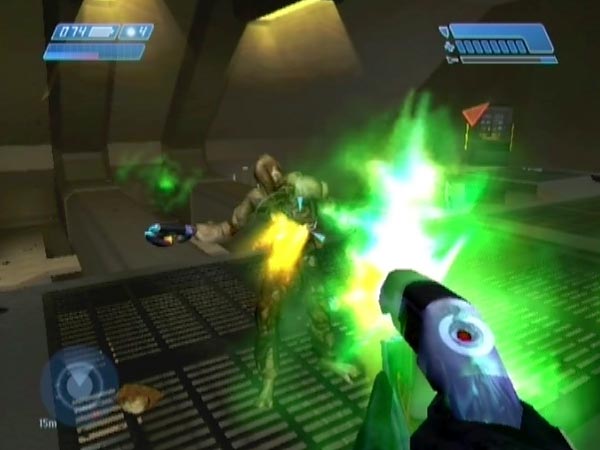
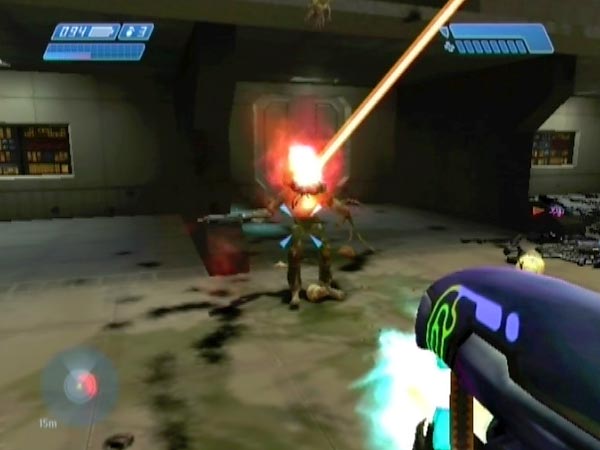
Just past the centre circle, stand on the middle of the pale rim on the left, facing where Echo 419 comes from. Hopefully you'll see a Banshee on the right. That's your ride if it's empty - which you can soon tell by seeing if its tracker dot is yellow instead of red. As it's about to pass close overhead, jump straight up and mash the X button. There should briefly be a boarding prompt, and your mashing will hopefully get you aboard (it's easy). Initially the Banshee is still on a scripted path and you have no control, but it frees up after a few seconds.
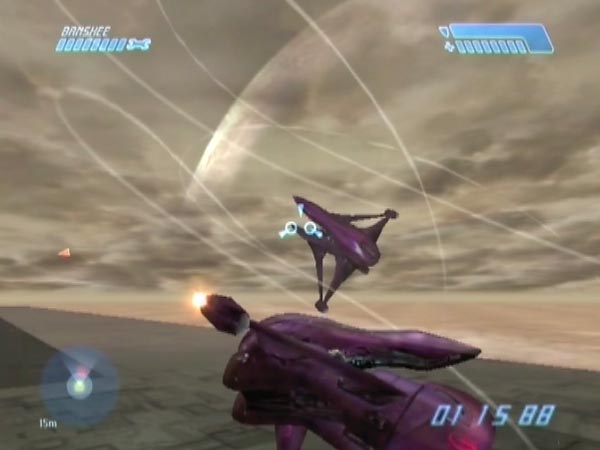
Not long after boarding, the usual post-rendezvous checkpoint is triggered. If the other Banshee was absent or empty, you'll be under no enemy threat and the game will grant you the checkpoint promptly, assuming you're not causing a delay by firing. Otherwise enemy threat will delay it, then cancel it before long. So if you want it you'll need to quickly get clear or destroy the enemy. You only have until a few seconds after Cortana says "If we move now we can make it", before cancellation. If going for a quick kill, try to manage it before Cortana stops talking. The enemy will fly your way, giving you an early chance with a fuel rod shot, such as seen at the start of BCM161. If you miss though, there's still time to pursue and get him.
If you instead want to get clear, leaving the enemy intact for later fun, I recommend flying into one of the two openings (e.g. see BCM159 around 6:04). Waiting inside, I'd say you've got something like a 50% chance of success. I suspect it depends where the enemy is flying, but the fickleness seems odd because you're quite safe in there. Going into the high cubicle might improve the odds but I'm not sure; and I disfavour that option anyway, because I want to be able to fly back outside with maximum ease. If you use the opening leading towards the Longsword, you can fly through into the tunnel, and in that case I expect you're more likely to get the checkpoint. However, there's also a risk of the enemy Banshee vanishing - something you may not want. An alternative to flying inside is to quickly head up over the ship to get out of sight there, which can work if the enemy hasn't latched onto your tail. But even if he didn't follow you up, getting the checkpoint seems a bit random, just like going inside.
Re-drive if needed
It's important to realize that from the drive start checkpoint, outcomes can vary in seemingly random fashion. For example you might find that sometimes both Banshees are manned, sometimes only the left one is manned, and sometimes both are empty. That's actually quite typical unless you've taken overloading to more of an extreme, in which case it becomes rare to get the left Banshee. So, if things don't work out the way you wanted (e.g. maybe you were hoping for the left Banshee to be present and manned), try the drive again and maybe you'll have better luck. It can potentially save you from starting over with your base save and trying a possibly different amount of extra weapon accumulation (or even just the same again).
Obviously, re-driving is also for when you simply fluff the snatch. But that really shouldn't happen often, because snatching is very routine. Of course, you can only re-drive if you you haven't lost the drive start checkpoint by inadvertently getting the post-rendezvous checkpoint. Revert before Cortana finishes talking.
Note: Splattering some enemies along the way (such as the covies at the start) might affect the outcome, but things vary even without doing that on purpose, so I'm not sure how worthwhile it might be.
Alternative plan without weapon counting
If you don't want to keep count of weapons, or if you lose count or become unsure about your accuracy, you can simply keep accumulating weapons until you get to the point of no-projectiles - which is what Ducain did. That's when your gun has no effect; and if you try throwing a grenade, it won't be there. Then blow any remaining cores and save the checkpoint triggered for the final one. How do you blow cores? Just backtrack from no-projectiles by getting some things removed. You can get a pistol or AR and do ammo taking to make others vanish (I gave a tip for that in the main plan), you can melee a Flood dead and look away so the body and weapon get removed, or you can make the game destroy Sentinels (something I mentioned earlier). Not much trouble. This gives you a base save - in as little as about 85 minutes.
From there, it's very likely that if you head off to the rendezvous point, there'll be an empty Banshee to snatch. However, because things are so overloaded, it may be unable to fire; and probably there won't be a second Banshee at all. If you want to try and have things less overloaded, e.g. to try and get the other Banshee present and manned, get some weapons removed via ammo taking, before leaving. That's how you'd try to control overload with this plan. Weapon removal rather than weapon addition. To get a manned second Banshee I suggest removing about 20 weapons to start with. If that doesn't work out even after doing a few re-drives (always worth trying), try removing more.
No more weapons coming?
When you get near the point of no-projectiles, you may find that Flood keep spawning without weapons, preventing you from going further. In that case you may as well consider that sufficient. I had one case where I only got another armed guy up top after killing some of the Flood who were down below (to free up some creation capacity); and then with his weapon added to my collection, I reached no-projectiles at last. But I'm sure it wasn't worth it.
Pros and cons
I considered making this plan my main one, for the sake of eliminating counting. But for one thing it involves a bit more accumulation work. You don't need to go all the way to no-projectiles. For another, when it comes to overload control, weapon removal is actually quite fiddly if you want to remove a particular number (rather than just a bunch without counting), and you've potentially got Flood bothering you on the lower levels (though not so much on level 2). Another thing is that if you head off to snatch a Banshee after reaching no-projectiles, I think there's a significant chance it won't be able to fire - which feels frustrating. Weapon counting does also give you the benefit of knowing how far through the work you are.
Accumulation tips
Here are some additional tips to help you speed through the accumulation work on level 3 efficiently.
Use plasma weapons
Favour plasma weapons for the killing. Compared to a shotgun they have better range and better precision (e.g. singling out one of two close Flood), and they're better for firing quick shots to attract unseen Flood. You'd soon run out of shotty ammo anyway, and it certainly wouldn't be worth going to the Armory for more. The plasma pistol is more powerful than the rifle, but you may prefer the rifle because there's less trigger work. It takes less effort to use.
Try to avoid having a pistol or AR, as you'd run the risk of making a weapon of the same type vanish by going near it. In fact, it's worth leaving a few surplus plasma weapons lying around on both sides, to switch to if you ever end up with a pistol or AR after some swapping. They can also save you time when doing swapping, because you can always just pick up the nearest instead of going back to the one you had.
Sometimes when a Flood drops a plasma weapon of the same type as yours, you may be unable to swap right away, because it has lower charge. For this reason it's actually good not to be high on charge. If you ever want to lose charge quick with a plasma pistol, fire plasma balls.
Keep 'em down
After downing a Flood it can be worth adding a bit more fire to prevent possible reanimation (or, simply keep on firing as he's going down). As well as being a bother, a reanimated guy could delay the next spawning.
Weapon overboard!
Shooting an armed Flood, there can be a significant danger of his weapon going off the walkway. It depends where he's standing and how he's moving. When you perceive such a danger it can be worth either waiting before shooting him, or moving somewhere else to alter his position or angle. Another thing you can do is fire a shot to make him reel, moving his weapon briefly away from the edge, and then you can make him drop it. That sort of precision work is another place where plasma weapons beat the shotgun. One other thing you can do sometimes is rush in and 'grab' the weapon before it falls out of range. I've saved plenty that way.
Clearing weapons away
When I said move weapons clear to avoid clutter building up, I meant preferably down to ground level, for the most part. That especially goes for pistols and ARs, as those are in danger of vanishing by having their ammo taken if you happen to go near when carrying one. A lack of clutter also makes it easier to swap for a new weapon. Incidentally, there are a few high surfaces just below the walkways, and you should try not to throw a weapon there, or it could still be within HUD prompt range.
Sometimes it can be worth using a grenade to clear weapons away, e.g. if it would be faster than doing weapon swapping to throw them. Plasmas are the best to use, and the Flood drop a good supply of them. I use them quite a lot, to try and go as fast as possible. But only do it if you're very confident of not blowing yourself up in the process!
Extra care later on
When the game has reached a point where newly dropped weapons get removed the instant they're out of sight, you need to be more careful in how you work. For starters don't kill an armed Flood too close, or the weapon could go past you, briefly out of sight, and get removed. If he's running it can be worth stunning him to stop him first, before making him drop the weapon. Then the weapon won't be speeding towards you. Look down as you approach a new weapon to swap, to keep it in sight. Also, try to avoid killing two armed Flood at once or you'll need to keep both weapons in sight while doing the swapping business, which can be awkward and slow.
Stalled spawning
If spawning seems to've stalled, it's probably because a Flood has fallen off somewhere, so you'll have to find him and finish him. Keep this in mind when attacking. In particular, you don't want one going off a walkway and then reanimating. If a Flood is reeling off a walkway, make sure he won't be getting up again.
The other reason for a delay in the spawning is simply that the game is really straining with the overload, when you're getting near the limit. That's not really stalling though, it's just a slowing down.
Rocket launcher as secondary
Having a rocket launcher as your secondary is useful in regard to weapon swapping. It means that your secondary will never prevent you from swapping with a newly dropped Flood weapon up here - because they never have launchers. Actually the same would go for a shotgun, except that sometimes a few Flood can get attracted up, and they can have shotguns.
Options and discussion
Of course, there are variations on how to do things. Here's some talk on that.
Snatching options
Earlier I described my favoured way of boarding the Banshee, but there are a few options. For starters, instead of standing on the left rim, you could be on the right rim. The Banshee flies level across the bridge, so it should work just as reliably. If you suffer from vertigo, I guess you'd prefer the view!
It's also viable to jump up off the bridge deck, along the middle. But you won't get quite so high as the Banshee passes overhead, so I think your window of opportunity for boarding will be slightly smaller, meaning a greater chance of missing it with your X mashing. I tested it and only managed to board 7 times out of 10, compared to 10 out of 10 using the rim. So I recommend the rim.
One other method is to be standing on the front of the hog, where you're not getting a prompt for boarding it. As the Banshee flies over, you're already so high that a jump would get you splattered, so you just stand there and mash X. This is the method Ducain showed in his video but it just hasn't worked for me. I tried lots but never got the Banshee boarding prompt. I did have success when putting the wheels on the rim to get extra height, but that was fiddly and dangerous. I'm not sure if Ducain was standing on a real sweet-spot or what (could there be a difference here between NTSC and PAL?), but try it if you like. Of course, this method does involve having to get the hog nicely positioned and then getting yourself up on a good spot. That's not difficult, but hopping onto the bridge rim is definitely less trouble.
Two limited Flood spawning opportunities
Once you've been in Engineering long enough for vent core indicators to appear on your HUD, you can trigger a couple of limited Flood spawnings in connection with approaching either of level 3's entry doors. Flood spawn ahead, and can continue quite rapidly until the supply is exhausted. You can repeatedly make new Flood spawn (you may need to back off to let it happen), and accumulate their weapons. On Easy it looks like you can expect about 17 weapons for the main door, and close to 30 for the other.
But speed-wise, is it worth it compared to just working up top? I think not. Doing the weapon swapping is a bit fiddly because you're in quite a confined area, but the bigger issue is the presence of carriers, whose explosions are a serious hazard (loose grenades!), quite apart from unhelpfully scattering weapons, which could make counting problematic. Even on Easy, it's dangerous and also hard to control things, so I'd say forget it. However, if you're keen on using the shotgun and want more ammo, you could try exploiting such spawning to get some. It might save you time compared to going to the Armory.
Accumulating on level 1 instead
When Ducain got his Banshee, he did his caffeine-fuelled 5 hours of weapon swapping on the spacious ground floor. Flood spawn infinitely on both sides, from behind two doors in each case. That's what I started off trying for a while, but you just can't accumulate weapons as fast down here - partly because of how long Flood take to reach you. I could only manage about 3.2 per minute at best, about half the rate I later realized you could get on level 3. In addition you've got spores pestering you, and the Sentinels are more of a bother, though you can still get them easily destroyed by briefly vacating your area.
Another drawback is that when you've got lots of weapons, you get really bad slowdown because they're often in quite close view, unlike when you're up top. The bad slowdown is probably part of why my accumulation rate dropped considerably when, despite knowing that level 3 was better, I took things to the point of no-projectiles like Ducain had. My accumulation work ended up taking around 4 hours. Ouch!
So unless the high walkways make you dizzy or something, I'd say there's no point working on level 1 any more. Poor old Ducain; if only he'd nipped up a few levels, he could've saved himself a lot of coffee!
Handling earlier weapons?
If you handle weapons prior to Engineering, will those contribute towards the overloading you need? Based on a test, I suspect not. I had a save in which I was close to having enough weapons to scoot off and snatch a Banshee. Just another 25 would do. But I tried playing it another way. Instead of continuing in Engineering, I went to the Armory and handled over 40 weapons there (all the ARs and shotguns), avoiding using up ammo packs except for one or two by accident. When I then proceeded to the rendezvous however, the Banshee was manned, as was the other. Also, there were plenty of enemies along the drive. So I don't think those Armory weapons counted at all. It's probably relevant that the Armory is back past a loading point, compared to Engineering. I suspect that no handled weapons before that loading point will count.
Actually, it surprises me that even handled weapons in Engineering have any effect. After all, once you're going down in the lift, Engineering is out of the game for good - so you would've thought the game would discard everything connected with it, potentially freeing up some capacity. Apparently things don't work like that though - which is lucky for us Banshee snatchers of course!
Higher difficulty levels
The only reason I see for using a higher difficulty level than Easy would be to get tougher opposition when doing any fighting after snatching a Banshee. In particular it would make dogfighting better, because your target wouldn't be so frail. So here's some advice on how things differ.
Normal and Heroic
On Normal things play much the same in regard to the weapon accumulation work. There's a bit more threat from the Flood and Sentinels but it shouldn't slow you down. On Heroic it's likewise still viable to accumulate weapons at the usual rate, but you have to be significantly sharper about keeping your health. The AR guys are the ones to watch out for most, as they cut into your shield fastest.
Legendary
On Legendary the situation becomes a fair bit different as the Flood spawn three at a time, and they're much more dangerous of course. They need to be killed quicker, and you'll often need to kill them all before you fiddle around with any weapon swapping. You need to be conservative about maintaining health, because losing it is easy and the supply of medkits is limited. When Sentinels turn up you need to switch sides or go through a door immediately to get them destroyed, or you'll be toast in seconds. Actually it may be a good idea to watch out for them on your tracker so you don't even start to get toasted!
Using plasma weapons, things are perhaps tougher than using a shotgun because of how long it takes to kill Flood. So maybe it's better to mostly use a shotgun - I'm not sure. If you do go with a shotgun, it could be worth putting your rocket launcher aside and carrying a plasma pistol as secondary, because then if you ever want to fire shots to attract newly spawned Flood, you can waste plasma instead of shotty shells; so you won't have to visit the Armory so often. Also, the plasma pistol could be used for killing when you're not facing too much threat, which would likewise help minimize Armory trips. You should try to have the pistol on low charge though, so it doesn't stop you swapping for dropped ones.
One other thing about Legendary is, you only get five minutes for the escape drive; so you'll have a minute less for Banshee fun.
Notes about the Banshees
Canopy quirk
An odd thing about the Banshee is that initially the canopy is up (same as for the other) - which it really shouldn't be. However, if you dismount then reboard, the canopy shuts as usual.
Firing issues
In situations where the overloading is so severe that there's no second Banshee, it's possible that your Banshee could be unable to fire. No reaction at all. That was my first experience actually, and I thought maybe things were always going to be like that. But then I thought, maybe it was just because things were too overloaded. Happily that turned out to be the case. I arranged a situation with less overloading (by doing less weapon accumulation), and found that my Banshee could fire this time. Much more satisfactory.
However, even if it can fire, it may not be completely as normal. The graphics may be lacking something, and the game may only be able to cope with a certain number of plasma pips in the air at one time. Incidentally, I've also had a situation where the Banshee was unable to fire, yet surprisingly I was able to fire weapons.
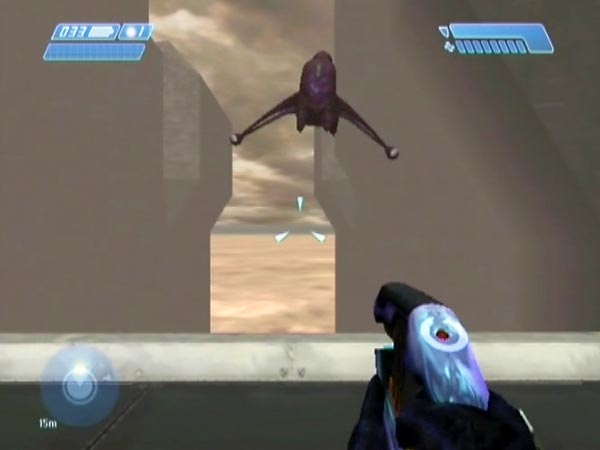
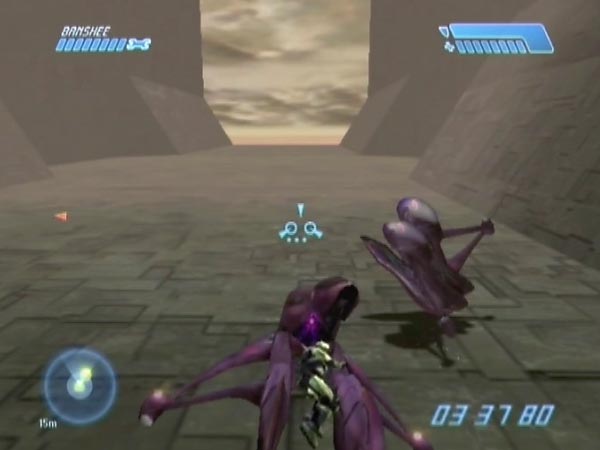
Left Banshee flyable too
The left Banshee is flyable too, if empty. You can't snatch it as it flies over the bridge; it's way too high. But you can fly to where it falls (after the scripted part of its flight), and switch. Not that there's much point though. Strangely, this Banshee is sometimes unable to fire despite the other Banshee being able to.
Right Banshee gets priority?
From what I've seen, the game gives the right-hand Banshee priority for creation, out of the two. If one of the Banshees is missing, it's always the one on the left. Actually I've never had a situation where the where the right-hand Banshee was absent at all, though Ducain apparently did, and was even missing Echo 419! Maybe I'll try some more gameplay with extreme overloading, to see if I can get that outcome myself.