V-start Shade ride method
Associated movies
- BCM33 - Heroic; Five descents via Shade riding (5:07)
- BCM75 - Heroic; Descents with Banshee destruction (5:11)
- BCM173 - Heroic; Refined Shade riding for easy descent (6:39)
But see also BCM41
In this method you blast the near left Shade down to the top part of the V, then board it as it goes over the edge (possibly forced off by melee), either riding it all the way down with a bounce at the ledge, or just riding it down as far as the ledge then getting down from there. Suitable for PAL, problematic for NTSC/PC.
Full description for the general plan
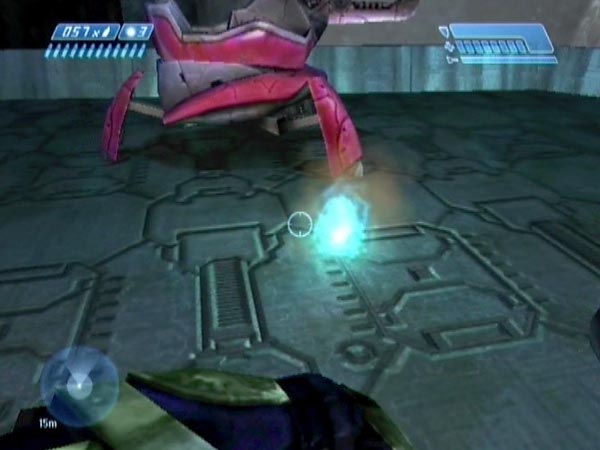
Throw a grenade to one side of the near left Shade so that it gets blown off the bridge, down towards the top part of the V where it's pretty level. The actual place where the Shade hits can be selected with considerable reliability by placing your grenade appropriately (could be either type). That's a matter of doing a little experimentation if you want, but the accompanying picture shows a pretty nice throwing aim, giving good results. I'll say more on specifics later.
Get down to the V before or after the Shade arrives there - but obviously it's best to arrive before if the Shade is likely to topple off the edge (depends where you aimed it). You can simply jump over the rim of the deck, ideally doing a crouch-landing to retain full health.
If the Shade isn't already going over the edge of the V by its own accord, get it going over. You can shift it with melee of course. Flipping is another option if it's overturned, though there's a danger that a flip could send it away from you too much. Once the Shade is going over the edge, flip it at the last moment if needed, and board as it's starting to fall.
Once you're starting to sail down there's a possibility that you'll quickly fall out, most likely due the rear leg of the Shade dragging on the edge of the V and making the Shade graze down in vertical posture. But a good way to minimize that possibility is if you flipped the Shade at the last moment, and timed your boarding well. Anyway, let's assume you remain seated.
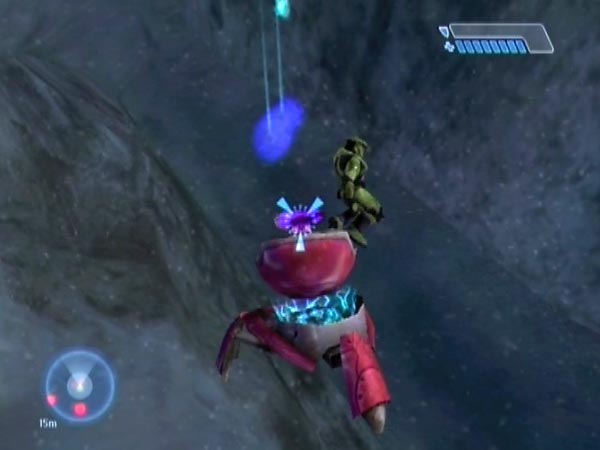
There are three ways the descent could be completed, but the primary one is where the Shade bounces off the ledge and takes you down to the snow - though you could be killed by the landing if it's awkard, such as landing head-first. Hitting the ledge is by no means assured however; and if you miss, you'll die in mid-air before reaching the ground. There's also the possibility of being killed by a ledge impact. What you ideally want is for the Shade to hit with a leg, in which case you'll probably survive - quite possibly with no health loss.
Another outcome is to get jolted out onto the ledge. The chance for that seems highest when the Shade is on its side as it hits. It's also possible to end up on the ledge by dismounting beforehand. From the ledge you can get down as described elsewhere.
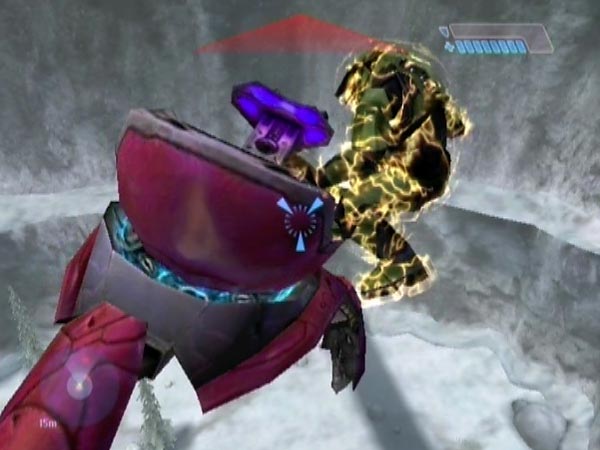
Incidentally, I'd recommend having a plasma pistol. For one thing, it's good for knocking the Shade off if you need to. It has the highest melee rate. But also, while doing this you may come under heavy fire from the Elite patrolling on the lower deck if you didn't kill him beforehand, and in that case a quick plasma ball is great for making him back off. However, I'd advise eliminating the Elite beforehand, and also any Banshee, because otherwise they can really hurt and distract you when you're on the V.
Far landing routine for greater reliability
So far I've described the general plan, within which there's plenty of scope for variation, including the grenading. But I developed a specific routine which made a huge difference for me, taking my success rate to around 40%, whereas previously I'd found it extremely hard to get any success at all, because the Shade was hardly ever hitting the ledge. I refer to it as my 'far landing' routine because the Shade lands at the far end of the V. And then much later I refined it, enabling a success rate of over 95%. It's also worth mentioning that you rarely lose any health in getting down.
I'll start by describing the original routine. The first five pictures on this page actually give snapshots of it, and it's demonstrated in BCM33. There are also examples throughout BCM75, and one at the start of BCM41 (all involving Banshee tagging along the way, but ignore that).
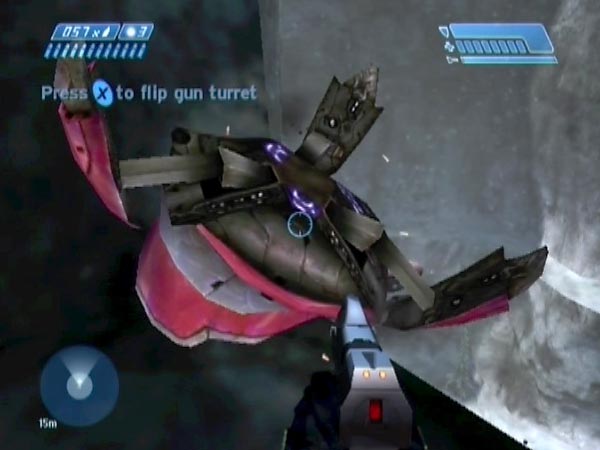
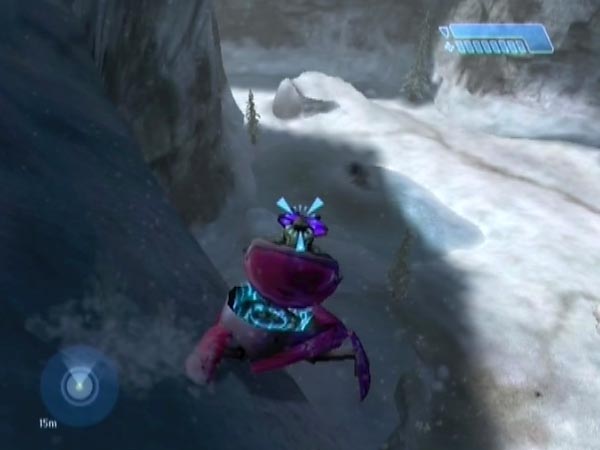
Throw a plasma grenade as seen in the first picture (or near enough), so the Shade will land on the V at the far end upside down with gun pointing away from the cliff (second pic), and start to topple off. Arrive there beforehand. You can safely let the Shade come in over your head - it's very predictable. Practically as soon as it lands, flip it. It should now be toppling off forwards with the rear leg dragging on the V. But if it's not quite going off, help it with a whack.
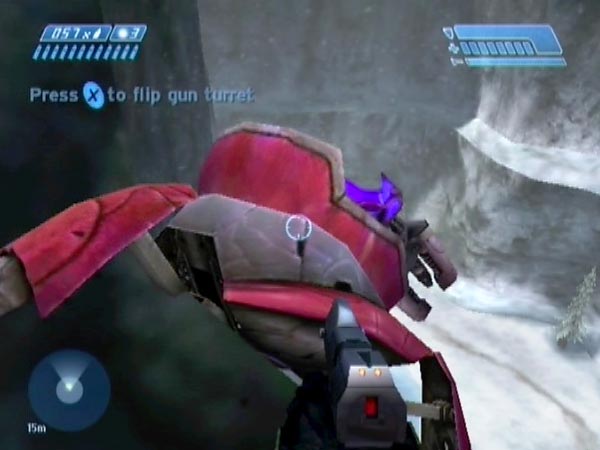
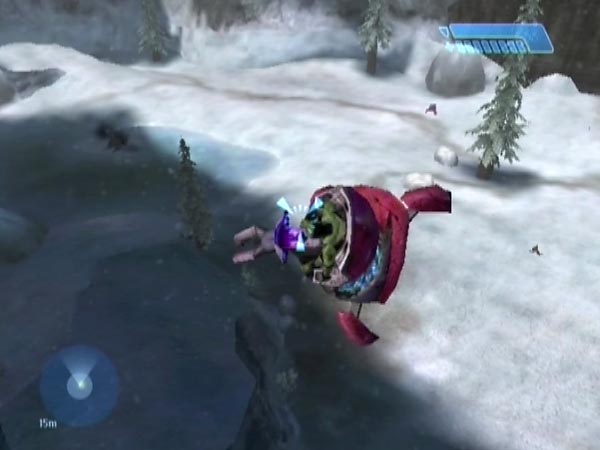
When it's angled heavily down (third pic), flip it one last time. This has the effect of raising the front of the Shade a bit and loosening up the rear leg's contact. Board it, and there's a good chance you'll get a nice bounce off the ledge. Ideally the Shade will do a forward rotation on the way down to the ledge and strike with rear leg, in which case you probably won't even take any shield damage. But in order to get that rotation, you'll want to've boarded the Shade only when it was approximately level or starting to rotate downwards. If you board too early it could end up rotating insufficiently or even backwards (which is usually fatal). It's a delicate business but you should soon get a feel for it.
However, there's still a significant chance that the Shade will graze the cliff just as you're starting to ride down, causing your ejection and likely death. That brings me to my refinement, which greatly reduces the danger. It's shown in BCM173. By having the grenade go off in an even more particular place (found through experimentation), the Shade tends to go off the V in a relatively nice fashion. In fact it usually rotates left, which usefully moves the rear leg away from the cliff face.
You can achieve the correct grenade placement as follows (or you could make up your own way, once you see where the grenade needs to end up). First you need to accurately position yourself. Facing the Shade from the side, lower your aim as far as it'll go (it'll be slightly ahead of your position), and get it as seen in the picture above, featuring a tile a few metres from the Shade. If you're slightly off - say by as much as half the width of a pistol reticle - that won't greatly affect your odds of success (I actually chose this particular aiming spot because it's roughly in the middle of a small patch of goodness), but try not to deviate much, because this whole thing relies on the Shade getting a fairly precise trajectory. For tips on making fine adjustments of position see my general article on precise self-positioning. Now aim at the middle of the diagonal line seen in the other picture, and throw a plasma. It'll bounce to the desired place.
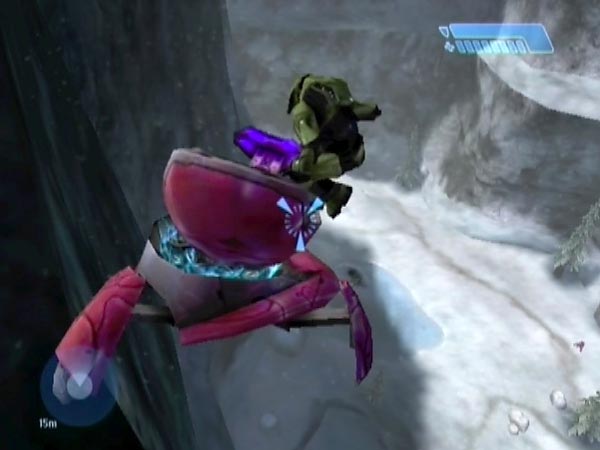
The rest is like I described before. On the V you flip the Shade practically as soon as it hits, then you do a flip and board. If you do those three things ok, you should typically find that the Shade does a forward rotation as it drops to the ledge, and bounces safely with the rear leg. Thereafter, it's rare to die when hitting the ground - I'd estimate a 3% chance - and similarly rare to even lose health. So you're likely to retain full health. In further regard to the possibility of dying on landing, the only chance for that is if you happen to land on your head; but even then, you usually take no damage. The snow is remarkably friendly!
Advice for the dismount variation
When using my far landing routine, you're unlikely to be able to dismount onto the ledge because the orientation will be usually be unsuitable. But here's a routine for dismounting onto the ledge as done by Juggertrout. You can see it demonstrated in BCM33.
When you come through the door onto the bridge, throw a frag near where the wall ahead angles backwards a little. With fairly good reliability, this sends the Shade over the edge in such a way that it lands on its feet, just where the flat part of the V meets the sloping part. The barrel will be facing off the edge. You can be down there in advance of it landing if you wish, though you'll need to make sure you don't get squashed by the Shade on the way as the frag goes off fast.
A few whacks should get the Shade toppling over the edge. As it's going over, flip it at the last moment and board. If things go just right, you can end up sailing down with practically no rotation, and with the cliff face close to your right; ideal for a dismount (though you'll need to time it well). The bad news is, it's extremely hard to get things to go just right. Typically the Shade won't go over the edge in the manner needed. It'll start tilting one way or another and things will be hopeless after the flip. Even if it does go over well, you have to time your boarding just right to avoid getting unwanted rotation. I found that the Shade was often upside down when I would've been wanting to dismount - which was no good because I'd end up getting out the wrong way.
Checkpoint advice
To make things as easy as possible for repeat attempts, get a delayed checkpoint when ready to throw your grenade. Alternatively, bearing in mind the high success rate you can get when experienced, it would be reasonable to get a checkpoint just before you come through the door.
Difficulty and system differences
At first I was finding it extremely hard to get any success with this method on my PAL Xbox, mostly because it seemed so hard to get the Shade to hit the ledge. But good grenade placement is the key. My far landing routine gave me give a success rate of around 40%, and its later refinement gave me as much as a 96% success rate (measured over 50 tries).
Juggertrout's dismount variation is another matter entirely. It seems extremely fickle, making for a descent method you'd probably only ever do once, just to say you did it. I felt rather fortunate to manage it when making BCM33. I really wasn't expecting to, based on past experience. I forget how many tries it took but I later did another 150+ without succcess, rarely even getting close to being able to dismount. To be fair, I was doing those under pressure. If you didn't have covie fire to worry about, you could take more time with the Shade whacking and perhaps improve your chances of sailing down to the ledge in the desired manner. But I still wouldn't consider this a practical way down.
For NTSC and PC things seem very problematic. You'll probably be killed in mid-air just before reaching the ledge. I heard from someone trying my far landing routine on PC, and that always happened. However, there's apparently some chance of getting a bounce and making it down to the snow, because that's what Spotcheck did on PC, albeit from a different part of the V (see the reference to his video below). He did mention taking three days to do it though. There are some relevant opinions on NTSC viability in a High Impact Halo thread here which seem negative (it's all a bit hazy), though in another thread zels seems to be saying that you can get down with NTSC. Whether it's possible to end up on the ledge, e.g. via the dismount variation, I'm not sure. I suspect the impact would kill you, as you're much less resilient than on PAL.
History and links
In regard to the primary version in which you bounce off the ledge, I think the publishing credit goes to Spotcheck. He descended that way at 0:58 in his AotCR Speedrun video on PC which I've been told was from April 2005, though I'm not sure where it was advertised. There's also a May 2005 High Impact Halo thread in which Spotcheck gives a mention and brief description of the method (for PAL Xbox I believe, not PC). Separately, 3rd Person had performed the same method during the Going Nowhere Fast contest, though he didn't capture it. More recently however, he demonstrated it in his YouTube video AotCR 2nd Fastest Bridge Descent. What you see there is actually pretty similar to the far landing routine I mentioned earlier, except he's using a fast-acting frag instead of a plasma. They're always in such a hurry these speedrunners!
As for the variation in which you dismount onto the ledge, I think the credit goes to Juggertrout. It appears at 0:47 in his video Things to do on the first AotCR bridge when you're bored which was advertised in the High Impact Halo forum on June 17th 2005 and is now listed in his video archive there. He sends the Shade down to the V with a frag and it lands upright, just where V starts becoming sloped. At this point he's already down there waiting. After a bit of melee, he's aboard and sailing down elegantly with no nasty spinning at all (he flipped it just before boarding, which levelled it out nicely). I'm not sure if he was a touch late with the dismount or just happened to get a bad bit of ledge, but he ends up with only one bar of health. Close call!
You can see the method demonstrated in two forms in BCM33, namely the third and fourth descents (starting at 1:46 and 2:34 respectively). There's a ride the ground using the original form of my far landing routine, and after that I show a dismount variation just like Juggertrout's, except that I manage to escape with no damage at all. I think I got lucky there; I'd never even got close before, and this remains the only time I've done it. You can also see the method done near the start of BCM41 and throughout BCM75, with the added challenge of trying to destroy the Banshee along the way. My refined far landing routine, boosting reliability considerably, was demonstrated in BCM173.