Things to know
This section explains a few bits of terminology I'll use throughout the guide, and a few other basics worth knowing about.
Near end, far end, left side, right side
Just so we're clear, when I talk of the 'near end' of the bridge, I'm talking about where you arrive. The 'far end' is the one the covies don't want you to reach (they're tetchy like that). By the 'left side' and the 'right side' of the bridge, I'm talking as if you've just arrived. So, the left side faces up the battlefield, while the right side faces the Marine defence area.
The V and the ledge
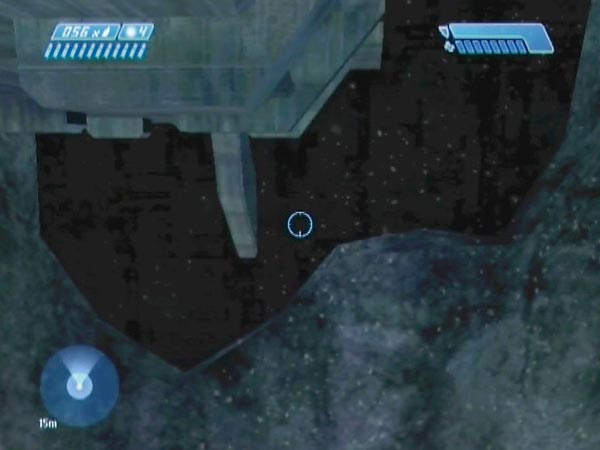
Below the near end of the bridge there's a sort of V-shaped rocky ledge you can easily drop down onto, including a flattish section at the top on one side - making something like a cursive 'v' then. It's the bottom part of a big hole in the cliff rock. I'm going to call this thing the V, while 'the ledge' will henceforth only refer to the snowy ledge that runs right around the battlefield quite a way down. Most descent methods involve the V or the ledge or both.
You can easily get onto the top part of the V by taking a running leap over the bridge's side rim on the left. With PAL you can avoid any shield damage by doing a well-timed crouch as you land; fairly routine once you're practiced. With NTSC and PC you're much less resilient when it comes to falling, and you should expect shield damage, but you might at least avoid health damage. However, it would be better to instead make sure you hit the sloping face past the end of the top section (hold the left stick forward as you fall, to get enough distance). In that case your fall is cushioned so nicely that you don't even need to crouch. Avoiding shield damage would be a help if you subsequently come under attack from a Banshee or from an Elite on the lower deck, though maybe you already eliminated those threats.
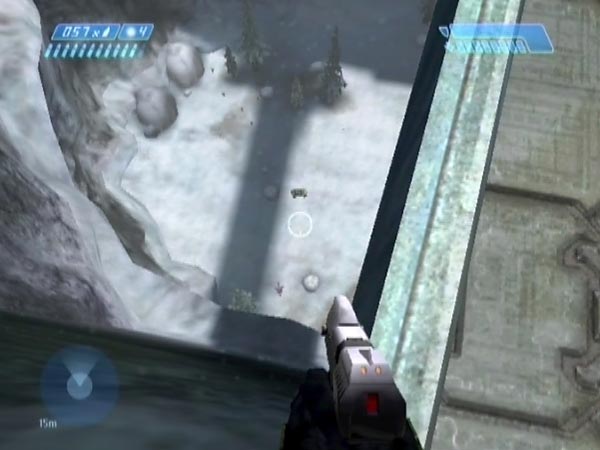
From the top of the V there you can safely run to the bottom or do another jump to take you most of the way. See the second half of BCM13 for an example. But you can also reach the bottom of the V by running off the lower deck of the bridge and crouching as you land. I'd suggest going just either side of the bridge support, approximately parallel to it. See BCM12 and BCM13 for examples.
Yet another way is to let yourself drop directly down from the right rim of the bridge, but I find that impossible with PAL because I can't stop myself being bounced off; can't get enough traction. You can see Scurty using that method in his Legendary speed run, and there's guidance from slYnki in a video tutorial.
Getting a delayed checkpoint to make repeat attempts quick
You can typically make a descent method a lot less arduous by making sure to get a checkpoint just before the most tricky part (or possibly multiple checkpoints for multiple tricky parts). That way, each time you fail you'll be able to revert and retry straight away, and it'll also be easier to fine-tune aspects of your technique. It's the sensible way to work, unless you're trying to do things in one take of course.
You can delay a checkpoint for as long as you like by being under enemy threat, by continuously jumping, by firing certain weapons, or by having a grenade active (yet to explode). It's up to you which methods you find most convenient for your particular situation. Mostly I'd use jumping, but in some cases the final thing I'd do to keep the delay going would be to lob a plasma grenade out over the battlefield, giving me several seconds for any final preparations I want to be precise about, such as moving to a specific spot and aiming a particular way.
There are three relevant checkpoints you could delay, so take your pick.
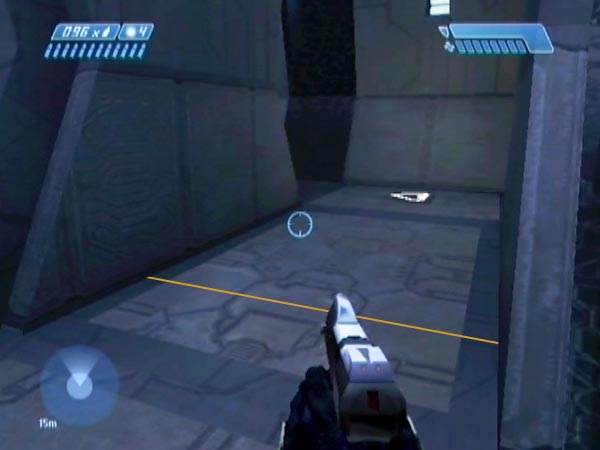
(1) The pre-bridge checkpoint is triggered in the passage before the bridge, the trigger being part way along the short second section when you turn right (see pic).
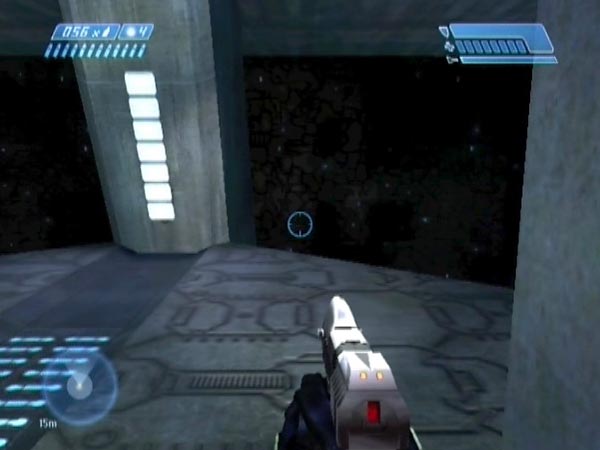
(2) The bridge checkpoint is triggered on the bridge, a few metres before the final pair of glass panels on the upper deck of the bridge (see other pic), though you could also come up from the lower deck to trigger it somewhere beyond. Triggering that checkpoint also activates the final bridge enemies, incidentally.
(3) The post-bridge checkpoint is triggered in the passage after the bridge, the trigger being part way along the second section, akin to the positioning of the pre-bridge checkpoint. You probably wouldn't be using that one so much, but it's an option.
Some of the descent methods involve a fall from the V, and in those cases it's good to get a checkpoint there. The quickest way would be to delay the pre-bridge checkpoint. When you emerge onto the bridge, you could lob a grenade somewhere to give you enough time to get down to the base of the V, ready for the delay to end. However, on Heroic or Legendary you'd probably have an incoming Banshee to contend with. Not only would that make the delay continue, it would likely also lower your health! So you'd be well advised to destroy it before leaving the bridge. In BCM12 I wasn't in any great hurry and I instead delayed the bridge checkpoint, after getting rid of enemies. That not only gave me full control over when I got my checkpoint, it also enabled me to do my repeat descents in peace and quiet, without having to listen to any voice chatter again and again (which would get irritating fast).
Perfect health please!
Take it for granted that with all these descent methods, you should start out with perfect health to maximize your chance of survival, as they all involve life-threatening acts. Most methods allow you to survive even if you don't start with perfect health, but you'd be crazy not to.
Two myths about falling
In descriptions of descent methods involving a fall, you sometimes see advice that you should keep in contact with the cliff wall or whatever, to try and slow yourself up a bit via friction. I've written such advice myself. But while working on this article I did some simple testing and found no such slowing effect at all! I got up on the rim of the far end of the bridge and stepped off. Whether I rubbed against the cliff all the way down (pushing myself against it using the joystick) or whether I avoided cliff contact altogether, the results were the same: I reached a point just a metre or two above the ledge in about 3.8 seconds, where the game killed me.
I believe the actual reason you might want to keep in contact with a bit of cliff face is purely to do with controlling the path you're taking. When you're falling down to a ledge, it's often a bit steeper just near where it meets the cliff, and because of this you're more likely to survive the impact. Being in contact with the cliff on the way down isn't slowing you up, it's just letting you make sure you hit the ledge at the back and with the best angle (namely heading straight down). It's easy to come to the wrong conclusion and think your survival was because the contact slowed you up, as you'd imagine it would in reality. But if my testing is anything to go by, it didn't.
Also in connection with falling, you sometimes see people talking about "the fall timer", as if the game is timing you from when you start going downwards and will kill you after a certain set time - unless you happen to hit something which "resets" the timer. Well, I'm pretty sure there's no such thing as a fall timer in Halo. Rather, the game monitors your downwards speed, and if it reaches a certain critical value you're toast. If you hit something which reduces your downwards speed, it's not resetting a timer, it's just helping prolong the time before you reach that critical 'kill-speed'. Or at any rate, that's my conception of how things are working. So I think the 'fall timer' is a myth - at best a figure of speech.