Spore herding
Posted June 28th 2007, expanded later
Associated movies
- Introduction
- A massive early herd
- General fun with your herd
- Chasm shoot
- Shaft hop
- Fun in the shaft base
- Shaft shoot on the second floor
- Herd building tips
- Getting extreme
- Spore counting
- Further remarks
Introduction
In the Library you'll often have a load of spores around you (the little bubble folk, more properly called infection forms), but why not put your mind to it and actively try to get more? By carefully harvesting carriers as you advance and doing your best to keep spores safe (away from fighting so they're not in danger of getting popped), you can end up with a load of spores swarming about the place and leaping at you, making quite a sight. There are various recreations you can enjoy with them including getting the herd into special formations, and I'll cover all that later.
The higher the difficulty level, the more carriers you'll encounter, hence the more spores can be harvested. Accordingly I'd recommend using Legendary or Heroic. Another benefit of using the higher difficulty levels is that the spores will be less fragile in regard to chain reaction popping, which means that when you want to wipe them out, your fun will last longer. Each carrier yields between 3 and 6 spores, and the yield seems to be random, with equal probability for each number.
A massive early herd
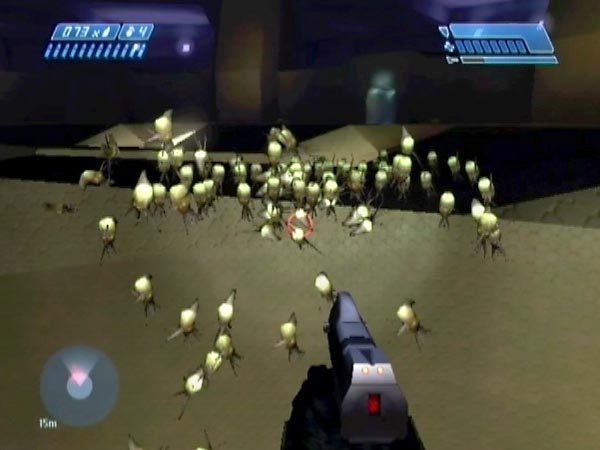
If you carefully harvest carriers (around 29 on Legendary, 22 on Heroic, 16 otherwise), you can have a massive herd by the time you reach the first door, and then you can get a handy checkpoint for playing about. Here's a bit of elaboration on the process, which is shown in BCM62.
Right at the start there's a carrier around the corner to the left, with spores nearby. There are also spores at the entrance to the next area, and a few carriers will come waddling through. Your initial task is to get all these carriers popped without losing many spores. After that, draw the spores to the back of the area then run off to trigger new enemies. Harvest more carriers and lead their spores back to join the growing herd, or at least try to minimize their exposure to danger.
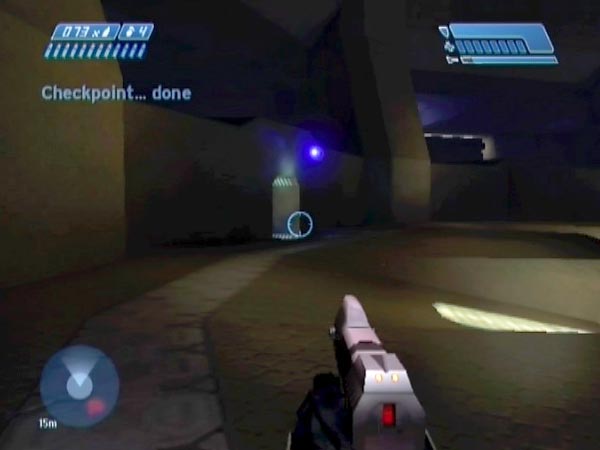
Continue on in the same vein, harvesting carriers and trying to keep spores safe. Eventually you'll near the first door. Once it's clear of combat Flood, arrange spare weapons if you want, then go back and bring earlier spores along. Recharge your flashlight if needed. A checkpoint is triggered about a metre past the door, and you'll get it if and when you're not too close to spores. Then you can have fun with the herd.
Note: By keeping spores sufficiently close you can delay the checkpoint to get it somewhere else if you want, but the door area is relatively bright and reasonably expansive, making a decent place to play. Jumping won't keep the checkpoint delayed, by the way. This level is odd like that.
General fun with your herd
Here are some general ideas for fun with a herd. You can see most of these demonstrated in BCM63.
Dodging around
To begin with I suggest some general dodging around, skirting close past spores to make them leap at you. With practice you can remain pretty close yet stay fairly safe. Watch out for opportunites to hop over part of the herd too; herd hopping is good fun though you have to be quite careful.
Creating herd formations
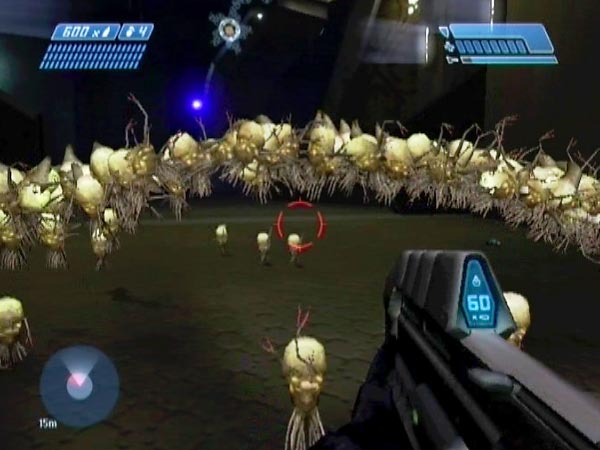
You can create special herd formations by moving in certain specific ways. For starters how about a game of 'ring' with the little guys? When you move around in a circle they form into a ring as they try to leap at you. A cute little Halo of miniature assassins! It's quite easy to do, though it's hard to maintain the ring when you try to look across it as you circle (to get a fuller view of the ring). In the picture here I'm circling clockwise, skirting past the leaping spores. It's like you create a disturbance wave stretching around the ring ahead of you as you orbit.
Secondly, you can create attractive wave effects by moving left and right as you back off, arcing around the herd to try and keep everyone in touch and leaping regularly. You can also get a moving ring that way (it can also be reminiscent of a double helix). It might help if you start off with a ring, but you don't have to; a moving ring can emerge quite quickly from just a general mass. You can make your ring or waves change direction quite easily by skirting around it then backing off in the new direction. Keeping a well defined moving ring isn't easy though, and you'll need a fair bit of open space.
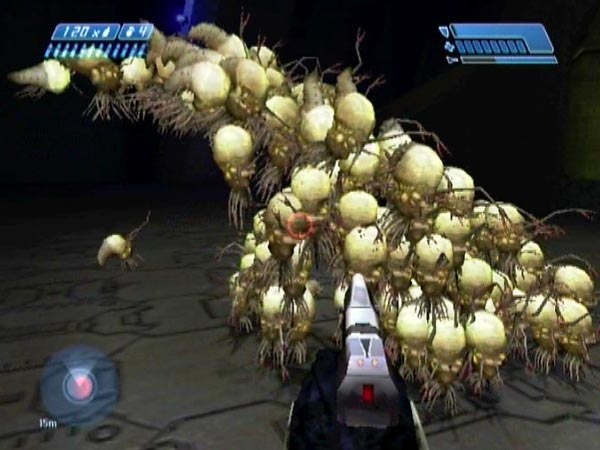
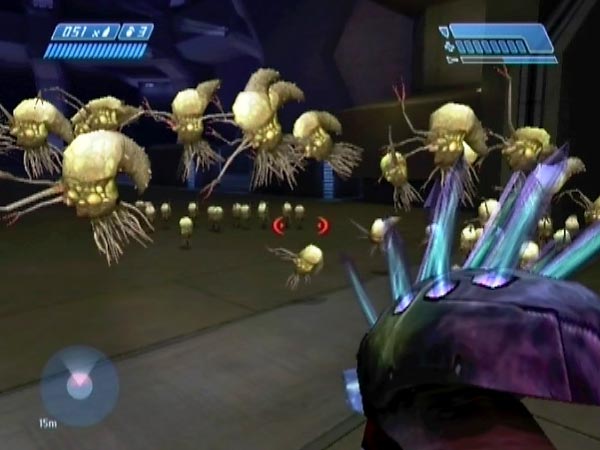
Thirdly, if you keep hopping over the main part of the herd while staying close, you can get them into a tightly clustered glob or bunch formation, which can look really weird. In BCM63 you can see me getting into a regular rhythm of hopping, staying close to a glob formed of about 150 spores. Spores freely merge with each other (they can occupy the same space), hence your herd can look extremely compressed. Sometimes it's as if there's a small core bristling all over with tendrils.
Wipeout
You can have fun wiping out the herd with your weaponry of choice. With a destructive activity like this, you ideally want to be doing it just after a checkpoint so you can keep reverting to play again with minimal delay. It's best to use Legendary or Heroic for this. On the lower difficulty levels, spores are so fragile that the whole herd is likely to get wiped out in a few chain reactions of popping, making your work almost effortless. On Legendary it's a completely different story and you might be surprised at how long it can take to finish off the herd.
I have to say, the assault rifle is my favourite for this; the sounds and visuals are great as the spores get shot up. It also feels like the most effective weapon, but try others too. The plasma rifle is nice, and don't overlook the needler. You can potentially make this activity into a bit of a challenge by backing yourself against a wall or into a corner, or simply resolving to stand still come what may. So if you don't kill the attackers fast enough, you're spore fodder!
Suicide
Another idea is to let the spores attack head on and kill you. They potentially come at you like some sort of gravity-defying waterfall flowing up off the ground. The graphics and rapid popping are pretty funny, but on Heroic or higher it's not such a laughing matter; you'll be dead on the floor in a trice. Death by spore-shower is not a pleasant way to go. I can't help thinking of a piranha attack here. Those little nibblers are vicious!
If the Monitor is nearby, you can expect to hear him comment on your death, such as at the end of BCM63. If you don't want him around, it may be possible to trigger him into leaving, depending on your location. At the first door you can trigger him to leave by advancing far enough (without triggering further Flood). The door checkpoint can be delayed until after he's gone.
Watching them play
Here's something else. You know when spores are bobbling around playing by themselves? That can look pretty striking with a big herd; you can use the 2x pistol view to watch from a distance. If you can manage to leave them in the vicinity of a large block or some walls or something, they may play around partly on vertical or other surfaces, not just the ground. They really don't care, just so long as they're bobblin'…
Chasm shoot
I later found a great spore herd activity which I call a 'chasm shoot' - now seen in BCM64 - involving some truly bizarre and spectacular shooting in the big circular area you pass through near the start of the level. That area is namely the start of the massive shaft - the Index chamber - which runs up through the level. Here's what to do.
Setting up with a handy checkpoint for replaying
Build up a big herd before you've ever entered the shaft. That's pretty easy; just do a careful job of harvesting carriers along the way. After clearing the shaft of hostiles and harvesting the carriers there, bring your herd through, trying not to leave anyone behind. Preferably be armed with a well-stocked pistol and plasma rifle as those are the best weapons for the forthcoming fun. Run clear towards the exit tunnel and you should get a checkpoint as long as you're sufficiently far from any spores. Obviously you'll want to've avoided triggering that checkpoint earlier; it's triggered about halfway between the entrance and exit. You're now nicely set up for having chasm shoot fun.
Getting the spores into a chasm
There are eight long teeth pointing into the centre of the shaft, and you want to get most of the herd down into the chasm between two teeth (any two adjacent teeth). You can do it as follows - as seen in BCM64.
Move onto a tooth with the herd not far behind. When you're near the end, jump to the adjacent tooth and move away from its end a bit so there's a big gap between you and the spores. They'll try to leap across, and lots will go down into the chasm right away if you're well placed. Others may remain up top and start heading around to get you. When you see this, move along your tooth in the appropriate direction to make them change their mind and head into the chasm instead (you're trying to give them a more inviting route). A brief bit of left-and-right movement like this can potentially get most of them down.
An alternative method of doing things is basically to run around the perimeter of the chasm a few times, until most or all spores are down.
When most spores are down, quickly reach the edge between the teeth (it has a bright strip running over it), and wipe out any spores which pose an immediate threat. A plasma rifle or AR is good for that. Avoid getting a bleeping shield or you could quickly end up nibbled to death.
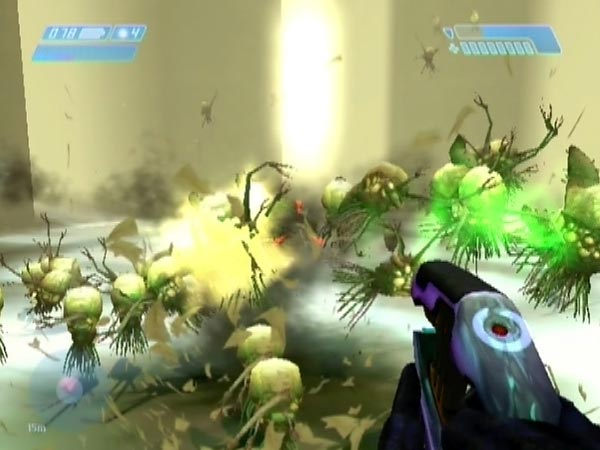
The fun
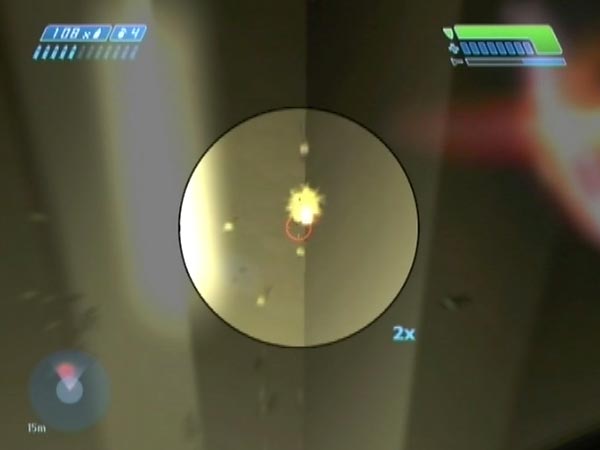
Stand right at the edge and look down. It's quite a sight. Spores are trying to clamber up three sides to reach you, but as they near the top they tend to leap away from the sides, which takes them back down a way. I believe they're leaping to attack but their judgement is hopeless; they don't cope well with their vertical attack angle.
Aside from just watching, you can enjoy shooting them in mid-air as they leap and fall. It's like clay pigeon shooting but with spores. It's great fun, for which I recommend a pistol or plasma rifle or AR. When they pop, it's quite beautiful how the fragments fall away under gravity. I've never seen popping look that good before, and it's all happening against a yellowy haze that makes the spectacle quite other-worldly. Mesmerizing, especially with a zoomed pistol. You could also try tagging spores in mid-air. Just throw at a concentration and you might get one.
I recommend Legendary or Heroic for this activity. On the lower difficulty levels the relative fragility of spores causes much more extensive chain reactions of popping, which will shorten your fun.
Some spores may manage to clamber up to nibble you, particularly at the start when there can be quite a rush, but things tend to settle down after a while. You do need to be close to the edge though, else spores will soon be coming up over it. Because of this, try not to let yourself get forced back; and if you do get forced back, make it brief else you'll simply be inviting more and more spores up.
Actually though, if you do position yourself back a short way, spores tend to overshoot as they come up over the edge, and you can enjoy shooting them in mid-air (looking horizontally, not down). So give that a try sometime too.
You may get a few spores coming at you from the side while having your fun. The majority of these will probably be spores which actually spawn down the shaft when your herd gets small enough. On Legendary you can expect 18, and they're unlikely to all spawn in the chasm you're using. You can either ignore spores attacking from the side and accept the minor damage, or take a moment to pop them.
Note: You can also do a chasm shoot standing on the edge of a tooth. Experiment!
Other fun in the Index chamber
As well as the chasm shoot you can also have fun leaping around from tooth to tooth near the centre of the chamber, shooting spores in the void and generally toying with them. Play around and see what you can do.
Shaft hop
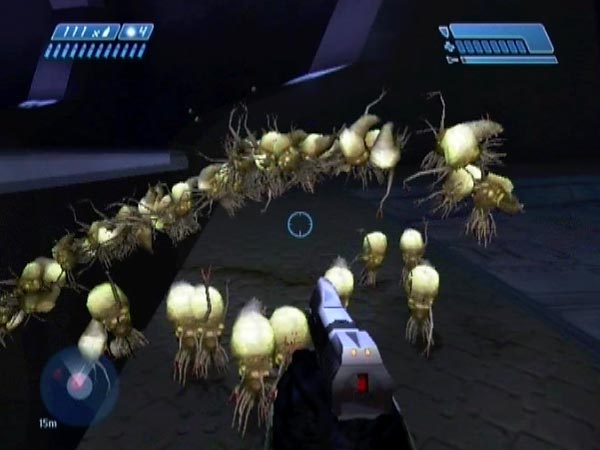
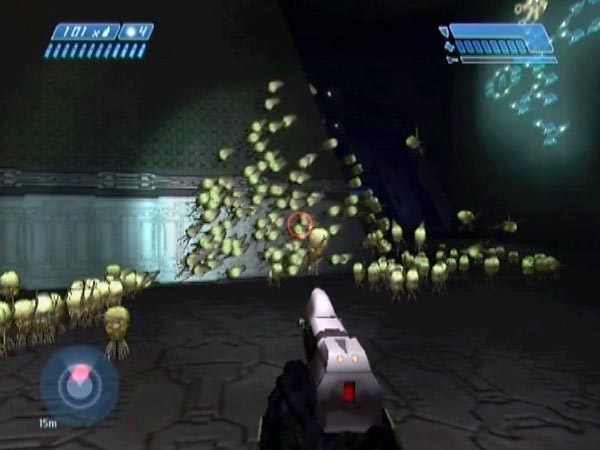
Another thing you can do in the same area as for the 'chasm shoot' is to hop around the shaft from tooth to tooth, repeatedly eluding the spores and attacking them from afar - or sometimes from closer up when some start to reach you. See BCM201 for an example. It's also interesting to just watch them, seeing what routes they take.
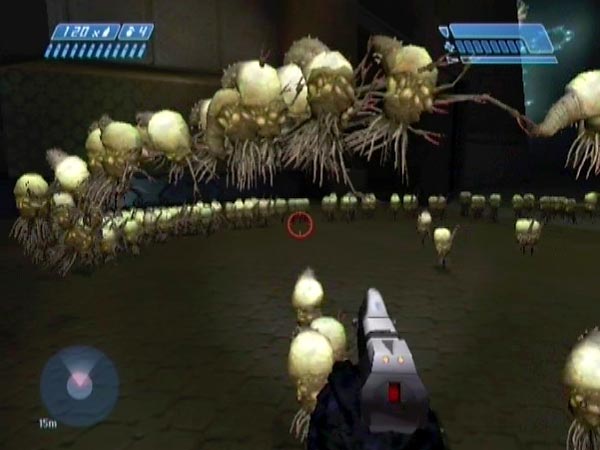
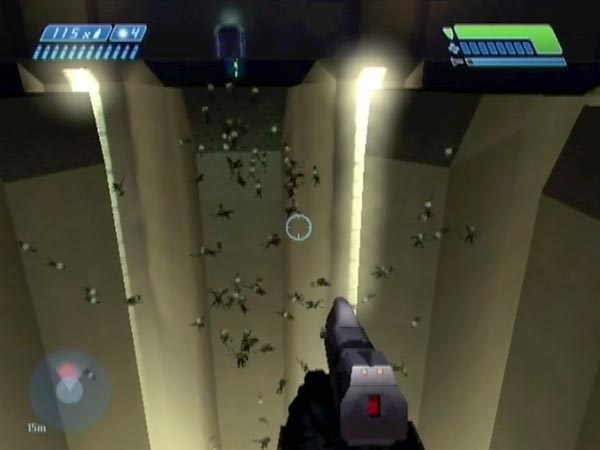
A good way to start things off is to first get your herd concentrated, then run to the end of a tooth and do four hops to get to the opposite tooth. The spores will start to flood down into the shaft, either going down walls or just leaping off, and they make an impressive collective sight in those early stages (see pic). They can reach you surprisingly quickly though, even when you've got yourself to the opposite side of the shaft.
The ideal weaponry to have is a pistol and plasma rifle. The pistol will be especially good for long-range fire of course, but the rifle has quite long-range potential too.
As well as shooting across the shaft, you can also enjoy standing on the side-edge of a tooth to shoot down the wall. Also, you can stand on the end of a tooth and shoot spores when they leap away, like in a chasm shoot.
There's fun to be had with plasma grenades too. In particular you can try some long-range tagging, trying to tag a spore across the shaft. To make this easiest, keep an eye out for a concentration, such as a line of them going up a wall. That makes a good target. Throw at the group and you can stand a good chance of tagging one. The tagged spore may leap off the wall before the bang, but even so, the blast can take out some of his buddies.
Eventually you'll probably find that things die down and you're not getting attacked much, but there are probably some spores at the bottom of the shaft, or on the walls, who've lost track of you. If you have an overshield which hasn't been weakened too much, you can drop down and kill any stragglers, to make things a wipeout.
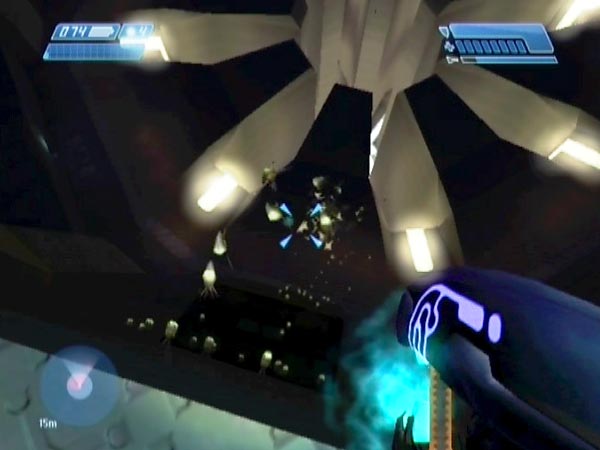
Fun in the shaft base
On PAL Xbox at least (I'm not sure about NTSC/PC), you can survive to the base of the shaft by dropping down from the first floor, if you have an overshield which hasn't been weakened too much. As long as your overshield had a full layer of protection left, you should retain full health. If you had a herd of spores, they'll chase you down, leaping off or coming down the walls, and you can have some fun in a novel bright location (including shooting them as they fall, or as they come down walls). This formed the subject of my 200th movie, BCM200.
The central area of the base is covered with a whitish layer which make the legs of the spores look white as they scuttle along. If you die in the white, it'll cover most of your body, looking quite odd.
As your herd reduces in number you'll probably find that extra spores eventually spawn in two of the alleys - as shown in my movie. On Legendary there are 18 and I think it may be the same for the other difficulty levels too (though I think using Legendary is best because spores are more resilient against chain-reaction popping). I suspect the spawning is triggered when a certain group of spores from before the shaft area falls below a certain number.
Setting up
One thing not shown in that movie is how I set things up. What you want is a checkpoint for convenient replaying, plus a handy stash of weapons from which you can quickly choose. So let me talk about this.
The overshield is down a ramp, just past a health pack. A few flood leap up out of that area as you approach. Prior to those guys though, Flood spawn from two high outlets. They get triggered when you're near the start of the approach avenue, and there's an associated checkpoint triggered. So what you need to do is delay that checkpoint, kill threatening Flood, get the overshield, then continue to keep the checkpoint delayed until ready to get it back at the shaft, with your spore herd not far away.
However, unlike in other levels, jumping doesn't cause checkpoint delay, so you have to use another method. I recommend using a harmless combat Flood; one who's had all offensive arms shot off so he can't attack. Get one like that before you trigger the checkpoint. Then as long as you keep him close enough, the checkpoint will be delayed by enemy threat. He'll follow you back to the shaft, and when you want the checkpoint, kill him or get clear. An alternative to using a combat Flood is to use one or more spores, but bear in mind that they need to stay closer to cause checkpoint delay. That'll slow you up a bit, and the chance of accidentally getting too distant is greater.
Now, how about the spore herd? You can build a nice herd early in the level, then leave them behind - e.g. somewhere before the shaft - then make a weapon stash and get the overshield. When you return, get them to the shaft, and then run clear to get the checkpoint - ideally not far from your weapon stash.
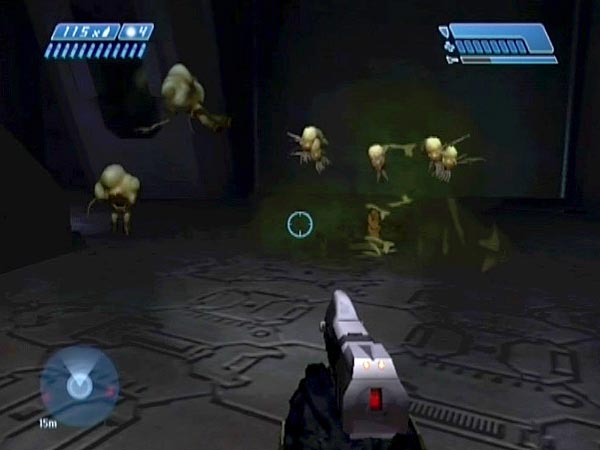
Shaft shoot on the second floor
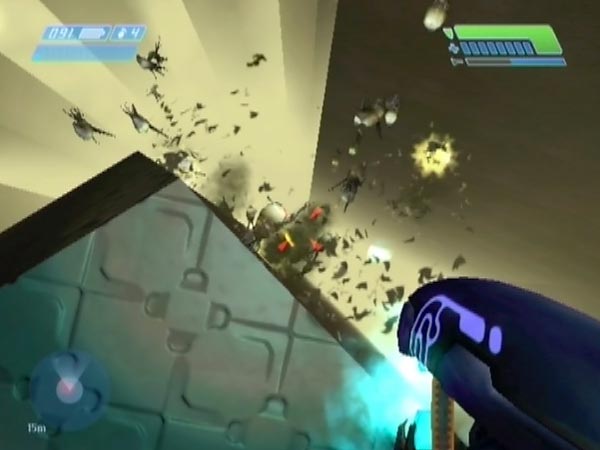
You can do something similar to a chasm shoot on the second floor. Dead ahead after the first door you encounter on that floor, there's a nasty drop into the shaft that runs up through the level. Get a herd of spores chasing you and stand at the edge, preferably near the middle. Dodge as they leap, causing many to go over. Repeat until they're all over.
Looking over the edge, you can see them trying to scuttle up but they don't get very close. They end up leaping away from the surface to fall back down again. Shoot them in mid-air. It's not as spectacular as the chasm shoot as the background isn't as striking and the spores are further away from you, but it's still pretty good, and it's nice that you don't have to worry about getting nibbled this time!
Note: Some carriers drop down behind you after you arrive on this floor. Run straight past to leave them intact until the battle at the door is over, so you can then harvest them for your herd. There will also be carriers in the door battle itself, and in an area off to the right after the door. All in all, you should be able to build a good herd, but you may need to destroy some Sentinels beforehand so they don't interfere.
Herd building tips
Here are some general tips on building a herd.
Repeated addition
You can enlarge a herd by progressing through the current floor or backtracking to earlier areas where you bypassed some enemies, repeatedly gathering fresh spores and adding them to the collection. You can either herd the newcomers to the main mass (left where they were safe from any danger of getting popped by friendly fire or Sentinel fire) or you can herd the main mass to the newcomers.
Harvesting
When you encounter some new Flood spawning, try to eliminate the combat Flood while leaving carriers intact. Some care and planning may be needed there, and perhaps some replaying until everything goes well. I'll usually be carrying a shotgun and pistol. The pistol is great for picking off combat forms from distance, something you may need to do if you've backed off from the spawning area (which can be a useful way of keeping things under control). Once you've just got some carriers waddling your way, things are relatively easy to control. At a suitable moment, try to pop one so that it sends others flying off to explode well clear of each other, so you harvest as many spores as possible. You don't want a carrier-pop to kill existing spores.
Herding
When herding (i.e. moving a herd along) be careful not to get nibbled, because if one spore pops, it may cause more to pop. Luckily it's pretty easy to stay clear, even when you have to backtrack to make sure nobody gets left behind. Skirt around the edges. As long as you keep moving and you're not heading straight for them, spores will jump at where you just were, and miss. There's sort of a knack to it but I expect you'll soon be herding comfortably.
If you ever misjudge things and find yourself hemmed in so that you have to go through the herd to escape, use a rapid zigzag motion as you go. This tends to throw off the aim of the spores as they jump, and with any luck there won't be any popping. If spores aren't too thick on the ground, you can simply dart through small gaps instead.
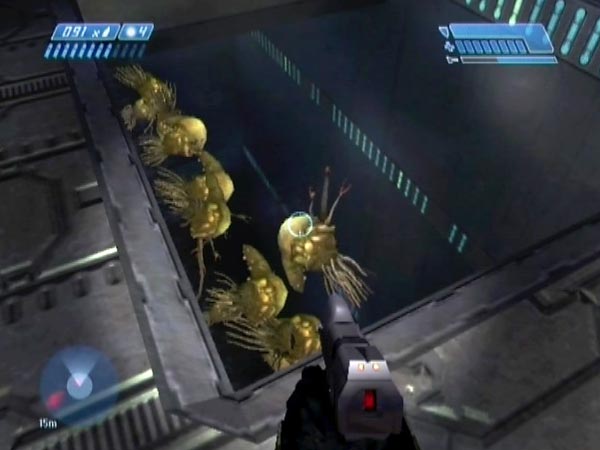
Glass panels
In places there are big glass floor panels. Try to keep those intact as long as possible so spores won't fall through the holes. They'd be able to scuttle back up but it would take a while and hold you up. Sometimes there are spores underneath the glass, so eventually you may want to shatter the glass to collect them.
Taking spores up in a lift
It's possible to take spores up a lift (down too I expect). To try to get most of a herd onto the lift, I suggest you first get the herd concentrated near the entrance, then start heading around the edge of the lift without getting on yet. Part way around, get on, and hopefully a lot of the pursuing spores will get on before it's risen too far. Spores exhibit some weird glitchy behaviour when on the lift (sometimes they seem to be on their side), but they seem ok once they get off.
Getting extreme
In this section I'll talk about when your herd gets really large. This is for the Xbox, I should add. Things may be different on PC, but I don't know about that platform.
Framerate slowdown
With sufficiently many spores you'll get framerate slowdown when nearby, sometimes even when looking away from them. The game is having trouble coping, and obviously this can degrade your fun when playing around. If you're concerned about this, see what it's like before you get a checkpoint for playing about, and if it's too much, thin out the herd until you're happy.
I haven't done enough testing to advise on good herd sizes to try, but one thing I've found is that there seems to be a degree of luck to how little the game will exhibit slowdown. For example, the slowdown was tolerable in the save I used for BCM63 featuring a herd of around 150, yet I had a similar save with slightly smaller herd and the slowdown was bad enough to make things disagreeable. Strange.
Herd removal
As things get more extreme the game may even remove your herd at some point (at a checkpoint I think). However, I think you can prevent this by keeping the herd relatively close as you move through the level, the idea being to avoid leaving them in an area the game might consider finished with. If you're concerned about possible removal, here's what you can do as you advance. Whenever you get a checkpoint, check that your herd still exists. If it does, save and continue. If it doesn't, eject the disc and reload to get back to when it last did exist.
Glitchiness at the limit
With enough spores (something well over 200 I think) the game can become glitchy, making further enlargement problematic. Here's what happened to me on Legendary. On the first floor I did a careful job of herd building right from the start, and kept the herd close enough to prevent removal. But when I reached the penultimate spawning point for combat Flood, my weapons stopped firing anything and the 'Start' button was being ignored so I couldn't save or revert.
Spore counting
Want to count or estimate how many spores you've got? Here's my advice.
Kill counting
As long as you've got a checkpoint to revert to, you can do kill counting then revert to get back your herd. Try to string them out or break them up (you can leave many behind if they lose track of you), and gradually pick off isolated spores that are far enough away from others that they won't cause an uncontrolled chain reaction of popping. I recommend a plasma rifle for this, but a pistol is handy too. Keep count of the kills, and eventually you'll know how many spores you had if you made no mistakes. Sometimes you won't even have to use a weapon. If you see a small countable group approaching, you can just count them then let them pop on you.
Unless you're very patient and careful, there are likely to be times when some unplanned popping occurs and you're not quite sure how many popped; and thus you'll typically end up with an estimate rather than a figure you can be completely sure of. But you can always revert and count again, and again, and eventually take an average of your estimates to be more confident of the actual number.
Combining separate counts
Rather than waiting until you've got your final herd, you could count batches along the way. Count your initial herd, and then each time you harvest a group of newcomers, count them before merging them with the herd. Counting small groups can potentially be done just by eye; no popping needed. Eventually you'll have the total, as long as the game didn't cull your herd while you were away at any point. I don't think the game does piecemeal culling though. If the game ever does any spore removing, I think it would be an entire herd, so it'll be very obvious to you.
Image analysis
You could potentially count a herd by examining video footage, or even just a screenshot, but it can be problematic because spores can overlap with one another, making it hard to tell exactly how many are in a merged cluster. To pick out individuals better, try to be looking down on the herd.
Further remarks
Near the third door
Earlier I mentioned a dead end to the left after the first door, where you can trigger a mass of spores. There's a similar mass you can trigger in a dead end by going left after the third door, namely the second floor's second door. It's the one you reach after crossing some wide open areas, and then you have to wait for the Monitor to open the door, during which time some spores drop from a distant ceiling and head your way. When the door finally opens, there are spores behind it ready to ambush you. Add those to the mob from the dead end and you should have quite a good crowd; and you've got some huge areas to play in.
Other levels
The Library is undoubtedly the best level for building up large spore herds, but there may be some potential in Two Betrayals or Keyes, and let's not forget that you also get some large masses of spores in 343 Guilty Spark when they burst through doors. I haven't investigated those levels for spore fun yet though.