Flood onslaught challenge
Posted August 8th 2004, expanded later
Associated movies
The basic idea
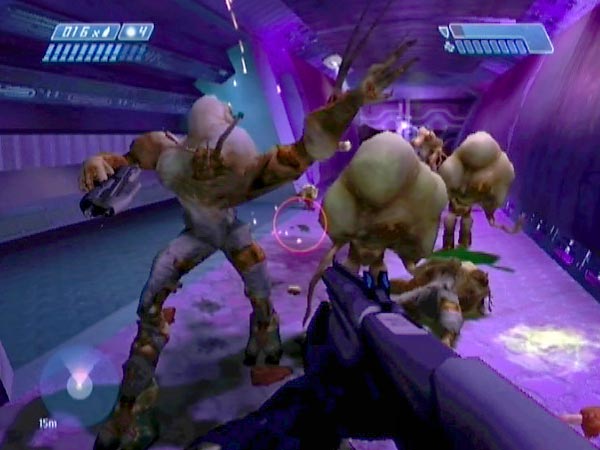
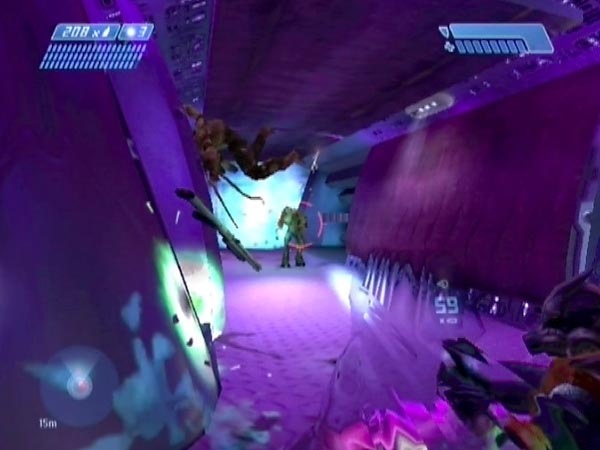
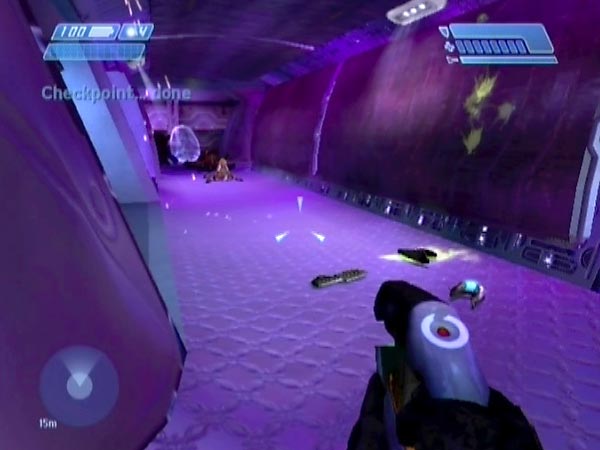
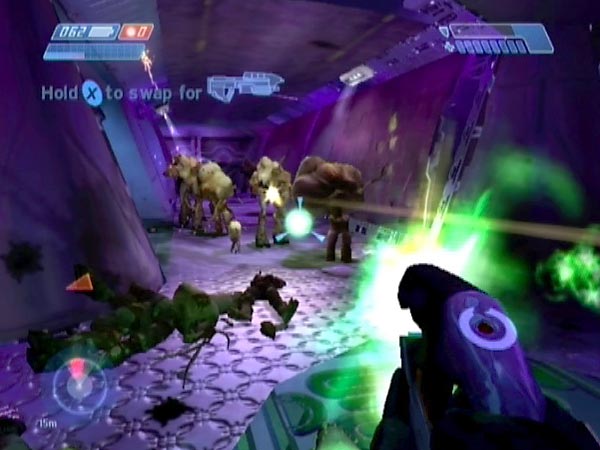
Shortly after the start of the level you encounter a drop down to the surface. Cortana initially suggests looking elsewhere, but then Flood start coming your way from back along the corridor, and she quickly changes her mind. If you're fool enough to hang around, you face a seemingly never-ending onslaught designed to force you to jump down into the pool of coolant. However, if you can stick it for a couple of minutes the attack will eventually end. So the challenge is to survive it, on your chosen difficulty level. You face combat Flood, carriers and lots of spores; and the combat Flood are armed with pistols, ARs and needlers.
I've had a real blast with this and highly recommend it. Despite the cramped setting there's lots of scope for tactical thought here, making for an absorbing affair as you try to hone your Flood slaying technique. Plus, it's quite easy to set up a good save for repeated play. Thanks go to fellow cyborg Doug Auclair, whose comment prompted me to see if the onslaught ever ended.
No cheating!
A couple of conditions though, to ensure the proper experience. Firstly, if you were to go near the door and stay quiet, Flood would tend to only trickle your way slowly. Don't be doing that as a means of making things easy. By all means recharge under cover, but aside from that, the idea is to make your presence known and keep sticking it to the Flood as much as you can.
Secondly, if you advance far enough towards where the Flood are coming from, they'll temporarily stop spawning. You could therefore use this as an artificial tactic for alleviating the pressure. But we're not going to stoop that low, right? We want the full non-stop onslaught here. It's ok to briefly pass the threshold line to pick up a loose grenade if you want, or perhaps to blast a Flood at close range, but don't be staying past it to slow things down. Get back right away. The line is a few meters from the turn. More exactly, see the purple panel along the side on your right? There are seven gratings below, and the line is just before the final three.
If you want to be more strict on that, you could oblige yourself to stay back from the trigger line. Depends how you want to play things.
Stragglers
Flood that spawn around the corner seem to get attracted your way partly by your gunfire, but at the end you can sometimes be left with a few stragglers. If you want to make sure you've dealt with everything, head up towards the corner and either fire a shot or take a look.
Spawning dynamics
Analysing the exact nature of the Flood spawning wouldn't be easy, but I think it's similar to the sort of dynamic you get elsewhere in the game, whereby new Flood spawn whenever Flood numbers fall below a certain threshold. The spawning doesn't seem to be on a timer. I think you're allotted a certain amount of Flood; so it's up to you how long you take to get through them. On Legendary you can expect to be in action for typically two to three minutes, depending on how you fight. On lower difficulty levels expect briefer action, potentially as low as about 80 seconds on Easy.
Setting up
Here's my suggested routine for setting things up with a starting checkpoint that comes just before the Flood begin spawning, ideal for replaying the onslaught. It's carefully honed with the goal of getting maximum or near-maximum shotty ammo with a minimum amount of work, bearing in mind that some retries may be needed. But if you're not so fussed about that, you could do things in a less fussy manner. I suggest using Heroic or Normal to start with, as Legendary is very hard to survive. You can see the routine demonstrated in BCM120.
Get the first checkpoint
When you start the level, go straight ahead and preferably kill the Flood which is chasing a Grunt. Shoot him unless you're keen on retaining as much AR ammo as possible for the start of the onslaught; else you could frag the pair of them if you don't mind losing a frag. Killing this Flood can usefully help you take the next lot of Flood by surprise - because otherwise the Grunts around the corner will fight him and quickly draw the attention of those other Flood.
Get the camo and three plasma grenades nearby, while doing some jumping to delay a checkpoint which got triggered earlier when you went through the door (you should start your jumping when you've killed that Flood). Then advance towards the next corner, pause near the start of the last purple side-panel and get the checkpoint, which is going to be handy if you need to retry the next bit of work.
Make the area safe
Around the corner there are more Grunts, and somewhere there'll be three Flood: one with a shotgun, one with a plasma rifle, and a carrier. The Flood can be in various places when you get to the Grunt area, but it's best if they're down the end of the corridor. If they're not, you may want to restart the level; but first continue for a while to see how things go.
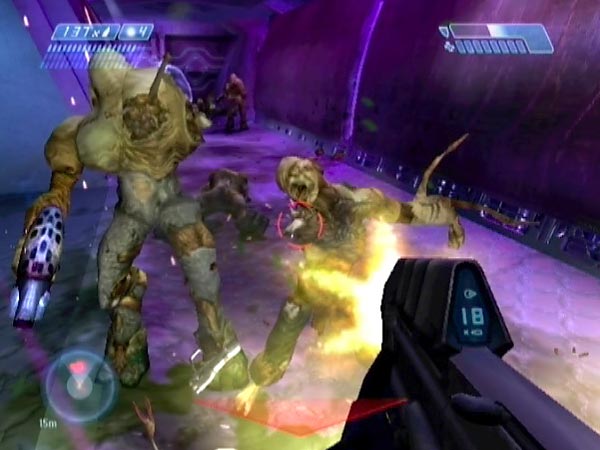
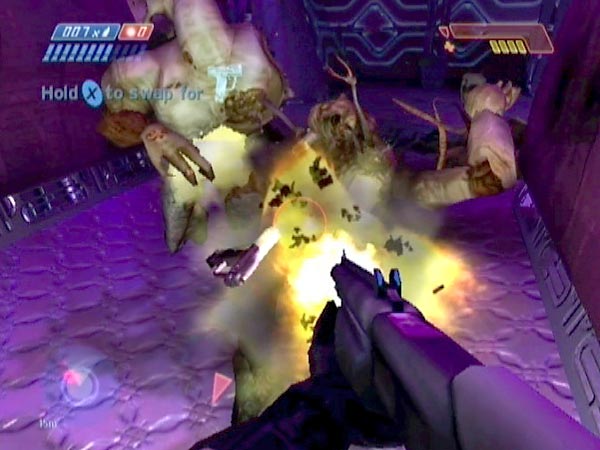
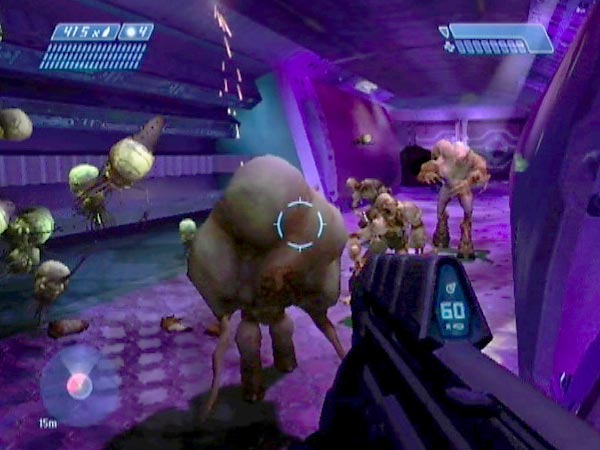
The shotty guy seems to get a randomized ammo count of between 20 and 30 shells, and each one he fires will potentially be one less for you, so try to kill him early - and explosively so he doesn't do any death throe firing. If he's somewhere down the far end, I suggest throwing a quick plasma grenade down towards the end, and if necessary fire a shot to get him drawn this way (maybe fire before you throw). This can often result in the shotty getting blown into your waiting arms (see pic), so you can quickly check the ammo count. But in doing this and getting everything else killed, don't go down the main corridor towards the door yet. I'll say why in a moment. The carrier is sometimes out of sight near the door, but a shot can draw him into view for popping. In doing all this killing, be careful not to lose any health of course.
You may not have been able to pick up the shotty yet, but when you eventually can, check the ammo. If there aren't enough shells for your liking, simply revert and try again. The plasma rifle's charge also varies, but is sometimes 100%.
An alternative but slower strategy for getting the shotty is to first quickly kill the Grunts before they provoke shots from the Flood - I'd suggest using melee - then get a spare plasma pistol and, from cover, draw the Flood around a couple of corners, then tag the shotty guy (all while still cloaked).
Neutralize the hangar
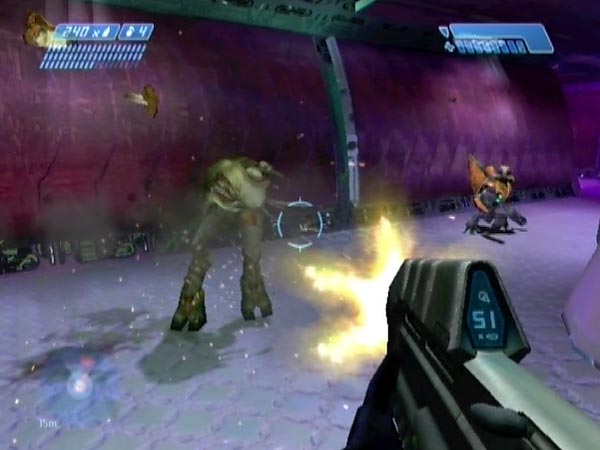
When you go a few steps down the main corridor, you'll trigger a conflict in the hangar across the hole. Before you do that, get armed with at least one covie weapon you're not interested in saving for the onslaught challenge. I suggest having a spare needler and plasma pistol (not the fully charged one you initially had, which is better saved for the onslaught). Go down the corridor, turn right and carefully go just far enough to cause the door to open; namely just past the start of the purple panelling. Be careful not to overshoot the door trigger line by much, else you'll trigger Cortana's speech and the Flood onslaught, which you don't want yet.
Try to kill the Grunt and two Elites across the hole, as well as any Flood that have jumped down to get them. Early in the fight, the covies tend to be pushed back on the defensive, which is when you can best get them. That's why you didn't want to trigger this fight until you were ready for it. The job is usually quite easy with streams of needles and maybe a few plasma balls or long-range plasma fire, but sometimes an Elite goes out of view to the left and you might not be able to get him. In that case I suggest you revert for another go. Occasionally a remaining Flood can end up standing behind a case across the hole, but he can be grenaded with a plasma and usually you can go back to get topped up later, so that's ok. The reasons you want to kill these nearby covies and Flood are that otherwise (1) their presence may shortly cause your intended battle start checkpoint to be delayed unacceptably, and (2) you could end up taking fire in the back when desperately fending off the Flood in the onslaught challenge. Not nice!
Prepare for battle
Go back and make sure to get topped up with plasma grenades if possible. You normally can. If you'd like to move some spare weapons into place for optional pick-up at the start of battle or during battle, do so. Finally, make sure you're carrying your desired starting combo. The most powerful combo would be the shotty and plasma pistol; and you might like to be holding the latter for some early spore popping.
Get a convenient battle start checkpoint
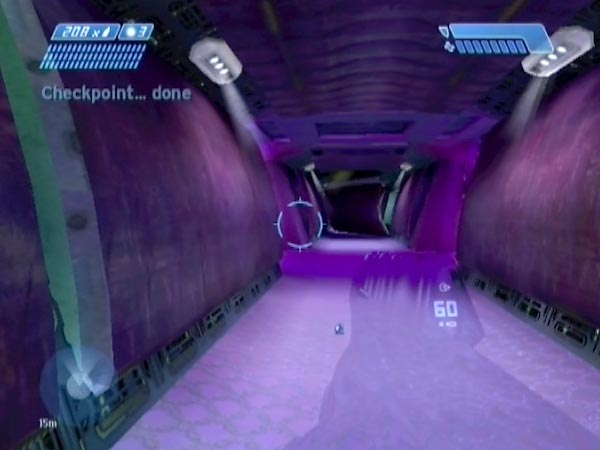
Now to get your battle start checkpoint. Just past where you triggered the door, there's a checkpoint trigger line. Delay the checkpoint with jumping for a while, and move to your desired starting position. You'll start to hear Cortana's speech: "Analyzing damage. This hole was caused by some sort of explosive; very powerful if it tore through the ship's hull. All I detect down there are pools of coolant. We should continue our search somewhere else."
Flood are due to start spawning at the scheduled end of this speech, and you want to get your checkpoint just before that. So, when exactly should you stop jumping? If you want the checkpoint a second or so before the Flood start spawning, wait until Cortana has said "detect", or thereabouts. But if you collected some spare weapons and want to always have an extra few seconds to get ready with any particular combo, only wait until she's said "powerful", or thereabouts. Incidentally, although Cortana hasn't quite finished her speech when the checkpoint comes, she won't continue it each time you restart your battle. It's done with.
If you're going to want your flashlight on for the battle, switch it on (fully charged) just before getting the checkpoint.
If the checkpoint fails to materialize when you stop jumping, that'll either be because of enemies in the hangar (there may be one too close to you, even if unseen), or because you stopped jumping so late that Flood have started spawning up the corridor. In this case you'll have to revert for another try.
Tip: It's a good idea to save your battle start checkpoint. Otherwise, if you fall out of the ship in battle, you'd quickly trigger a new checkpoint, and then you'd no longer be able to get back to the battle start.
Experiences
Here are some of my early experiences with the challenge. There are a few implicit sub-challenges here to do with imposing weaponry limitations for extra difficulty, if you fancy giving them a go. With any such challenge, you can moreover attempt to survive with perfect health.
NB: All my play is on PAL Xbox, but if you're instead using NTSC or PC, I think things may be harder because Flood move faster. Accordingly, some things which have been viable for me may not be viable for you.
Let's try Normal first
I tried it on Normal first and survived using a plasma pistol and shotgun. I was also able to get through with just a plasma pistol on 100% charge; no grenades needed. After that I managed to survive using just the AR and grenades, though it was quite a bit harder.
Moving up to Heroic
Next I switched to Heroic and was again able to survive, though it was a lot harder. It struck me that the spores moved much faster, which made them more troublesome. I used the plasma pistol a lot, plus grenades, and brought the shotgun into play when things got sticky close up. One challenge I eventually managed was to survive using just a plasma pistol (no grenades).
On Normal it was possible to hold off the Flood from close range up near the spawning area, standing about halfway up the corridor where there's a recess that can give you a bit of cover if you want it. But on Heroic the pressure was too great and I always had to retreat back to the far end.
Resisting the voice in your head
As I was finding, it's not just the Flood you have to resist. You also have to resist the increasingly dire warnings from your in-house AI dreamboat Cortana, who really really wants you to make a hasty exit. I mean, she does her best to sound respectful about it, but reading between the lines it all pretty much boils down to "Jump, you tin-plated fool!". Apparently the little sweetie has no confidence in you whatsoever! And after all we've been through together. Now that's just dispiriting.
And now Legendary
After a while I gritted my teeth and gave Legendary a go. I'm tempted to say "Don't make the same mistake!". It's so hard at first that you probably won't know whether to laugh or cry. I think it may even be tougher than that bit in the Library where you get trapped between two doors. But after a number of attempts and a good deal of perspiration, I managed it using a plasma pistol, shotgun and grenades. Eventually I managed to do it while retaining perfect health too. Yes, it's possible, but you'll need to be right on top of your tactics and fight like a cyborg possessed!
Later I played on Legendary a lot and found it becoming significantly easier as I honed my technique. Nowadays I can actually survive around 40% of the time with plasma pistol and shotty, often with full health - such as seen in BCM3 and BCM107. As such, it provides an ideal challenge, putting me in serious danger but allowing a decent chance of survival if I play well. I've also been able to get through using just a plasma pistol and grenades (I managed it while working on BCM107), but it took a lot of tries and a good deal of pain.
AR challenge
Finally I managed what turned out to be the trickiest challenge of all: surviving on Normal using only an assault rifle (no grenades - which makes all the difference). My central tactic there was to use quite a lot of staccato firing, as elaborated in the tactics section below. This battle is a great place to get some intensive practice with that technique, but do bear in mind that this challenge is extremely difficult. If you're finding it too tough, you could always make an easier challenge by allowing yourself a limited number of frag grenades - e.g. just your initial four - to help you in sticky situations.
You can see me survive the AR challenge with perfect health in BCM4. In that particular play an AR gets blown my way early on, topping up my ammo rather conveniently. It's not an uncommon event to get an ammo boost from a low-flying AR, but you can also deliberately let a Flood with an AR get close, then kill him to get his ammo. All in all, you shouldn't have much trouble keeping stocked with ammo.
Tactics
Having trouble staying alive? Keep these tactics in mind, some of which you can see in action in my movies.
Lower difficulty while learning
Don't let yourself in for too much frustration right away. If you're finding things too hard, try fighting at a lower difficulty level for a while. With the reduced pressure, you'll have more time to execute the tactics such as described here. When you're fighting in complete or near-complete control, step up the difficulty again.
Plasma weapons are better than the AR
I don't know why people think the AR is the thing to use on the Flood. The plasma weapons are far superior. As if the shot damage isn't weak enough, the AR's reload time makes it even more of a liability in this sort of situation. To get a vivid demonstration of just how much more effective the plasma pistol is than the AR, try surviving on Normal using just a plasma pistol or just an AR (no grenades in either case). The latter (the 'AR challenge' mentioned above) is far harder.
As for comparing plasma weapons, the plasma pistol beats the plasma rifle by quite a way. It does more damage, lasts much longer, and seems less prone to overheating. It's a real powerhouse when used well, and I've even been able to survive on Legendary with just a plasma pistol and grenades (very hard though). Moreover, a plasma pistol on 100% can last for the whole fight. Don't bother with the overcharge feature though; rapid bursts of normal fire are far more effective.
Conserve your shotty shells
If you've got a shotgun, try to save most of your shells for when you really need them. None of your attackers will have shotguns, so you're limited to the shells you start with, which can be as many as 30 (see my advice on setting up). Mostly I save the shotgun for intensive use when I've been forced back by multiple enemies and it's time for some close-quarter stuff. But I sometimes use it elsewhere to quickly get rid of an attacker or two, enabling me to then concentrate on more distant threats.
That said, a plasma pistol is also pretty good for close-up stuff and I often fight with a combination of these two weapons; definitely the strongest combo.
When you've got two attackers close together it can be worth aiming a shotgun blast in the middle to score hits on both. Even if it doesn't bring them down, it'll usually stun them, buying you some time.
Staccato firing from the AR
When using the AR, you may like to make good use of staccato firing, in which rounds are fired separately by rapid twitches of the finger. This is far more economical than using bursts, yet has a comparably rapid effect once you get the hang of it. The most important benefit here is that it greatly reduces the frequency with which you have to reload. Reloading is agonizingly slow and leaves you in danger of getting overwhelmed if there's still a bunch of Flood coming up the corridor. If you use bursts all the time, you're more likely to run your magazine dry before you've wiped out the latest wave. Mind you, sometimes a burst will be needed to take down Flood quick before they lash you or whatever. But whatever you do, try to pick your reloading times intelligently.
Needling fun
Much as I love the needler, it's hardly the ideal choice here. It's relative slow-working and you have to be careful not to end up getting caught in an explosion when your needled target closes in on you. However, on Heroic or lower you can certainly have fun with it, and can do good damage if you use it well. On Heroic, surviving with just a needler would be murderously hard, so you'd surely want to couple it with another weapon for when Flood get too close. The shotgun is the obvious choice, and you can see that combo used in the final play of BCM121, and throughout my dedicated movie BCM139. That combo is a lot of fun, if you're able to use the needler well enough. On Normal, surviving with just a needler could be a reasonable challenge, though I haven't yet tested that.
Keep the spores whittled down
It's important to keep the spores whittled down to avoid being continually nibbled at, and to allow enough time for shield recharging. Plasma weapons are ideal for this, especially when there's a mass of spores up the far end of the corridor. A few shots can cause a chain reaction of popping, though the effect becomes less pronounced the higher the difficulty level. The AR is good too of course, but try to fire individual shots to conserve ammo. On Legendary I find the plasma weapons easier for spore work. You can also use melee of course.
When you're sheltering near the door, spores tend to collect at the end of the recess along the corridor as if they were trying to get to you via a straight line. When you move out, you've got a good opportunity for popping lots at once via chain reaction, due to how bunched up they are. Careful you don't get surprised by such a mob.
If you can spare a grenade, particularly a frag grenade, that can be a good way of cleansing an area of spores. However, I wouldn't normally be doing that unless desperate to get my shield recharged. Grenades are more valuable against combat Flood. At times you may be under such pressure from combat Flood that there's no time to deal with spores, or not enough to deal with them completely. But at least keep moving around so the jumpy little devils keep missing you, otherwise they can be your undoing.
Grenade use
The Flood will provide a steady supply of grenades, so it makes sense to try and use as many of them as you can. Watch out for dropped grenades and try to pick them up - which may sometimes involve a quick dash up the corridor. Whenever you're topped up with a certain type of grenade I'd suggest you use one soon, though it's not as crucial on the lower difficulties. On the higher difficulties good grenade becomes more important.
Look for concentrations of Flood to grenade, for maximum payoff. You can often throw a grenade up to the far end to take out a load of them, some of whom may be just out of sight, approaching from around the corner (but you know they're there). I do that a lot, and after a good bang like that you've potentially got a few moments to cleanse the area of spores to give yourself a nice clean corridor again. It's usually also a good time to reload if needed.
In general you should try to avoid tagging Flood, else you can end up with the grenade coming right back to you, fast and fizzing! When Flood are close, aiming for the floor or wall is probably safest. Sometimes I'll pretty much drop one where I stand, then back off, letting my attackers run into the bang. If you ever do accidentally tag something coming your way fast, try to stop it quick and back off. The only time I might tag a flood deliberately is if it's a carrier form a good way off.
If you've been forced back towards the door, you could drop a grenade near the corner to stall further Flood and give you a chance to get back in control. Grenades can also be handy for buying you enough time to recharge your shield. Clean corridor and a healthy shield; strive to maintain these things.
Carrier exploitation
Carrier forms are walking bombs that you can exploit. Try to pop them when they'll do a lot of collateral damage among other Flood coming up the corridor. That can save you from delving into your stock of grenades or whatever. Normally you'd set them off with gunfire, but remember you can also induce them to pop just by getting up close to them. Occasionally I do that then beat a hasty retreat. Keep aware of loose grenades on the ground and don't get caught in a chain reaction!
Sometimes you can deliberately wait until combat Flood reach a carrier before you pop it. On Normal I had plenty of fun with that tactic but on higher difficulty levels it's harder to pick out carriers, partly because there tends to be more Flood in the way, and partly because you're just plain under a lot more pressure. Talking of carriers, watch out for any getting blown down to your end of the corridor, either by grenades or carrier pops. An unexpected nearby pop can really ruin your day.
Here's a tip for buying yourself some reload time (particularly with the AR). If you see a carrier form waddling up the corridor, run up to it, reloading as you go and using it as cover from Flood further back. Approach to make it prepare to pop, then retreat. The bang will hopefully damage Flood coming up behind the carrier - depending on how cleverly you timed your approach - and by now you're reloaded.
Cover and motion
When defending from the end of the corridor (back near the door), make good use of the corners as cover. I use both sides but the door side obviously gives you more room. It has two other advantages as well. Firstly, you have your gun on your right so you don't need to move out so far to get a line of fire. Secondly, Flood find it harder to get a line of fire at you and often end up hitting the corner if you keep close to the wall.
Beware of needles homing in on you; move around or briefly dodge out of sight to avoid them. If enemies are getting close, maybe edge back into cover a bit so you're not exposed to fire from more than one at once. However, if they're getting that close, it's maybe time to use a grenade or shotgun to try to stay in control. Once you start getting overrun it can be hard to recover.
If enemies are starting to crowd you near the door, it can be a good idea to get past them (maybe jumping over them) to get more room in the opposite side. When I do this I'll often be reloading as I go, unless I'm mowing them down with gunfire to create a path. Sometimes you may need to go back and forth a bit, to keep giving yourself room. If you anticipate their leaps, you can potentially make your move as they head to where you were, so you end up with extra distance between you. Another idea: if you've got a grenade, you might consider dropping it among the mass then moving clear.
Inevitably you'll get into desperate situations sometimes, seemingly doomed to become Flood fodder. But don't give up too easily! With good movement and efficient weapon use (picking your targets rather than shooting wildly), you might be surprised at the scrapes you can get out of if you keep your cool. Oh, and by the way, when you get forced back near the door, watch out that you don't end up stepping back out of it! Been there, done that.