Banshee battling
Posted March 16th 2006, expanded January 21st 2011
Associated movies
- BCM26 - Legendary; Stream at the end of the valley (5:30)
- BCM47 - Legendary; Bottom of the valley (5:37)
- BCM65 - Legendary; Cliffside hilltop (5:47)
- BCM155 - Legendary; Stream under the overhang (5:36)
- BCM157 - Legendary; Underground tunnel (5:37)
- BCM166 - Legendary; Stunt drive special (5:17)
- BCM187 - Legendary; Battling after ejection from the hog (6:09)
- The basic idea
- Creating a base save
- Setting up a battle from your base save
- Some options in setting up a battle
- Driving into battle
- Battle tips
- Some choice battle locations
- Off the beaten track
- Alternative base saves
The basic idea
In the latter part of level 2 (after the underground bridge section) you'll usually get attacked by a pair of Banshees in the valley that links the three survivor areas. They're triggered once the game considers one of those areas finished with, such as if the survivors have been evacuated or if they've been wiped out. Typically you'd be in a Warthog and a gunner would make short work of the Banshees, but you can have a much more interesting time than that. It's easy to arrange battles in which yourself and a squad of Marines take on the Banshees anywhere in the valley, or even some places outside it. Banshee battles to order! Basically all you need to do is get a squad ready in a chosen defence location, go off and trigger the Banshees, then rejoin your guys with Banshees in pursuit. Lots to play about with here, so let's get on with it.
Creating a base save
The first thing you'll need is a handy base save to form a starting point for setting up different battles with a minimum of effort. In the save I describe here, ideally all but one of the rockslide survivors will have been ferried out of the rockslide area. Together with your original passengers they'll form a squad of up to eight, ready to be moved to any chosen battle location. Here's the detail. I recommend using Legendary so the Banshees are as tough as possible, to give you the most to get your teeth into.
Get the sniper rifle and a checkpoint
When you emerge into the valley after the underground section, drop off your passengers at a fairly central 'base camp' location in the valley, where you're going to assemble your squad. Get the sniper rifle at the lifeboat and reload it. Also save a checkpoint there or - more convenient for restarting from if necessary - near the waterfall entrance to the hillside survivor area.
Wipe out the initial covies
Drive into the rockslide area via the right hand entrance. Stop early and try to quickly wipe out the enemy with the sniper rifle, ideally before they attack the Marines. Sometimes they're already attacking and it won't be possible, but in that case you can eject the disc and reload to restart from the outside checkpoint you saved. Or if you're not too fussed about saving all the Marines (and keeping them in perfect health), just do the best you can. If any covies get into the rocks, you can potentially still get a bead on them as they move around.
Extract all but one Marine
With the initial covies dead, start ferrying out all but one of the Marines, ideally leaving the sniper behind. It's quickest to drop the first two pairs in the nearest part of the entry passage, to be driven the rest of the way out later (they should just stand around in the meanwhile, nice and safe). As long as you're taking the shortest route both ways, you should be able to do this with no trouble. By the time you're going back for a third pair, the Marines may have retreated up to the plateau and fresh covies may be closing in. You might need to do some killing to help ensure the safety of the guy you leave behind, but it might be enough to just distract covies away as you leave.
Actually you might want to do some thinning out of the covies regardless, because it'll make bringing out the final survivor safer later on, and it's also helpful for something else (covered later). It's not essential though - and in any event you should leave at least 5 of the total covie force alive, else the remainder will get classified as stragglers and an evac Pelican will arrive in a few minutes, which you don't want.
An alternative to temporarily dropping the Marines in the passage is to drive them out into the valley right away. That can work fine but obviously the extraction process will be slower. Because of this it might be a good idea to use squashing and chain-gunners to thin out the arriving enemy troops during the ferrying, to help minimize the threat to the remaining Marines. But if you do that, make sure to leave at least 5 covies alive as just mentioned.
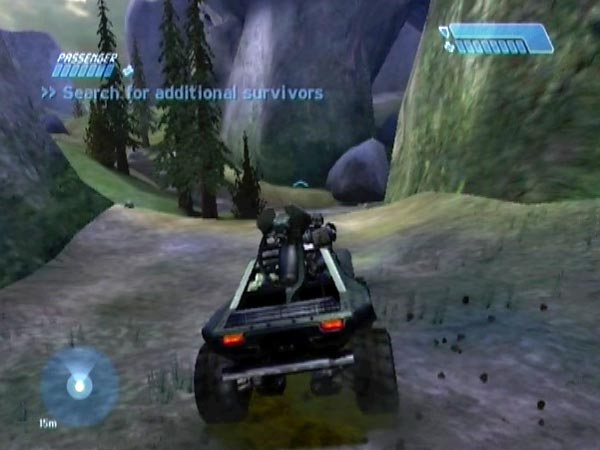
If you ever see "Search for additional survivors" on the screen, that means the remaining Marines got wiped out, which is no good, and you'll have to try again after restarting from your earlier saved checkpoint.
One other thing. The rockslide personnel are randomized when you first head in. So if you get too many duplicate characters for your liking, or the wrong sergeant (you'll probably want Stacker if you've already got Johnson from earlier), that's another reason you might want to restart from the saved checkpoint. Stacker is sometimes armoured, making him extra tough.
Set up base camp and get kitted out
Now you've got all but one Marine out, move everyone to the base camp. You might like to spread them out a bit to make it easier to pick up specific personnel later when ferrying folk to a battle location (e.g. you might want to drop Stacker and Johnson together on top of a rock, intending to join them in battle like I do in BCM47).
Get equipped with your favourite weapon combo for the battling. I recommend an assault rifle for good visceral fun. The pistol is the best anti-Banshee weapon of course, but can make things feel too easy. Also make sure you're loaded with plasma grenades and set to use them; tagging Banshees is good challenging fun. Frags can be useful too, especially when battling on the cliffside hilltop.
Optionally you could assemble a stash of alternative weapons at base camp to make your save more flexible, or place some in certain battle locations to save you having to move any there later. There are plenty of weapons lying around in the rockslide area which you can probably sneak out ok, even though a few enemies may be around (you could lure enemies away first, so you'll have some time). It's also possible to've taken weapons out before triggering the first dropship if you avoid the dropship trigger zone. You could even make quick trips into the other survivor areas as long as you don't trigger the Banshees. My favoured combo would be an AR with pistol as secondary, but I'd also want a stash that includes plasma weapons and even a sniper rifle in case I fancy doing a distant bit of battle watching.
Avert a Banshee disappearance glitch
A little detail I need to mention. Sometime during your set-up work, preferably trigger a checkpoint at one of the entrances to the cliffside survivor area. Cortana says "Maybe they took cover in that structure; we should check it out" if you go a little further - which I recommend doing to get it out of the way. If you don't do this first-time triggering prior to the spawning of the Banshees, you might get a Banshee disappearance glitch later during the battle phase if you happen to do it during your drive (or whenever). In the glitch they become prone to spontaneous removal from the game when they're out of your field of view - even if close and attacking. Interesting, but not good for battling!
Maybe fix a Marine speech anomaly
If you left a sniper (or other Marine) in the rockslide, preferably do this step just before finishing. Let a few Marines board and see if you get a boarding line (e.g. "Floor it!"). If you don't, you've probably got a speech anomaly (cause unknown) affecting all Marines, making them strangely silent aboard the hog or when boarding or dismounting. As such, the sniper won't react to spotting the Banshees, nor when you do a big jump, nor will he shout when shooting. That would make your drives into battle less enjoyable, so it's worth fixing things if you can. Here's what I suggest. Just let the hog wait with the motor running. Eventually you'll hopefully hear some delayed boarding lines and the anomaly will have gone. In my case the wait was 15 minutes but I'm not sure what the general situation is. You can always just leave the game running and do something else for a while, then come back and check whether the anomaly has gone.
Finish off
To finish off, drive to the rockslide entrance and save a checkpoint (or save a checkpoint somewhere else if you like - it doesn't matter). Optionally you could have two of your squad aboard as you do this, ready to take them a defence location. That'll save you a bit of pick-up time.
Setting up a battle from your base save
Now you've got your base save, it's time to set up a battle!
Set up your defence position
Decide where you fancy battling, then ferry all your Marines there - or as many as you want (there's a bit of advice on squad size below). It can be anywhere in the valley, and even some places outside it. Have fun trying different locations and squad arrangements - there's a lot of potential. For general tips on arrangement see Squad arranging in the Engineering tips section.
If you've got a weapons stash at base camp, select the combo you want. Optionally, you could even move some or all of the stash to the battle location, to allow you to choose afresh each time you arrive there, or to vary weapons during battle.
Deal with the final survivor and get a checkpoint
Drive back into the rockslide area. If the final survivor is a sniper, pick him up (in the seat) or eliminate him; but if he's not a sniper, eliminate him because you certainly don't want a chain-gunner destroying the Banshees on your way into battle. Sniper rounds won't affect Banshees but a sniper is still worth having along because of the racket he makes. In regard to elimination if needed, squashing is the obvious way but another option is to let the covies do the dirty work, possibly after ferrying him out into the open. It would be helpful to be near the exit when he dies, so you can be heading out with minimum delay after the Banshees are triggered by his death, but it's not critical.
Note: Occasionally I've seen a sniper clamber up to man the chain-gun rather than taking the seat. If that happens, just get him out and have him reboard. Hopefully he'll take the seat this time.
As you head back out through the passage with the last survivor, or as he dies, the area becomes empty of survivors, hence the game considers it finished with and spawns the Banshees high up over a big overhang, where they initially fly around in a small circle. Ideally you want an exit checkpoint in the passage, but if you're going at full speed there's a small chance it could get cancelled due to the threat of enemies behind and then the Banshees ahead. You can reduce that chance by slowing a little after passing the trigger point, allowing the game more time to grant the checkpoint while you're in a sheltered area.
Drive to your battle location with Banshees in pursuit (this is a lot of fun in its own right), and enjoy the fight. When it's over you'll normally be able to revert to that rockslide exit checkpoint so you can drive into battle all over again (in essence it's your battle start checkpoint). But with some locations you may have got a later checkpoint, in which case you'd revert to that one instead. Checkpoints are triggered at survivor area entrances and also the entrance to the underground tunnel; but Banshee proximity can cause the checkpoint to be delayed and then cancelled (namely if the delay continues more than a few seconds).
Creating a battle save
If you use a copy of your base save for setting up a battle, you could save things if they turn out to be particularly good. In general I'd recommend saving at the rockslide entry checkpoint, for two reasons. Firstly it leaves you the option of going back to adjust things a bit, including the possibility of changing weapons (you could've left spares nearby so you can do that very quickly). Secondly it leaves some welcome variability in how the Banshees latch on to you when you exit. But you could always save the rockslide exit checkpoint if you want - or a later checkpoint if you happen to get one.
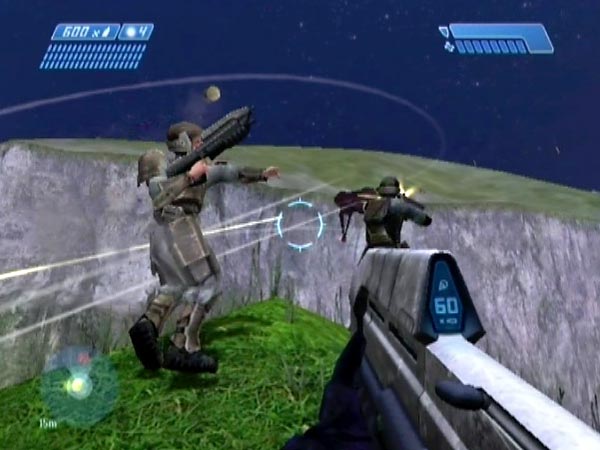
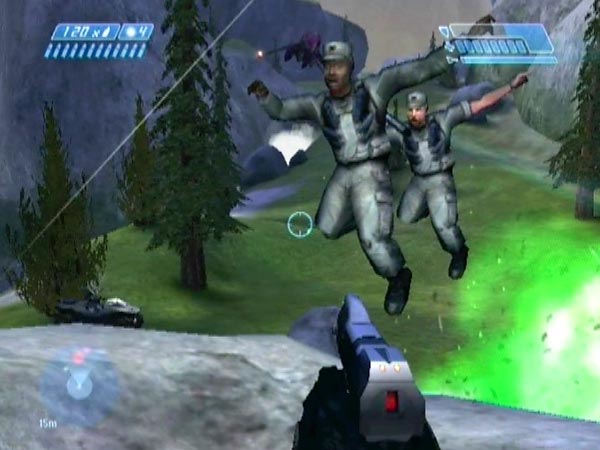
Squad size
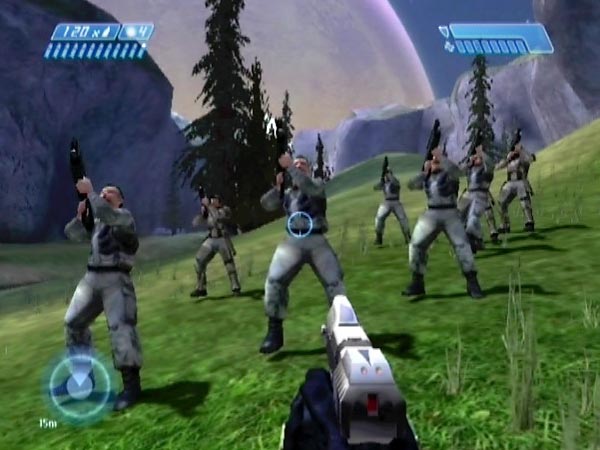
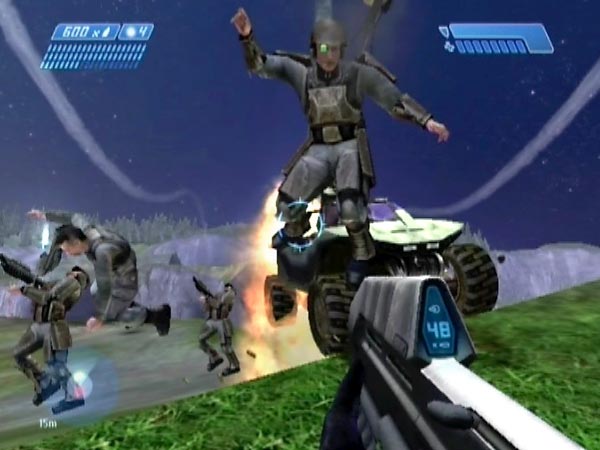
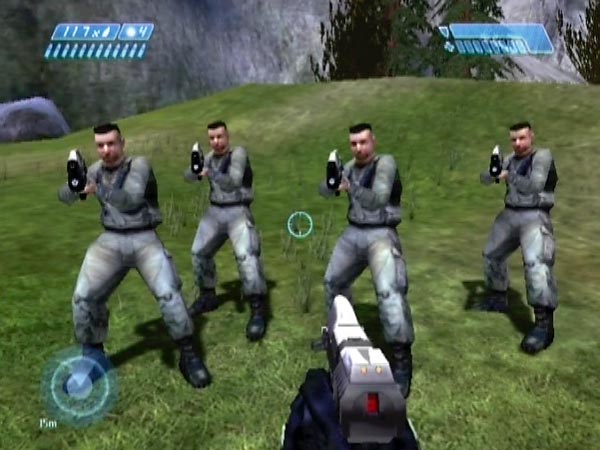
A few words on the matter of squad size now. Even if you're playing on Legendary as I recommend, a mere six Marines can do a pretty good job of destroying the Banshees unaided if they don't frag themselves to pieces first (see pic illustrating some classic Marine technique). If you want more of the responsibility, use a smaller squad. You don't have to use all the Marines you assembled at base camp; you could always ferry some to another location where they'll be out of the action. Or accidentally squash a few - "Oops, sorry guys, must get that steering fixed!". You could also simply leave them at base camp, but the drawback there is that the Banshees might focus on them and not follow you.
In BCM26 I used eight Marines with ARs plus the ineffective sniper, but that was partly for the sake of having lots of noise and hollering. A squad of that size creates plenty of atmosphere but it does tend to make battles quite short - though it partly depends on the location and how they're arranged (things may last longer if they're spread out more). If I was battling just for my own enjoyment and not for movie-making, I think I'd be inclined to use only four or six AR Marines, giving a decent compromise between atmosphere and battle duration.
Some options in setting up a battle
Here are some options in setting up a battle from your base save.
Nonstandard entry into the valley
Here's something you might like to try if your Marines are well away from the central part of the valley. It's a way of making your entrance into the valley different. When you exit the rockslide area ready for battle, go up over the big mound to make sure you get the Banshees' attention, luring them down, then return to the rockslide area without being followed. Go right through the passage and beyond, spending a little time away, then head back out. As long as about 17 seconds have passed since your last passage checkpoint, you should be granted a new exit checkpoint.
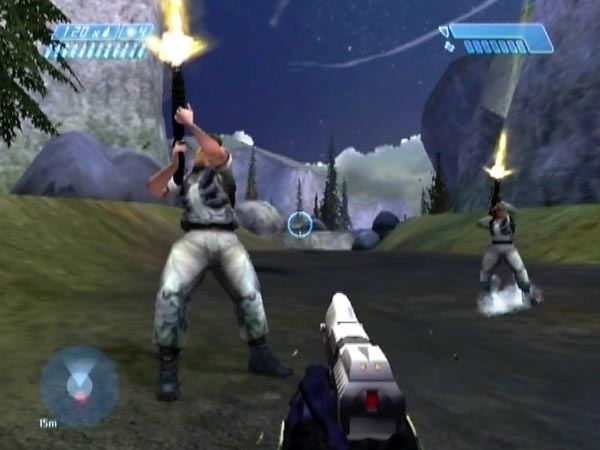
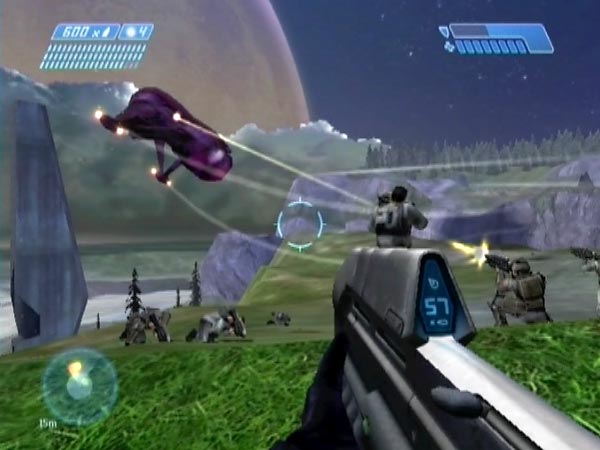
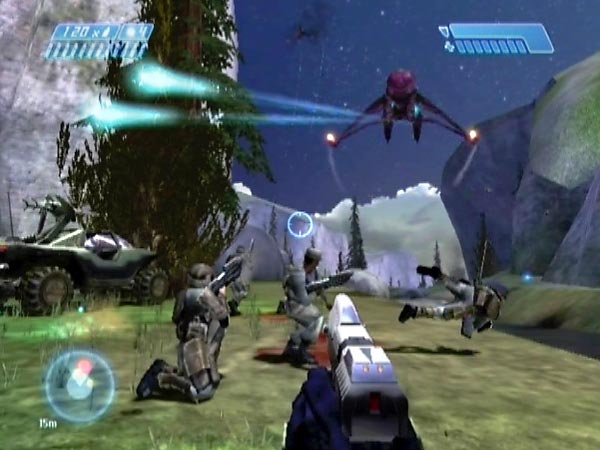
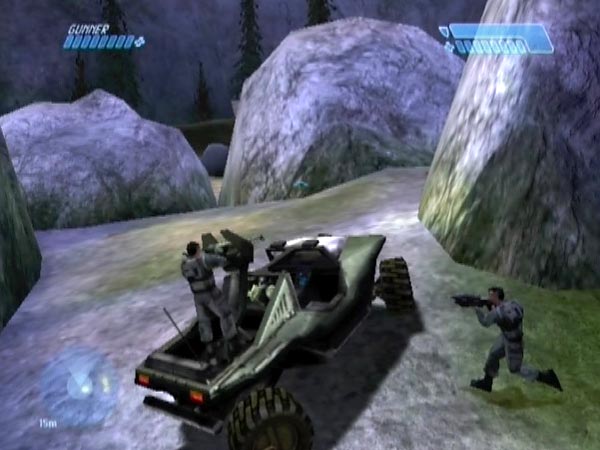
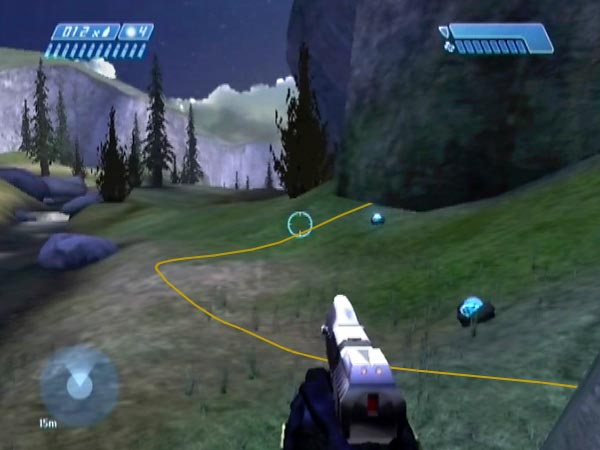
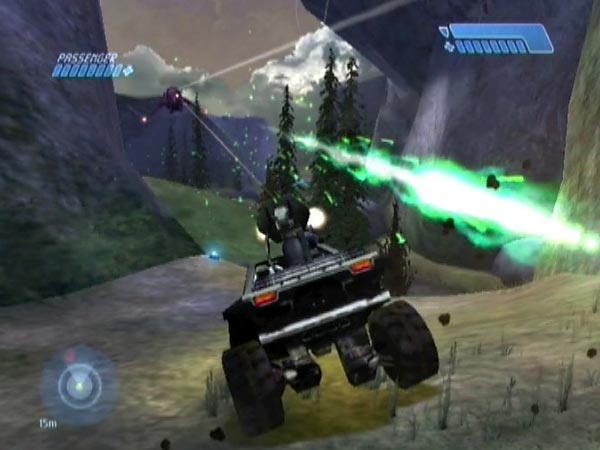
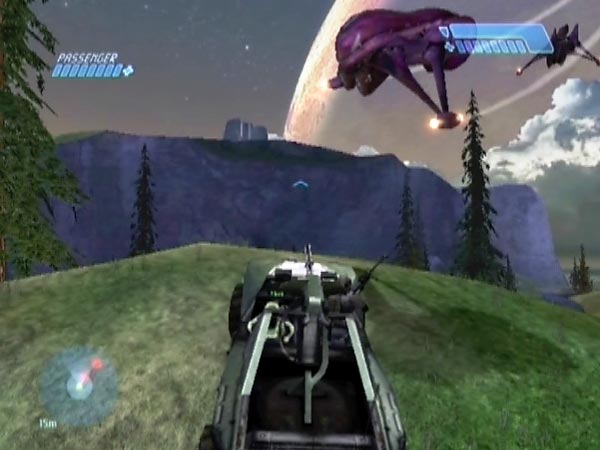
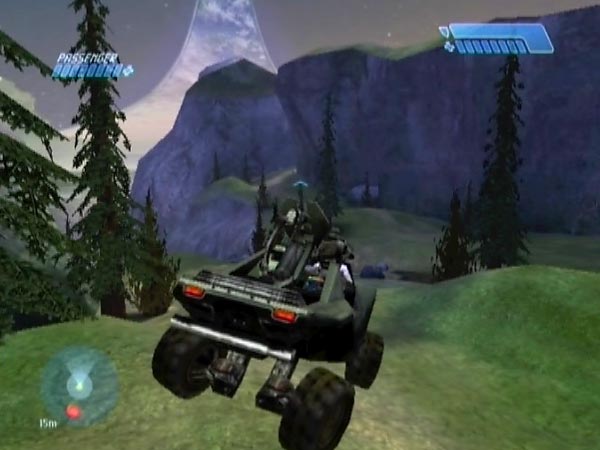
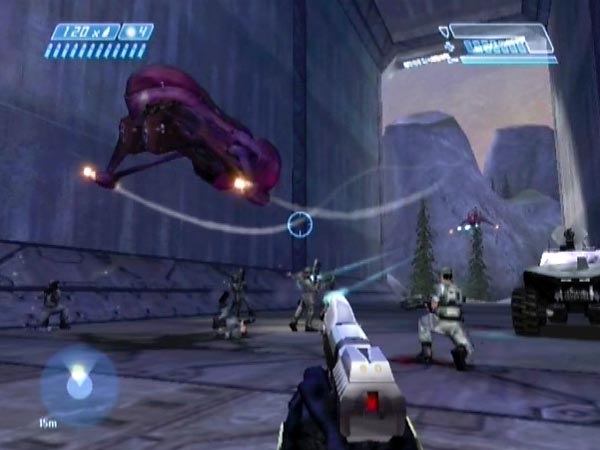
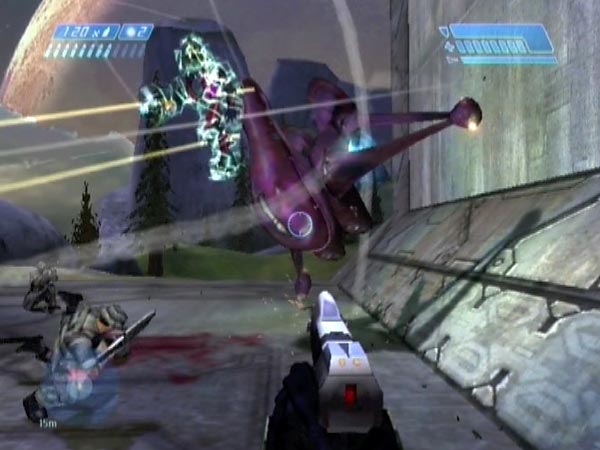
The Banshees will have been frozen while you were away (they froze once you were sufficiently far through the passage into the rockslide area), but they reactivate as you head back out into battle. Their initial positions will be quite different from their normal high circling positions, and this can make your drive significantly different from normal - and possibly more dramatic. For example you might tend to come under fire quicker (see the first picture for an extreme example), or maybe Banshees will tend to be in close view as you head up and over the big mound (see the second picture) - and perhaps you could even collide with one! If you don't like how things turn out, you could return to the rockslide again and again until satisfied. It's mostly down to luck.
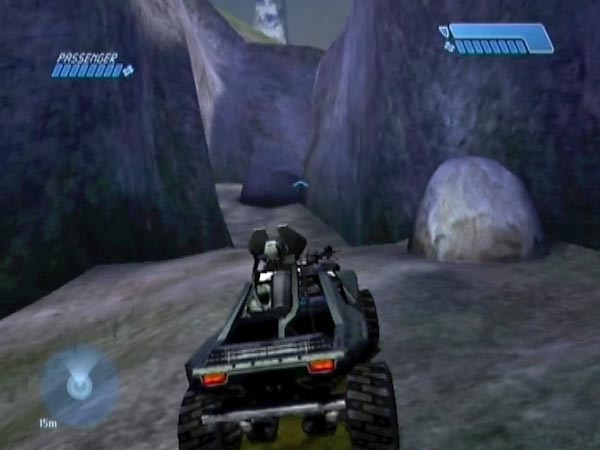
I said to go out into valley, but actually you don't need to go so far. The most minimalistic way of doing things would be to just go far enough to trigger the Banshees (it suffices to cross the checkpoint trigger line in the passage) before heading back into the rockslide area. If you do things that way, the Banshees won't have been alerted to you and they'll continue to chase one other around in a circle. They often sink down into the valley as they do that, eventually skimming around on the ground. So if you give them time, you could subsequently encounter them circling low down - an amusing sight.
Avoiding possible irritations in battle
Normally when you head out into battle through the rockslide entry passage, two things are due to happen in just under two minutes time. Cortana will say "We need to find the other two lifeboats" and you'll get an arrow indicating the way to the hillside survivors. If you're still battling, which could well be the case if you're taking things easy or if you spent a relatively long time driving to the battle location, these prompts can be a bit irritating or distracting, especially if you're getting them again and again as you repeat your battles. There's a way to avoid them though - and to avoid something else.
It seems that if you're back inside the rockslide area at the time the prompts are due, they'll be cancelled. So what you can do is this. Go at least far enough into the passage to trigger an exit checkpoint (you could potentially go a good way out into the valley if you like, as described above in 'Nonstandard entry into the valley'), then come back and wait clear of the passage until the prompts are past due. Then head out into battle, getting a new exit checkpoint as you go.
However, if you've left any rockslide covies alive there's now a different potential irritation you might get after a while, namely Cortana saying "Cortana to Echo 419. Foe Hammer stand by. We weren't able to rescue anyone here. We'll call on in when we need you". She can say that even if you've rescued every single Marine! To avert this, wipe out the covies (obviously it would be helpful if, in creating your base save, you've already reduced them to only a handful). You might like to do it before picking up the last survivor - assuming you intend to - so he won't be in the line of fire. Covie elimination triggers the Banshees, and also a Pelican which the last survivor will head for after a while; but you shouldn't have any trouble picking him up beforehand if you don't dawdle.
Driving with a seated non-sniper
If you fancy driving into battle with a seated passenger from base camp (Stacker or Johnson most likely, for their vocals), have him seated as you re-enter the rockslide area, then eliminate the remaining rockslide survivor (see tips earlier). If you like to have a sniper in the battling (good noise), you'll want to've left some other Marine in the rockslide, rather than the sniper.
Driving into battle
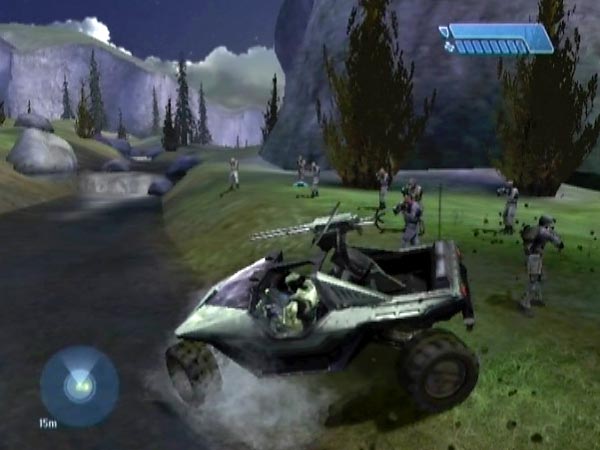
Driving into battle can be great fun with all the weaving and jumping you can do in this lush rolling terrain. In fact I probably enjoy it as much as the actual battling! It's good to have a passenger because of the things he'll say, plus he's liable to do a bit of shooting. The rockslide exit is a great starting point for heading places, and you can always get things off to a flying start with a jump off the big mound nearby - a great feature. Have fun exploring different routes. There's a lot of potential for skilful controlled driving, threading the hog through narrow gaps or even just keeping the thing upright. I get a kick out of trying all sorts of variations and making things nice and smooth. You don't even need to take a 'direct' route, as long as the Banshees aren't going to spot your squad before you lead them there. So why not take the long way around?
Come and get me
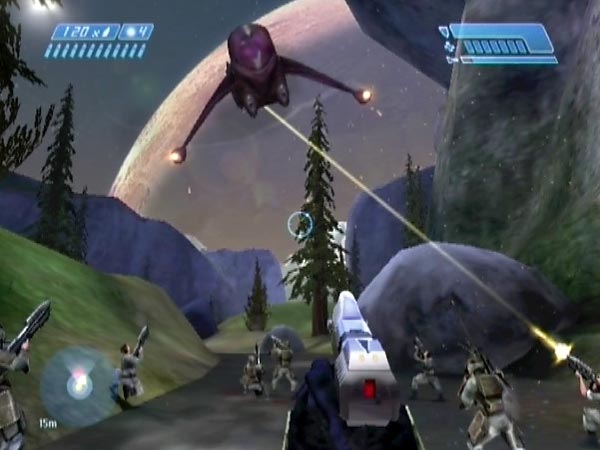
Naturally you want the Banshees to spot you so they'll give chase. That almost always happens, especially if you go up over that big mound, which is sort of like shouting "Yoo-hoo! Here I am!". They tend to latch on to you extra fast in that case.
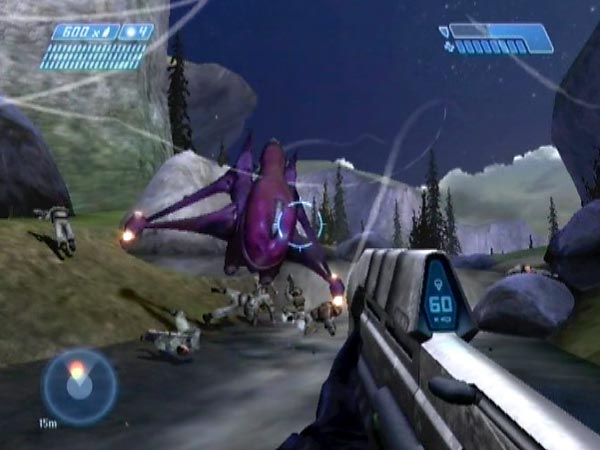
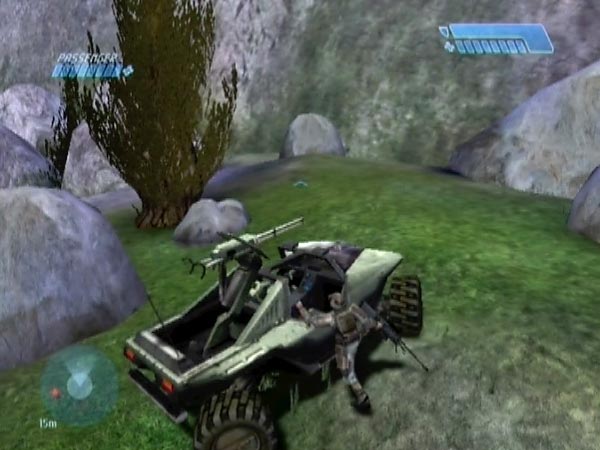
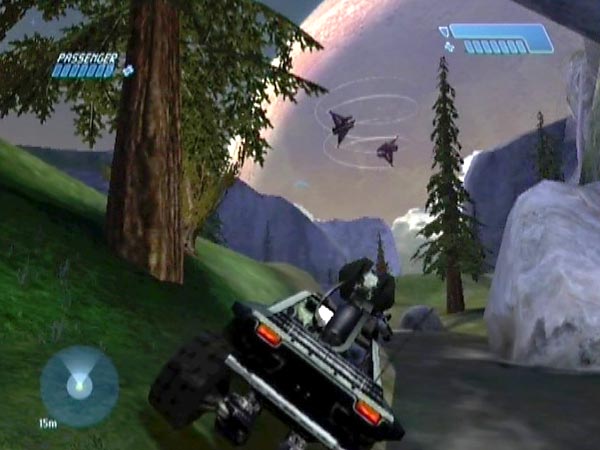
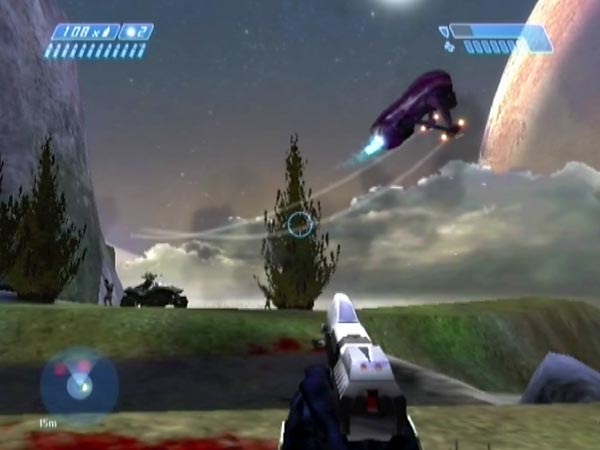
You'll often have a Banshee or two sending plasma your way, and certain routes may help you achieve that goal if you want things exciting like that. If the plasma's getting too hot, one trick you can employ is to briefly swerve into a small circle or turn on the spot, which tends to make make pursuers overshoot or veer off. The picture here shows a swerve at my usual base camp area (you can see a few spare weapons), on my way to the bottom of the valley. You can also simply swerve about trying to make the most use of any cover on the way. Getting near a cliff face can make any close pursuer veer off too.
Stunts and on-the-spot retaliation
By driving in particular ways you can raise the liklihood of the hog getting blasted, which can enable you to do some spectacular stunts. See BCM166 for five nice example. Of course, you won't always land on your wheels, but in that case you might like to enage in some on-the-spot retaliation, rather than reboarding. That can be excellent fun, and in particular it's fun to try and tag the attacking Banshee before it gets away. See BCM187 for eight incidents, four of which feature rapid response tagging.
Getting enough preparation time
When you reach the battle location, it's nice to have a bit of time to prepare before the Banshees start attacking there. Typically I'd want to get the passenger dismounted then run to a spot from which to defend. There may be particular driving patterns that tend to give you sufficient preparation time. Try different things and see what works best. If you've got both Banshees attacking you as you get close to the location (but not close enough for the Banshees to notice the squad yet), one thing you could try would be to make them veer off back the other way. That could give you enough time.
Battle tips
Now here are some tips regarding the actual combat.
Weaponry
A pistol can make it rather quick and easy to bring down the Banshees, so consider using an AR or plasma weapons for a bit more challenge. The AR is my favourite but all these weapons have their pleasures. Things are still pretty easy even on Legendary and I really wish Banshees were more resilient so you could do more shooting, but you can always make things last longer by picking your shots and letting the Marines take a chunk of the responsibility.
A fun thing you can do with a plasma pistol is to deal the final blow with a 'chaser' shot; a plasma ball that chases after the smoking Banshee as it flies off. When it catches up, BOOM! Very satisfying. I quite like to have that weapon as secondary, just so I can whip it out when the opportunity for a chaser arises. See my general combat tips section for a fuller discussion of anti-Banshee tactics.
Tagging
Tagging Banshees is a major source of fun in this battling and you'll see a whole lot of it in my movies as it makes such good footage. You may not find it particularly easy at first but you'll probably soon get better at it with all the practice you'll be getting. For a challenge, see if you can get them both by tagging. A tagged Banshee can be a bit of a hazard for the Marines if it's down near the ground, but that all adds to the fun right?
Incidentally, on Legendary or Heroic the blast from a tag doesn't always destroy the Banshee. I've seen this quite a bit with a grenade on the nose but it can happen with tags elsewhere too. So you might want to add a bit of weapon fire to weaken the Banshee before the grenade detonates. Of course, Marine fire may be enough to weaken it sufficiently too.
When you score a tag, occasionally you may hear the pilot scream. I believe that's due to the grenade actually getting through the Banshee and tagging him, due to some technical shortcoming in the game; a failure of collision detection perhaps. My belief seemed to be confirmed by a clip in BCM65 at about 2:52, where a pilot gets ejected and you can see that he's been tagged.
Cyborg ambush
Depending on the scenery and how you arranged the Marines, you may be able to hide yourself behind a rock or tree so that as a Banshee swoops in to attack the Marines, you can pop out from hiding to give the pilot a nasty surprise, such as a vicious AR drilling at close range, or a nice sticky plasma grenade.
Caution: airborne explosive
Marines have a comically bizarre habit of lobbing frag grenades at Banshees. Of course, all this is ever likely to accomplish is to blow up fellow Marines or nearby cyborgs, and it frequently does. So watch out!
I have occasionally seen Marine frags destroy a Banshee, but usually only by fortune when the Banshee just happened to be passing close to the ground when the frag went off.
A squashed Marine is not a happy Marine
If you're taking your cyborg duties seriously, have the awareness not to bring down a Banshee when it would likely fall among Marines. On the other hand, if you're just having fun, let 'em dive clear! If they can't see a ruddy great purple hunk of hardware heading straight for them, that's their fault dammit, am I right? Likewise, you may or may not care to avoid destroying a Banshee when Marines are within the blast radius.
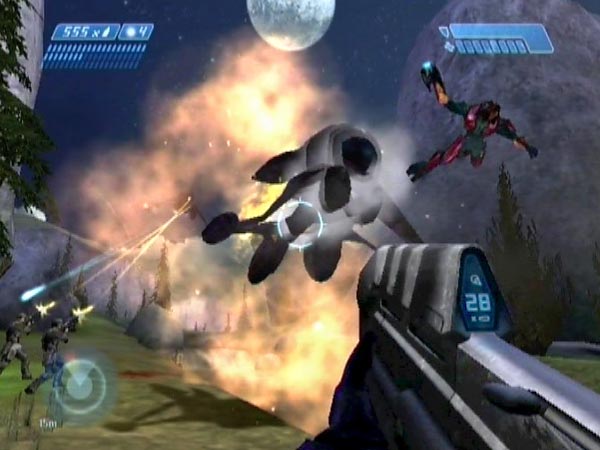
Pilot whacking
When a Banshee heading your way explodes, the pilot is likely to come flying through the air towards you. If you get the chance, take the opportunity to give him a good whack before he hits the ground, just to make sure he got the message. Ok it's not strictly necessary, but it sure feels good.
Sit back and watch
You can always enjoy simply watching the Marines defend. See if they can cut it on their own. You may even be able to sneak away from the battle to enjoy watching it from a distance, perhaps through a sniper scope. Banshee battles make for excellent watching. I suspect things will last longer on the lower difficulty levels, but I haven't actually checked things out yet as I've been using Legendary almost exclusively.
Traitor!
If you're up for a bit of mischief, turn traitor by killing some Marines. You'll have a whole lot of frag grenades heading your way real soon - possibly while having to deal with Banshees at the same time. Could be fun! Of course, you could also do this separately from any Banshee fighting. Consider it a bonus activity, having taken the time to set up a squad.
Some choice battle locations
I've tried out quite a few battle locations by now, and here are some worth special comment.
Cliffside hilltop
I mention this location first as it's so unique and because it also relates to the origin of all this Banshee fun. As described in Cliffside hilltop fun, you can actually drive up the steep hill in the cliffside survivor area to reach the plateau-like hilltop. The tremendous Banshee battling you can have up there is notable for the way Banshees tend to come in menacingly low across the ground, with a keen interest in squashing you and your Marines; see BCM65 for a taste of the action you can get. It was the battling up there that got me wondering where else you could arrange to fight the Banshees with a squad of Marines. Pretty much anywhere down below, I suddenly realized; and soon the whole valley became one big Banshee battling playground. Woo-hoo!
When you head into the area having triggered the Banshees, you'll probably get an entry checkpoint, though it could get delayed and then cancelled due to how close a Banshee was to you. Hopefully the Banshees won't get around to attacking your hilltop squad until you're actually up there, but it depends whether they get spotted. Instead of starting the battle in the standard way like that, you could instead start it from the hilltop by killing enough of the cliffside enemies below (see the aforementioned article for details), but that can take a while, so you're probably best off using the standard method.
Stream at the end of the valley
At the end of the valley, just past the right entrance to the cliffside survivor area, the stream area makes a great location for Banshee battling; in fact I'd recommend it as an ideal first choice. See BCM26 for some battling there. There are lots of interesting possibilities for squad arrangement. For example place them on either side of the stream, as if inviting the Banshees into a two-sided ambush. Or maybe put them in the stream itself. There are various trees and rocks around that you can use for cover if you want, and you can also get cover by standing behind one of the shallow 'steps' in the stream. During the battle you may hear some frag grenades going off in the water. SPLOOSH!
It was here that I noticed something new. Look out for the incoming plasma hitting the water. You'll see a nice splash effect in dark blue. You get a similar effect with the plasma rifle or plasma pistol.
Something else I notice here is that the Banshees are quite keen on trying to squash or mangle Marines and cyborgs, which makes for quite a lot of fun. I particularly enjoy AR drilling and tagging when they come down low like that, but if you want to avoid collateral damage when a Banshee is near Marines, only tag it as it's moving off. This Banshee behaviour probably increases your chance of seeing a pilot ejected from his machine (see BCM26 at 3:25), though that's rare under any circumstances.
Incidentally, on the right as you arrive at the location, the cliff wall includes a bit of slope (near a big rock) which you can run up, potentially giving you a perch from which to watch the battle or maybe do some medium-range pistol shooting, while the Banshees focus on the Marines.
Jackal mound
Outside the left entrance to the cliffside survivor area is a tall mound where Jackal guards stand or patrol around, except on Legendary where there are no guards. I call it the Jackal mound and I've had some of my most exciting battling there. You can get some highly dramatic battle views by dropping some Marines on top of the mound (a bit fiddly) and standing behind them a short way down. When the Banshees come swooping in you get a striking view with the Marines ahead of you blazing away, silhouetted against the sky. Go try it out and you'll see what I mean. The mound gives great cover too, plus a panoramic view of the valley down to the underground tunnel.
There's further drama when the Banshees come swooping along at about the same level as the top of the mound, occasionally even coming right over it with the apparent intention of taking your head off. As they veer away, their undersides are nicely exposed for some concentrated AR drilling. There are great tagging opportunities too. The pilots seem quite keen on blasting Marines and cyborgs off the mound with plasma bolts, and sometimes laugh as they swoop off.
Bottom of the valley
I really like it outside the tunnel where you first emerge into the valley. There's a large crater-like depression that looks ideal for placing Marines in, and there are some nice rocks at the back to either use for cover or to stand on. You've got the atmospheric sound of the nearby waterfall, and I just love that dramatic view up the valley. Also, the drive to this location is fantastic. The direct route features a huge mound to launch off shortly after leaving the rockslide area, followed by lots of smaller jumps as you bounce down the hill with Banshees on your tail. Great stuff. Try other routes too though; e.g. how about following the stream? See BCM47 for some action in this great location.
The big rock at the back is sometimes climbable, giving you a nice wide perch if you want one. You can even drive a Warthog up to drop Marines on top of it; I've had four up there. The smaller rocks can be high enough to give you decent cover from Banshee fire, which is likewise a good thing to have. As you may know, rock geometry varies. It gets decided at the loading point shortly before you emerge from the tunnel. If you save at the preceding checkpoint (just after the light-bridge), you can make repeated attempts at getting good rocks as follows, when creating your base save. Take a look at the rocks when you emerge. If they aren't to your satisfaction, eject the disc and reload to try again. Alternatively, you can always re-randomize the rocks any time later by going back across the loading point then returning.
Underground tunnel
Having enjoyed battling outside the underground tunnel, it wasn't long before I started wondering what would happen if I put the Marines inside the tunnel. And boy oh boy, what a time we had when I placed them part way along the flat final section (leading into the valley). The Banshees periodically enter the tunnel, prang themselves against the walls, and sometimes briefly disappear down the far end before managing to find their way back out.
Meanwhile the idiotic Marines are busy lobbing frag grenades about the place, so you've got high explosive bouncing off the walls all around you, and sure enough, BOOM! There goes half the squad and most of my shielding. Talk about comical. Make sure you try this! Check out BCM157 for some tunnel action in which the Marines are quite near the exit. You can place them considerably deeper though, something I plan to feature in a later movie.
The tunnel is an especially good location for seeing pilots getting ejected, because it's so confined and because they often get close to the ground trying to do some splattering. If they scuff the ground or hit a wall while trying to turn sharply, they can pop out. It's still rare, but if you play for a few hours I think you'd have a decent chance of seeing it happen at least once. You can see three ejections in BCM157.
Something else interesting here. When a Banshee disappears down the far end and you go to have a look, you'll probably find it pushing against a corner on the right, low down. If you approach and stand on the slope (the last bit of slope before the tunnel levels out), it may start trying to squash you, but you can move around so it's continually chasing after you in a small circle, with one side of it scraping along the ground. It can't quite turn as sharply as the pilot would like. First time this happened, we were going around like this for well over a minute and there was no sign of the pilot giving up (I eventually started getting dizzy and tagged his machine). It's an unusual dynamic; have a go and see how long you can keep it going. See Mad banshees for more on weird Banshee behaviour.
Stream under the overhang
By the 'overhang' I mean the pronounced overhanging bit of cliff above which the Banshees materialize, doing their formation circling thing. Try putting the Marines down below, scattered around in the stream or on the sides. You'll see examples in BCM155. There are lots of trees for cover and there's a big rock against the cliff, which is potentially climbable for a perched view (you can even drop Marines off on it). With your back to the cliff, the views are particularly dramatic. On one side there's a moon above the cliff, and on the other, Banshees sometimes come diving in out of the sun.
Banshees often come swooping along just above the stream, giving you some nice opportunities for tagging them as they pass. They don't find the area terribly easy to navigate, and occasionally bash into the cliff or trees (or even get trapped in the trees), which gives you further chances to tag them or give them a nasty AR drilling. And whilst all this mayhem is going on, you've got the restful sound of that running stream as a comforting backdrop. Nice!
Off the beaten track
The areas I consider convenient for battle locations are the whole valley, the rock tunnel leading to the interior waterfall, the hilltop along the cliffside survivor area, and the final section of the underground tunnel.
What about other places? Namely, the three survivor areas, the interior waterfall area, and the rest of the underground tunnel all the way back to and including the light-bridge area. Well, it turns out that you can lead Banshees into those areas, and things get quite weird, resulting in yet more fun as described in Mad Banshees. But they're not too suitable for arranging Banshee battles. This is partly because of the weird Banshee behaviour. Banshees tend to either squash the Marines fairly quickly or get themselves blown up after chasing frag grenades. That certainly makes for a fine spectacle, but it's not much of a battle. A further drawback is that it's not easy to lead both Banshees into an area at once, so you'd usually only be battling a single Banshee. Also, in the survivor areas you may need to kill some enemies first so it's safe enough to drop troops off in a particular locale; but not so many enemies that you trigger the Banshees prematurely.
Interior waterfall
If you want to try out a battle in one of these other areas, let me recommend the interior waterfall area adjoining the rockslide and hillside survivor areas. It's picturesque and there are plenty of interesting ways to arrange your squad there.
When you lead a Banshee in, you can potentially sit back and watch once it's got sight of the squad. Indeed, you can be over on one side of the stream, watching Marines fight on the other. If a Banshee comes after you, you can get rid of this unwanted attention by throwing a grenade in the rough direction of the Marines so the Banshee briefly heads after it then fixates on the Marines. Bit naughty perhaps, but it gives the guys something to do, right? Besides, they need the practice.
Alternative base saves
Finally, here are a few ideas for other base saves.
Want more Marines?
With the base save I described, you potentially end up with eight Marines at base camp. If you want even more you can get some from either or both of the other two survivor areas (the hillside area is easiest). Make sure not to finish either of those areas however, else the Banshees will be triggered, which you don't want yet. Another option is to have brought along all five Marines from earlier in the level. For advice on extracting Marines from any of these three areas, see Gathering Marines for use in my rockslide megabattle section.
On Legendary or Heroic I think the largest base camp squad you can have is sixteen, namely comprised of five from the first part of the level, six from the rockslide area, two from the hillside survivor area (you'll have to leave the third behind) and three from the cliffside survivor area (leaving the ship crewmen cowering safely). The Banshees aren't likely to last long against that lot (not on Legendary anyway; I'm not sure about the other end of the scale), but it could be good fun watching the squad in action.
Or different characters?
A different reason for getting Marines from additional locations would be so you can pick and choose, to end up with less visual or vocal repetition (redundant Marines could be left in some remote location or otherwise eliminated). In BCM26 four of my marines are visually identical (see pic), which isn't ideal though it hardly notices amid all the action (and their voices differ at least). They were all from the rockslide area. Actually the rockslide personnel are randomized the first time you head in, and you can restart from an earlier saved checkpoint if you want to get them re-randomized. I really should've done that.
Using just hillside survivors
Another variation would be to only draw on the hillside survivors, not bothering with the rockslide area at all. It would be quicker and easier. You could drop your original passengers at a base camp location, then ferry out all but one of the hillside survivors to join them. Try to get Stacker, preferably armoured for extra toughness (it's random whether he's armoured or not). Get a checkpoint somewhere later to complete your save. To trigger the Banshees after arranging your squad, you'd re-enter the hillside area and either kill or extract the final Marine (or if he's already being attacked, you could just wait for him to die).
However, on Legendary or Heroic the hillside area only has three survivors, and because none are snipers, you'll be killing the final guy (not wanting him to chain-gun the Banshees), hence your battles would feature only four Marines. On Normal or Easy the situation is slightly better. There are four survivors and one is a sniper. You could therefore ferry out the three normal Marines, giving you five; plus the sniper eventually if you want, though his weapon will be ineffective.
Note: When you get out into the valley, hopefully the Banshees will soon spot you, but I don't think it's as reliable as the usual set-up in which you're exiting the rockslide area. I've had times when the Banshees had sunk down above the cliff top as they circled, and they never spotted me at all. As for which exit to use, I'd recommend exiting at the high entrance then heading through the wide tunnel so you end up near the usual rockslide exit - a great starting point from which to drive to various locations.
Base save for a particular location
If you're interested in trying out lots of squad arrangements in a particular location, it could be a good idea to use your primary base save to create a more specialized one, in which the base camp Marines have been moved to the location, or at least not far from it. By using this secondary base save for setting up battles, you'll save yourself some ferrying time.