Extra Marines and hogs
Posted August 30th 2007, expanded later
- Introduction
- Gathering Marines for use
- Squad on or near the plateau
- Squad in the far area
- Squad near the top pass
- Extra hogs
- Using Marines from within
Introduction
This page is about adding extra Marines and even extra Warthogs to the battlefield, waiting for your later arrival. In battle you'll notice the difference even with as few as 2 extra Marines. That's very easy to arrange, and I actually do most of my plateau battling with a couple of extras out front to add to the atmosphere and carnage.
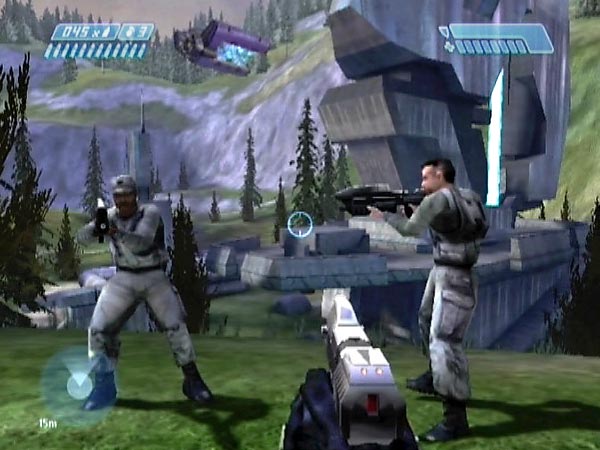
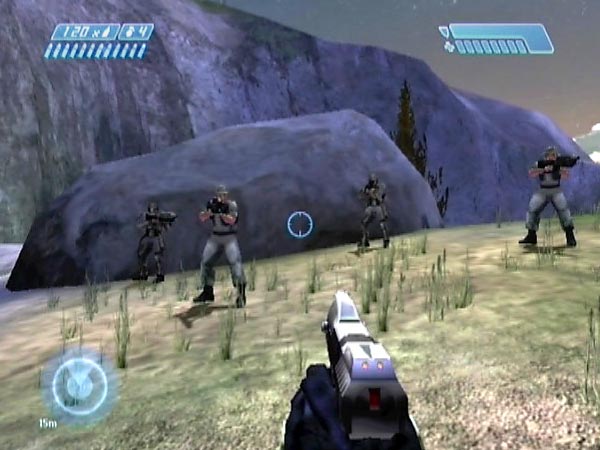
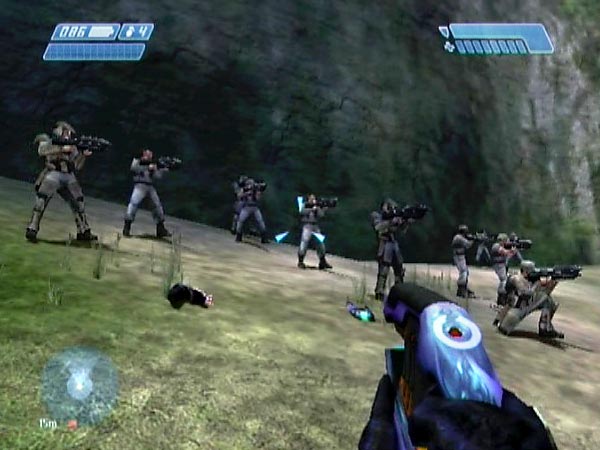
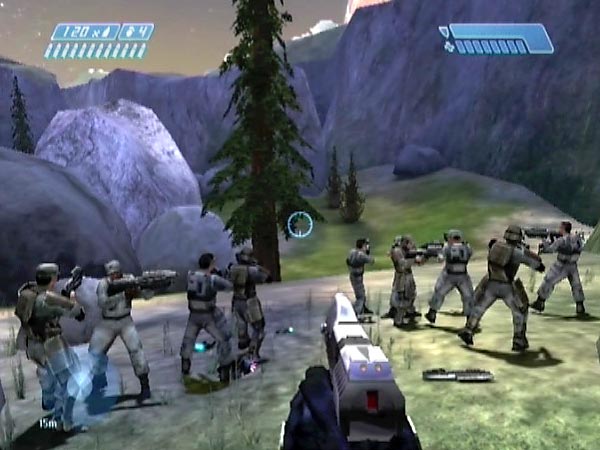
But you don't have to stop there. You can bring in as many as 12 Marines gathered from elsewhere in the level! With a large squad you'll get a very different battle experience from usual. On Heroic a squad of 8 or more makes a pretty effective force, able to fend off even an Elite while you back off to recharge your shield. You can expect frag grenades to be flying everywhere and the atmosphere is great, with lots of hollering and gunfire. Heavy support can also make it viable to stand back and use the relatively weak AR if you fancy that.
My advice starts with gathering Marines from elsewhere in the level, then there are three sections on bringing them into various parts of the battlefield: on or near the plateau, in the far area (a great spot for a large squad as you've got so much space), and near the top pass. You'll find a bit more besides. For advice on arranging Marines at your chosen defence location, see Squad arranging in the Engineering tips section.
Gathering Marines for use
Here's some advice on gathering Marines (and potentially extra Warthogs) from outside the rockslide area, for later use within. Ideally you should create a save which features a pool of such Marines gathered outside before you've headed in at all, plus an assortment of spare weapons. You can have up to 11 Marines on Heroic or Legendary, and 12 on Normal or Easy (the extra being a sniper from the hillside survivor area). Each time you want to set up a megabattle that features extra Marine support, you'll be able to use a copy of that base save as a time-saving starting point.
There are three areas you can get external Marines from and I'll comment on each one, including advice on keeping them as healthy as possible for the megabattle. On Heroic it seems quite easy to get all these guys in perfect or near-perfect health.
First survivor area
You can gather 5 Marines from the early part of the level: 4 holding out at the tower with a few ship crewmen, plus the guy who comes in later on the Warthog. They include Sergeant Johnson of course. See my piece on evac prevention for advice on how to keep these guys healthy and stop them leaving on the Pelican.
Ferry them to the light-bridge area, but keep them back out of danger and clear the area yourself. There's no need to use your carried weapons if you want to conserve their ammo for later; you can use the chain-gun to kill some enemies, then use dropped weapons to tackle the rest. Ferry everyone across the bridge. It'll go down once you cross the loading point just before your ascent to the surface.
Hillside survivor area
You can gather the Marines from the hillside survivor area, where they're hiding at the top of a hill. There are 3 on Heroic or Legendary. On Normal or Easy you also get a sniper, but I'd recommend leaving him out of the megabattle as he's so lethal (which would mean a lot less killing for you, quite apart from the danger he poses to your head).
This group includes the entertaining Sergeant Stacker, but preferably make sure he's armoured for greater toughness, as detailed in Warthog passengers. On Heroic I know that it's possible to even get a second guy with armour; but you'll need to be lucky or be willing to try for it many times. The survivors spawn as you head into the area for the first time, and it seems to be quite random as to who you'll get (i.e. which character models) and who's got armour. If you're going to be fussy about personnel, you should save a checkpoint prior to triggering the hillside area. Each time you're dissatisfied with the survivors you find, eject the disc and reload to try again.
It's easy to get everyone out with perfect health. Here's how you could tackle things, also getting a new hog for good measure. Using the right entrance (near the waterfall), drive to the survivors in an empty hog, pick up two and drive back out, making sure they don't get damaged along the way. Return on foot to wipe out the enemy. Because you've still got at least one survivor in the area and don't have a hog here, the evac Pelican will bring in a new hog, which the last survivor or survivors will board.
Cliffside survivor area
You can gather the 3 Marines from the cliffside survivor area, where they're hiding underground with a few ship crewmen (hello Engineer Jones). Here's how you can tackle things.
Entering via the high right entrance, eliminate all enemies on or around the small structure nearby. You could do most of this by sniping from the entrance, but if you want to conserve ammo you could go in and do it at close quarters with a plasma pistol from the nearest Jackal.
After that, place your hog to the right of the small structure, near where the Jackals were. Head into the structure. At the top of the ramp leading down, fire a few shots to attract a couple of Grunts into view, and kill them. With your path clear, run down and quickly kill the Jackals beyond the survivors (maybe use a frag grenade or two; you can replenish those back at the lifeboat in the valley). Lead the survivors back the way you came.
Near the hog, check that no enemies are approaching. When it looks like nobody will be coming, ferry two Marines out of the area. Here are three options for how to finish off.
Option 1: If you want a new hog, return to the area on foot and wipe out the enemy, making sure the remaining Marine doesn't get damaged along the way. You'll get a new hog and the Marine will board it.
Option 2: If you want to fully deal with the area but aren't interested in a new hog, drive the final Marine out of the area then return and wipe out the enemy.
Option 3: If want to extract all Marines yet not fully deal with the area (something I usually want to do in connection with avoiding music in the megabattle, as discussed shortly), just drive the final Marine out, leaving the ship crewmen cowering safely on their own.
Keep them safe
If you deal with either the hillside or cliffside survivor area, you'll trigger Banshees in the valley, and on Heroic or lower you can expect one or more enemy troops to get dropped at an entrance to the rockslide area. To keep your Marines safe from these threats until dealt with, I suggest initially placing them in the tunnel with a stream running through it.
Music option
If you fully deal with both the hillside and cliffside survivor areas, the rockslide megabattle will be the final phase of the level and will hence get accompanied by rousing music. If you prefer not to fight to music, you'll need to make sure that at least one of those survivor areas is not fully dealt with. That needn't stop you extracting all of the Marines however. With the cliffside survivors, you can use the third option I listed, which allows you to extract all 3 Marines yet leave the area unfinished.
Squad on or near the plateau
Here's my advice on how to set up a megabattle with extra Marines on or near the plateau (including on the island plateau), once you've gathered some.
Early and late ferrying
Just before I get to the procedure, let me explain that there are two possible methods to ferry in Marines. There's 'early' ferrying done before all the covies have arrived, and 'late' ferrying done afterwards. Early ferrying isn't viable if you also want to keep most of the rockslide survivors and initial covies alive though (see my refined routine), because while bringing in your extras, the covies would surely spot and attack the survivors below the plateau. Instead you'd need to use late ferrying, delayed until the survivors have safely retreated up to the plateau. Ok, now here's the general procedure.
Deal with the initial conflict
When you first enter the rockslide area, deal with the initial conflict as desired, but preferably don't enter the dropship trigger zone yet. If you help out the covies, preferably maintain a survivor so those covies retain a territorial limitation that can keep them out of your way until dropship 4 arrives.
Maybe do some early ferrying
The vicinity of the Marine plateau is within the dropship trigger zone, which means that as soon as you enter it you're on a countdown to the arrival of the first dropship. If you're going to ferry more than two Marines, have the rest gathered just outside the trigger zone beforehand to minimize how long all the ferrying will take. If the initial covies are still around, a good holding area is the inner rise, bearing in mind that the trigger zone starts about half way along the next narrow passage, as mentioned in my section on spare weapons. Don't have those waiting guys too close to the passage, else some idiot may decide to jump into the path of your hog as you head through. Don't you just love it when Marines do that?
If you kept at least 3 of the initial covies alive for the megabattle, you'll have about a minute before the dropship arrives. If you're quick and efficient, you could ferry as many as 6 Marines to the plateau and still be off in time to distract covies away from the rockslide so they won't kill any foolishly wandering plateau survivor. It could take repeated attempts though, as you'd be cutting things fine. It would be much easier if you limit your ferrying to at most 4 Marines. If the initial covie count is below 3 the dropship will arrive almost as soon as you enter the trigger zone, but there's still enough time to ferry 4 Marines and get away before the new enemies approach. In either case, make sure you do get away before enemies approach, to minimize the danger of your squad getting spotted and attacked.
Maybe do some late ferrying
Once the first dropship has visited, it's still possible to add Marines with the following method but I think it's best left until all the dropships have visited. That's certainly the case if you have any survivors below the plateau, because you'll want to give them time to retreat safely - which they don't do until sometime after dropship 4 heads in.
Try to draw all covies out of the rocks. This can take quite a bit of teasing and it seems easier to do after dropship 4 has left, because the troops from dropship 1 seem reluctant to come out before then. Pick up one or two Marines - ideally waiting just near an entrance - and ferry them in, then get away before covies get too near the plateau (you don't want them to spot any Marines). The point of drawing all covies out of the rocks was simply to give you as much time as possible for dropping off your Marines and getting away before any covies get the scent of your squad.
Repeat the whole operation as necessary. When you've added all the Marines you want, you can get a battle start checkpoint at an entrance.
Of course, a potential drawback is that some covies might get damaged or killed by your passengers when you make these late trips. One way to minimize that is to only take Marines in one at a time in the seat (no chain-gunner). It'll take more time overall, but that shouldn't matter much to you if you're investing time in a good save for long-term replaying. Note: When taking in your final guy, you'd ideally want a spare Marine on hand, so you can let two clamber aboard and then ditch the chain-gunner. If you don't have a spare, you'll be obliged to ferry in your final guy on the chain-gun.
Squad in the far area
The 'far area' is the big open plain near the left entrance, where dropships 1 and 3 visit. It's a superb place for a battle, as elaborated in my far area defence plan. Here's my advice on how to set things up there with extra Marines, once you've gathered some. Initially I'll just be talking about Heroic and Legendary. Differences for Normal and Easy are given at the end.
Deal with the initial conflict
When you first enter the rockslide area, use distant sniping to help out the covies so you'll have as many as possible. But maintain a survivor so the initial covies and dropship 4 troops will have a territorial limitation that will keep them out of your way until dropship 4 arrives.
Maybe do some preparation
Before triggering the dropships, it can be worth ferrying your Marines close to the left entrance (just back from it, within the passage) so they'll be handy when you do the final ferrying later. You could also take the time to arrange some spare weapons in the far area.
Trigger the first dropship and keep the survivor alive
Trigger the first dropship and take preventative action to keep your plateau survivor alive. I'd normally use the distraction method, ending up near the right entrance with lots of covies watching me.
Do some ferrying after dropship 1
After dropship 1 has left, ferry Marines into the far area. As long as they're close at hand you'll have enough time to bring in as many as you like before dropship 3 is due here. The dropship 1 troops should've retreated into the rockslide, and as long as your Marines aren't placed too near they shouldn't get attacked yet, though they may get eyeballed by a Jackal or two. If your troops are going to be close enough to get attacked, you'd better kill the dropship 1 troops beforehand. Dropship 2 troops will stay distant for now as there's still a Marine survivor.
Before dropship 3 arrives, it's a very good idea to nip back to the nearby entrance to get a checkpoint in the passage in case the next phase results in too many casualties on either side. You can't count on getting the usual checkpoint for dropship 3; it can get cancelled due to the threat level you're under.
After getting a checkpoint, now would be a good time to try and tidy up your squad if you want to. As mentioned on my Squad arranging page, you can do that by driving in such a way as to make Marines dive in the direction you want. I'd usually do this to get them in a more tight-knit group. Mind you, their formation isn't going to last. They're liable to do a fair bit of rolling around when dropship 3 arrives, and once the battle kicks off they'll roll around even more and probably get quite spread out. A slight frustration, but there's nothing you can do about that.
Let dropship 3 troops run off
When dropship 3 arrives, its troops will be trying to head off towards the lifeboat, so try to let them. Marines will get aggressive but hopefully there won't be much damage to either side (preferably don't have anyone on a chain-gun). If Marines are close enough to lob grenades however, this can often result in a squad decimating itself with fumbled frags, or frags that get blown back by other explosions! If you're unhappy with how things go, you can always revert and let the ship come in again. The closer your Marines are to the landing zone, the more attempts you're liable to have to make.
There are a few things you can do to help minimize damage to Marines. As the ship comes down and later rises, draw its cannon fire to yourself by firing on it from relatively close range. Likewise try to draw Elite fire your way; you could use a Warthog as cover when doing that. All this should also help minimize the likelihood of fumbled frags.
After the ship is gone, you've got a few moments to do any reloading and get ready with the combo you want to start your battle with, if you've got the relevant weaponry nearby. I normally use a spare plasma pistol for firing on the ship, and then I'll swap it for a pistol which I've left waiting on the ground.
Finish off
There are various ways you could finish off. As dropship 4 comes in, you could simply drive off to the right entrance to get a battle start checkpoint a short way into the passage. If you prefer, you could drive right out into the valley then come back, so you get a checkpoint as you're heading in, like you would for a normal set-up. That way your hog will have a good bit of momentum already built up at the start of your save.
If you lost health during the landing of dropship 3, you could even drive off to use a medkit somewhere. By the time you get back the final dropship will be gone, but things will otherwise have remained more or less frozen, so your Marines shouldn't be under attack yet.
When doing your finishing off, you could arrange to have Marines on board as you get your battle start checkpoint, or at least nearby ready to board. I'll leave you to think how best to do that. But bear in mind that if you intend to get them dismounted near the waiting squad and then drive the hog out of the way (possibly to make sure nobody will end up blocked by it in battle), other Marines may run to board it as you start to move it clear. If you don't want that potential annoyance, you may prefer to drive in solo so you can just park the hog where you want it and run into position. The only down side is that the drive in won't be as much fun as normal.
Variation: Late ferrying
What about only ferrying Marines into position after the dropship 3 troops are moving off? That way the Marines and covies would take no damage at all. That would be nice, but unfortunately there won't be much time left before dropship 4 puts down and enemies are heading over. You probably wouldn't have time to ferry more than 4 nearby Marines into position before heading off for a battle start checkpoint. But if you think you can work things that way, by all means try it.
Differences on Normal or Easy
On Normal or Easy, things are a bit different near the start because there isn't a non-sniper on the plateau. In order to maintain a survivor (so the initial covies and dropship 2 covies will have a territorial restriction until dropship 4 arrives), you'd better pick someone up quite soon after sniping a Marine or two, and drop him on the island plateau. Having done that, the first dropship will be arriving shortly, leaving little time for the preparation phase I suggested, of placing Marines near the left entrance and maybe arranging spare weapons. To help compensate, you could've moved Marines and spare weapons well into the left entry passage beforehand, without actually getting an entry checkpoint. That way you'll have less remaining distance to move them.
Squad near the top pass
Up along the left cliffside you'll get to a narrow gap I call the 'top pass'. You can have some great battling on either side of it, as detailed in my top pass defence plan and (for battling on the inner side) inner rise defence plan. Setting up a squad of Marines to help out is much the same as doing it for the far area (just detailed), except for the following differences.
Order of business
On Heroic or Legendary I suggest you move your squad and any spare weapons into position before triggering the first dropship. On Normal or Easy however, you're not going to have time for doing much of that, assuming you want to ferry a survivor onto the island plateau for safekeeping (which entails triggering the dropship early).
Dropship 1 troops
The dropship 1 troops are inclined to head into the rockslide, and you'll need to either kill or distract them to keep your squad safe. However, distraction only seems viable if you've placed the Marines after the top pass, out of sight. From near the right entrance it seems fairly easy to attract the dropship troops over your way, but you'll need to keep them focused on you until dropship 3 is down and you're ready to get a battle start checkpoint in the entrance passage behind you. You might need a few tries at keeping them focused on you as they have a bit of a tendency to back off towards the rockslide when dropship 2 arrives. I've been able to do it on Heroic though.
Extra hogs
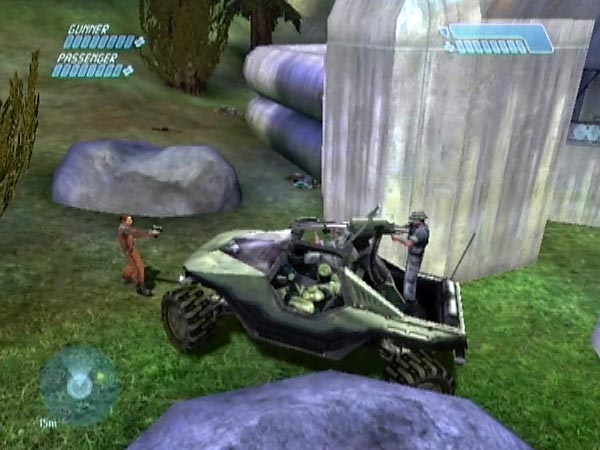
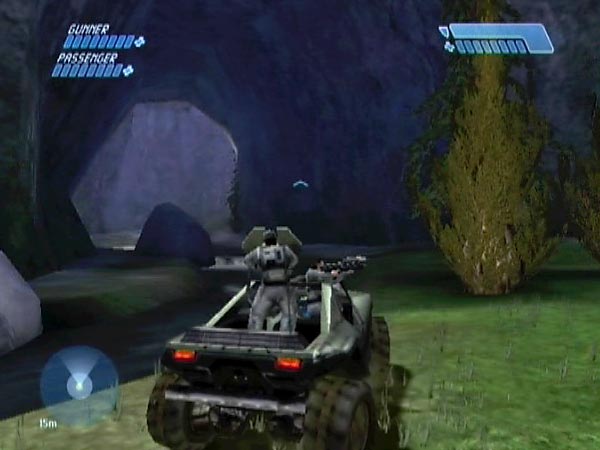
In each of the other two survivor areas it's possible to get a new Warthog. Once you've taken care of the enemy, a Pelican will bring one in if you don't already have one in the area, and if you've also still got at least one of the Marine survivors there. I gave some specific advice about that in the section on gathering Marines. This means that you can have as many as 3 hogs in your megabattle. You can bring in extra hogs when bringing in extra Marines.
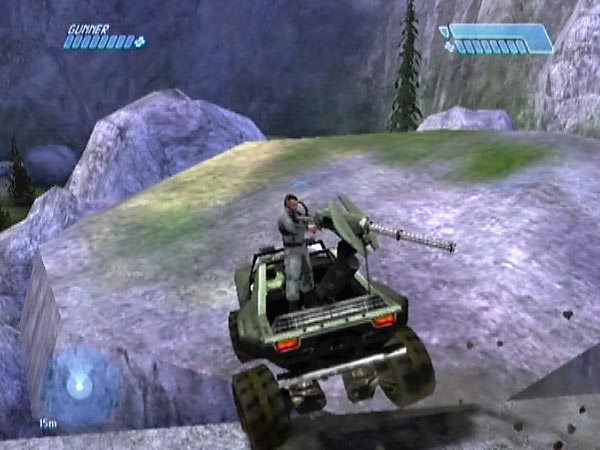
Chain-gun fun
Obviously one use will be to get a lot of chain-gun support. It may make life rather easy, but it's great fun to have a couple of chain-guns rattling away, and you can potentially just take a back seat and watch the carnage unfold. Good fun to watch arriving enemies get cut to pieces! You could use a sniper scope for that. Also, try standing between a couple of hogs placed close together; the noise is terrific when they're both firing. You'll often have good opportunities for setting off huge chain reactions from all the grenades being dropped by Elites and Grunts, especially if the enemy is funnelling into a small area or if they tend to fire from particular spots.
Blocking the enemy
As an alternative to having a chain-gun party, you can use hogs to block the enemy, potentially causing a build-up on the other side. Good possibilities for chain-reaction fun there, blowing the hogs and enemies sky-high!
Using Marines from within
This section is perhaps only of minor interest, but I've included it for completeness. If you've got survivors at the plateau, it's possible to ferry some over to help out in a far area defence, even after all covies have arrived. It's something I used to do occasionally, before I realized how you can arrange support more easily by using Marines from outside. It's a bit problematic though. Unfortunately, a dropped rockslide survivor may start running back to the plateau at some point. Maybe right away, maybe later. It's not clear to me what triggers this homing behaviour, but it's likely to frustrate you. That said, it's certainly possible to get a squad of 6 from the plateau; I've managed that on Heroic at least once. Read on for advice.
Elaboration
Most survivors will hang around below the plateau until dropship 3 is departing. To minimize the chance of them getting found and attacked, distract the dropship 2 troops by hanging around near the right entrance until the danger is past.
During the ferrying, you don't want your growing squad to get attacked while you're away fetching the next lot of Marines. You also don't want the plateau survivors getting attacked if you haven't yet got everyone you want. You can help arrange all this by intelligent driving, bearing in mind that most of the enemy will herd after you. When picking up Marines, do it quick and drive off before the enemy arrives and spots the survivors at the back of the plateau. When dropping off Marines, you want the far area to be deserted. Ideally, most of the enemy will be kept wandering about among the rocks, getting confused and dizzy as you dash to and fro. Or consider the following strategy. Each time you drop off new Marines, lure the entire enemy horde over toward the right entrance (and get a checkpoint while you're there, handy for reverting to if the next phase goes badly). That might improve your chances of doing the next round trip without trouble. I suggest you drive in around the right and continue anti-clockwise after picking up survivors.
After you've got enough Marines from the plateau, you can get a new battle start checkpoint at an entrance. But first I'd recommend luring most enemies out of the rockslide so they're mostly collected in the open plain between the right entrance and the lifeboat. That way you should get a good strong attack, rather than having enemies slowly trickling your way.
A massive squad?
If you use this method in conjunction with the standard method of bringing in Marines from outside, you could theoretically end up with a massive squad of 17 non-snipers. However, it would surely need perseverance! Maybe I'll give it a go sometime.