Top pass defence
Associated movies
The basic idea
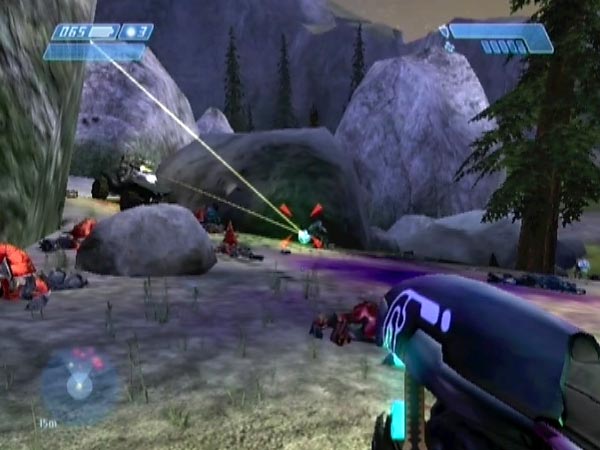
The top pass is the first narrow gap you reach around the left cliffside, up the hill from where dropships 1 and 3 hovered. In this battle plan you want to get the enemy coming up the hill towards you as you defend from near that gap on the outside of the rockslide. There are a couple of ways to get such an enemy arrival dynamic, resulting in quite different battle intensities.
Using a normal set-up
When using just a normal rockslide megabattle set-up for this battle, make sure to cut through the dropship trigger zone on the way there, in order to free some covies of their territorial restrictions. Without that, the lifeboat group would remain near the lifeboat, not taking part in the attack (your defence area is well outside the aforementioned zone). I suggest you take a detour towards the lifeboat then through the central part of the rockslide, to hopefully suck everyone in. Park up and get ready. Within seconds, covies will be coming up the hill towards you from the left or right or both. Time for you to start earning your pay!
Setting things up this way is very similar to using a normal set-up for a far area defence, and my advice there applies here too, with a few obvious modifications.
Using a horde set-up
Much later on I found a way to make the battling far more intense than when using a normal set-up. Just start with a far area horde set-up or modified far area horde set-up, ideally in which there are few or no enemies near the top pass, and drive straight there. Ideally you'll have the entire covie contingent heading up the hill towards you in pretty short order (some from within the rockslide), leading to some fantastically intense action as they converge. Say hello to a whole new world of hurt! I cannot emphasize just how good this battling can be, except to say that it's blown my cyborg socks clean off. You need to experience this!
A welcome aspect of this set-up is the immediacy of the carnage. It takes only a few seconds to drive in and take up position, and then the enemy starts arriving in numbers and all hell breaks loose. Perfect for when you just want a quick high-intensity blast. Most of the rest of this page will primarily have this super-intense version of the battle in mind, which is the way I usually play it nowadays.
The nature of the battle can vary quite a bit according to the enemy's initial layout as this will influence their arrival pattern, so it's worth trying out some different set-ups over time. Also, it's convenient if hardly any of the enemy are initially more than about halfway up the hill towards the tree, as this gives you a good chance of settling into position without taking much fire.
High comedy
This battle plan is great for comedy potential, perfectly showcasing that aspect of Bungie's amazing work. Quite apart from all the multiple explosions you can cause among the congested enemy, be it by grenade or needler, you'll tend to see them take quite a lot of friendly fire when closing in on you. Adding to the fun, you'll have loads of Grunts and Jackals intermittently running around in panic. The Grunts chatter almost constantly, and in a single battle you'll probably hear more of their lines than you would in an hour's worth of normal Halo play. No doubt about it; if you love those grunty fellows, this is the battle plan for you!
First rush
There's some excellent rocky cover just before the pass, in particular a large rock which I call the cover rock, and if you're tackling an intense attack without the aid of a chain-gunner, you can bet you'll be grateful for it as you attempt to fend off the first rush of enemy. If I've driven in solo, sometimes I'll jump out just through the pass then run back through, giving me a pretty safe start from behind the cover rock. Other times I'll jump out before the pass and let the hog slide out of the way (you can grenade it onto enemies later). That way I'm in position quicker which might help me keep the enemy at bay. If there aren't too many Elites around, maybe I'll even gun the hog at a nearby enemy and leap out whilst they're busy diving clear, though I might take some fire as I run for cover. In front of the cover rock there's a smaller one, and that can be handy too.
Early grenades
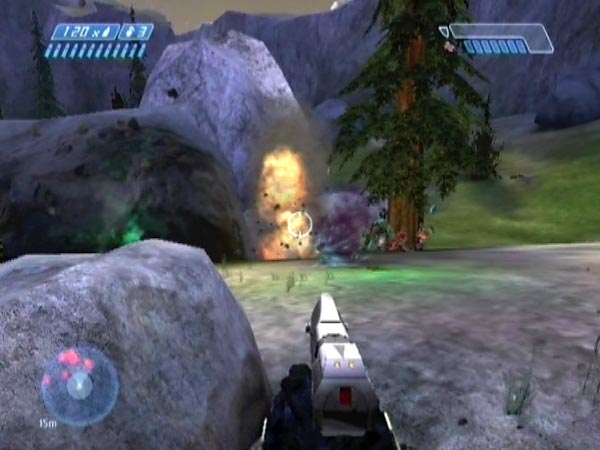
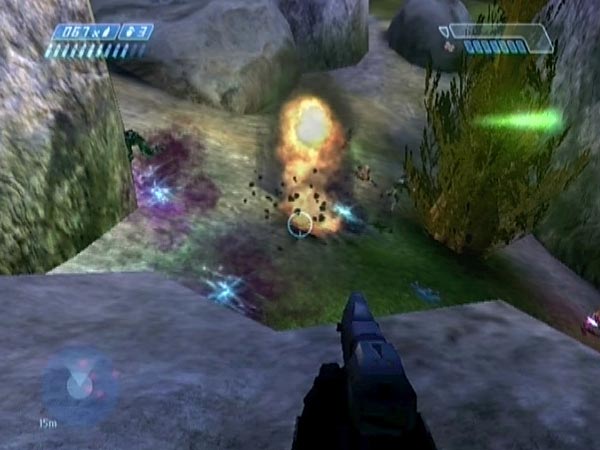
If there are enemies by the tree or ever closer, often the first thing I do is lob a quick-acting frag grenade to give myself a bit of breathing time. If they're further back though, there's time to land a plasma grenade to meet new arrivals by the tree. Enemies often collect and pause there, making a great target for grenades. If you can hold off the first few Elites and Grunts with weapon fire, there should be a good few plasma grenades littering that area ready to be set off in one big bang - ideally when more Elites arrive. On Heroic however, that's easier said than done. In practice, the arrival of multiple Elites can quickly force you back.
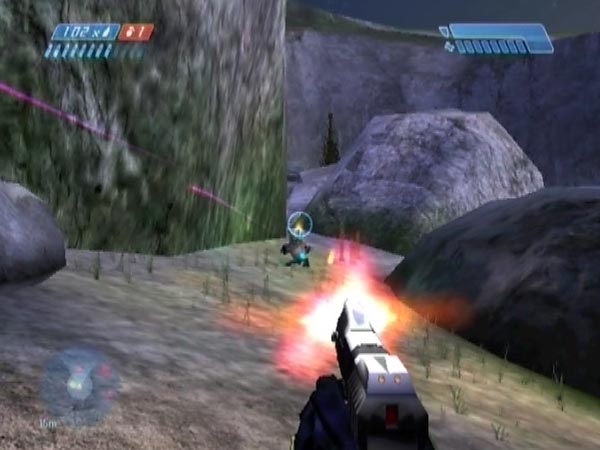
Pistol and needler
A pistol and needler make a great combo for this battle plan and it's certainly the combo I've used most often, though plasma weapons would also be good. At the start I'll maybe use the pistol to bring down a few Grunts and Jackals, or concentrate on bringing down an Elite if it looks like there's enough time before my shield starts taking a hefty dose of plasma.
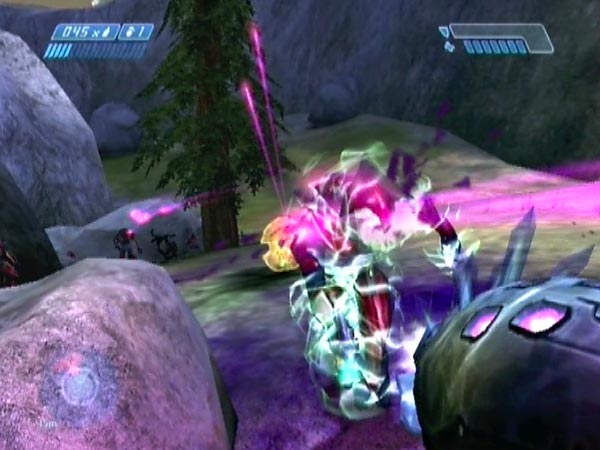
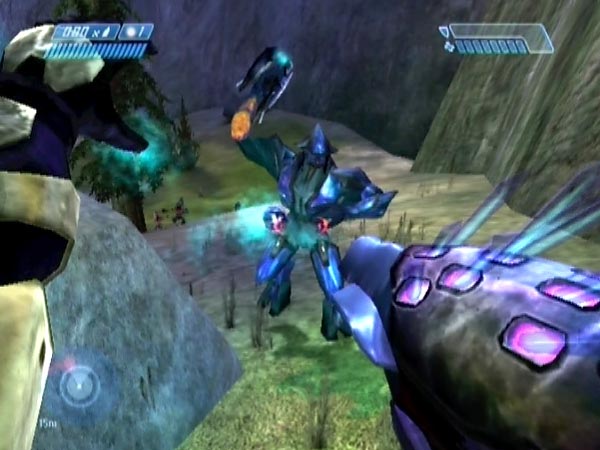
Alternatively I'll attempt to wreak havoc with a needler, which is a fine thing for taking care of Elites heading your way. If you can stick your head out long enough to send out a good stream, you'll have the satisfaction of seeing or hearing an Elite go up in a spectacular pink bang as he runs straight into it. Highly recommended. Often there are five or six Elites heading up the hill over a period of thirty seconds or so, and on a good day they all get blasted into pink clouds in a glorious spell of utter carnage and mayhem. It doesn't get much better than that!
When fighting solo I often hear a bang rather than see it, because I've already ducked back behind cover. Elites with plasma rifles can really eat into your shield fast and those Jackals are pretty trigger-happy with their overcharge shots too, so you'll need to be careful about exposing yourself too long. When you see that an advancing Jackal has overcharged his plasma pistol, one tactic is to momentarily show enough of yourself to tempt him into firing, at which point you dodge back under cover, then immediately back out to take advantage of the safer situation. Pepper that ugly hide with lead!
Getting forced back
When a bleeping shield forces you back behind the cover rock, that needn't keep you from dishing out more pain, as you can potentially lob a shallow grenade over the rock without being exposed (except maybe for a moment at the top of a jump). I say potentially because rock geometry varies and it may or may not be suitable. Sometimes the rock has been chest high, other times it's towered above my head. If I were creating a save specifically for this battle plan, I'd make sure the rock was suitably low.
If the masses are getting too close, you can buy a bit more recharging time by placing a grenade a short distance away from your cover, just off to the front right. There's a good chance you can blast approaching enemies like this, though they may need a bit of finishing off. Don't throw too short mind; been there, done that! Another grenade method is to bounce a frag grenade off the cliffside, hopefully taking out the front few blips on your motion tracker.
If worse comes to worse, you can end up with one or more Elites facing you at point blank range. Some good options here include tagging and backing off, or needling as you back off. It's probably a good idea to have at least one plasma grenade in reserve for such an emergency.
Retreat!
If things get too hot, you can always retreat through the pass and try to stop the covies from coming through. At this point however, you've effectively switched to a Top pass retreat plan, discussed at length elsewhere.
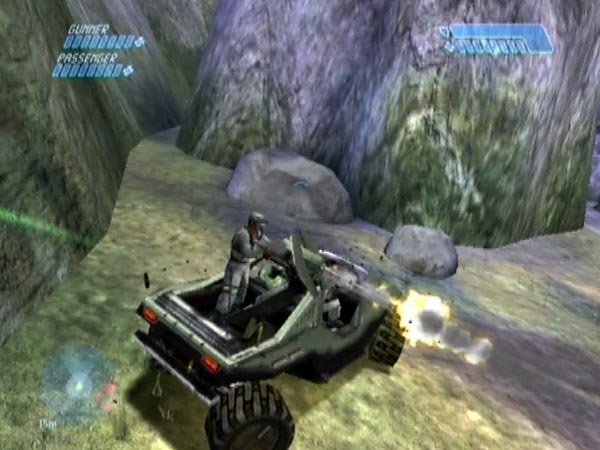
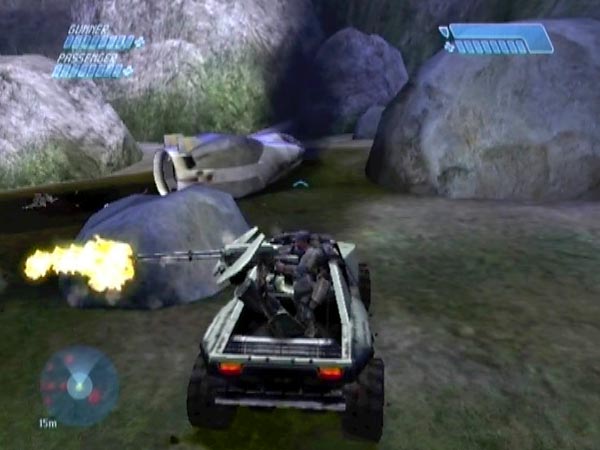
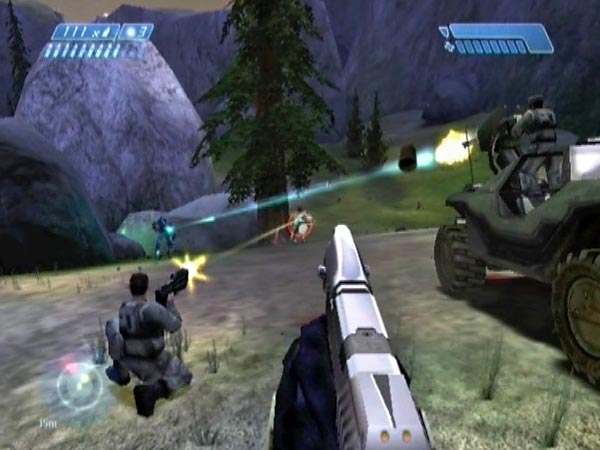
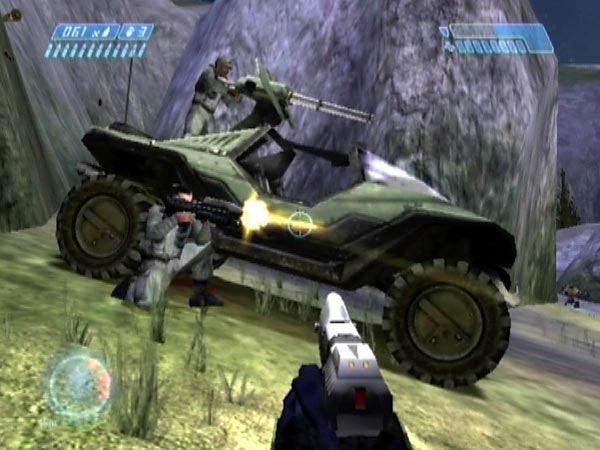
Chain-gun carnage
If you drive in with Warthog buddies and park up just before the pass, and leave the gunner on board, you're in for a different type of battle (just compare BCM20 to BCM21). Fighting alongside that deafening chain-gun while the gunner gets vocal about the pain he's inflicting can make for a supremely atmospheric time, and I've certainly had some of my most enjoyable battling this way.
Despite the presence of the gunner, the battle can still be really tough. With my best set-ups on Heroic (my usual level for the megabattle), I still have to work seriously hard to keep the enemy back and my buddies alive, and I'll probably need to sacrifice a few health bars doing it, moving to the fore to help take the enemy fire off the Marines. Typically I'll lob a few frag grenades right away to help clear the nearest enemies, and follow up with a few plasma grenades to help stall the glut of enemy flooding up to the area of the tree just down the hill. Then I'll settle down to administering widespread pistol-based migraine, as a sort of free public service. When Elites are present I'm liable to send in streams of needles to take them out with a bang. With any luck the explosion might set off a chain reaction among the plasma grenades that often litter the ground. That said, the needler can feel frustratingly slow when you've got all those Elites dodging around in front of you. In addition the gunner frequently kills enemies that you were already taking perfectly good care of, which is wasteful of your efforts and needles. So you may prefer the immediacy of a plasma weapon.
No grunty grenades allowed
While you've still got a gunner, an important duty is to quickly take out any approaching Grunts, whose grenade lobbing poses a major threat to the hog. Because they might flank you, you have to stay sharp. Whilst occupied with the hectic frontal assault, it's worth glancing at your motion tracker periodically to check for such grunty assassins. That said, they sometimes creep in, which is too slow to show on the tracker. Inevitably some little fin-backed pixie will take me by surprise once in a while and I'm alerted by the ftt-ftt-ftt of his needler as he closes in on the hog. You know a throw is imminent, and that's when the speed and accuracy of your fire can save the day.
Delayed dismounts
When it comes to positioning the hog, one method I like is to swing it around so it'll be facing down the hill or towards the right a bit. This way the passenger has much better protection against enemy fire. I sometimes leave him seated to begin with; I'm too busy trying to hold the enemy back, and in any case the intensity of fire could kill him in seconds, especially if he's unarmoured. When things are a bit less hot I'll make him dismount. With any luck he'll lob a grenade or two to help out; because let's face it, his assault rifle isn't doing much! Sometimes when things have cooled down I'll also make the gunner dismount and we'll fight the rest of the battle on foot. I'll quickly drive the hog forward out of the way, maybe letting it slide down towards the tree; and if it squashes anything when it gets there, so much the better! Once the hog is down there among the loose grenades, it can be fun to lob in a grenade at some point, to send it skyward along with the enemy.
Switching sides
During the battle you may like to switch around between the hog's left and right a few times. On the right you've got a better view of any approaching enemies, and I think it also helps the crew survive by attracting enemy fire away from them. If the incoming fire gets too hot, you can switch and maybe use the cover rocks by the top pass for a while. I like to leave a bit of a gap between the hog and the cliffside, partly to give me ease of movement, and partly so that when I'm on the right I'll be able to get a shot at any sneaky Grunts coming through the top pass. Once most of the Elites are down I'll take on more of a free-roaming role as cover won't be so important.
Crossfire
With Warthog buddies you can have some fun setting up a crossfire. One idea is to put the hog in the lower pass that runs parallel to the top pass, then take up a position near the cover at the top pass (maybe running around the back way to get there, to avoid taking fire). The great thing about this situation is that a lot of enemies will tend to focus on the hog, leaving you to pile in the punishment from their flank, such as sending explosive streams of needles into unsuspecting Elites. Glorious!
However, the hog is rather vulnerable to grenades in that situation, and quite often comes to an sticky end from some unseen critter. You'll hear "Everybody duck!" or whatever, and you just know things aren't going to end well. It's also quite hard to position the hog. If it rests against the big rock, you have to get it in just the right position else it tends to gradually slide down along the rock. Basically things are hard to control, so I'd consider this arrangement more a bit of chaotic fun rather than a serious tactic. It may also be best left for battles of relatively low intensity.
For an alternative crossfire in which you can better protect the hog, swap the positions. Park the hog close to the top pass, then take a position in the lower pass. From there you can attack the enemy from the side as they spot the hog and go for it. This time however your cover won't be as good, and you're probably best off with plasma weapons for close-up fighting. I like to surprise Elites from the side with an overcharge shot, then switch to the plasma rifle or add a grenade.
Something else you can do from that position is nip around behind the enemy to give then a nasty surprise. But that had better wait until most of the Elites are dead, or you could end up getting a nasty surprise yourself! When things have become less intense, you can get a bit more playful. It's quite fun to listen out for approaching Grunts or Jackals and drop a grenade in their path, or bounce a frag off the rock behind the tree. There are few things more satisfying than hearing the sound of an unseen Jackal who's just seen a grenade land right in front of him. Also keep in mind that the rock is sometimes low enough to get on top of, to surprise enemies from above.
I love this job!
Different Marines have different shouting styles on the chain-gun. So if you want a change, swap your Warthog buddies around before driving in. You can even go off to pick up a new gunner from one of the other survivor areas. The hilltop group is the easiest. You'll find Sergeant Stacker up there - the guy in a cap with a southern drawl. He's very talkative on the chain-gun and pretty funny with it too ("Damn I look good!"). He's easily the pick of that group and sometimes he's armoured, which makes him a lot more resilient. But my favourite has to be Sergeant Johnson.
If you care to get in the line of fire so the gunner accidentally kills you, you may hear some amusing lines you might not have heard before, as the gunner realizes he's really gone and done it now!
Mopping up
Once the enemy attack is broken, I like to use a plasma pistol and needler to have fun taking care of any stragglers with extreme prejudice, especially the Jackals, and especially when they have the effrontery to actually fire at me. Big mistake! A plasma ball takes out his shield, revealing him for the miserable bag of leathery hide that he is, and then I'll aggressively pile in a full clip of needles. BOOM! That'll teach him! Or maybe I'll tag him with a plasma grenade, for the pleasure of seeing his comical agonized reaction.
Up on a rock
One fun thing I sometimes do is clamber up on the large rock just ahead to the left (forming one side of the lower pass running parallel to the top pass) - assuming that the rock geometry permits. From there you can get a great view of the remaining Grunts and Jackals, who thought they'd found shelter from the big bad cyborg. Give them a nasty surprise from on high! Actually it can be viable to fight the whole battle from up there if you fancy something different. With an intense attack on Heroic however, you'd want chain-gun support. Plus you'd need to dodge around quite a lot!
Distant Jackals
Often you can be left with distant Jackals in the far area, who've been crouching behind their shields and sending plasma balls your way (something you want to stay aware of in the heat of battle, else you can suddenly find yourself without a shield). Blowing them to kingdom come with carefully lobbed grenades is a lot of fun, especially when they make pathetic efforts to dive clear. Too late, beak-face!
Extra Marines
When using a normal set-up (i.e. not a horde set-up), it's possible to've deposited lots of extra Marines near the top pass beforehand, ready to help out. It's a great place for adding extras and I've had some sensational fun with a large squad. Frag grenades flying all over the place! Highly recommended. The support of a decently sized squad can enable you to take a breather when you need to recharge, and could also allow you to use the relatively weak AR for a change. It might even be ok to mostly stand back and enjoy watching, just lending a helping hand when needed.
For advice on setting things up, see Squad near the top pass on my page about extra Marines. That page also contains three pictures of Marines at the top pass (one picture near the start of the page).
Protected passenger
Sometimes I go in with a passenger but no gunner, and swing the hog around as I park up just before the pass. If you get it right, the hog can partially or totally protect the passenger from enemy gunfire, something I'd already seen a few times in other situations such as when battling at the Marine plateau. This can give some amusing situations in which a whole load of enemy are standing at close range sending in an absolute cacophony of fire while the passenger sits there chewing gum and evaluating his situation with masterful statements such as "I need some backup now!". Meanwhile I'm bravely cowering behind the hog in my shiny tin plating. Well, even a cyborg has to draw the line somewhere!