Merged Grunts via gunner sniping
Posted October 7th 2025
Associated movies
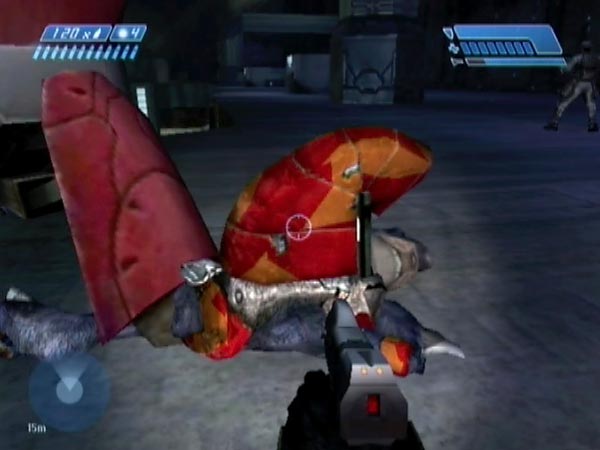
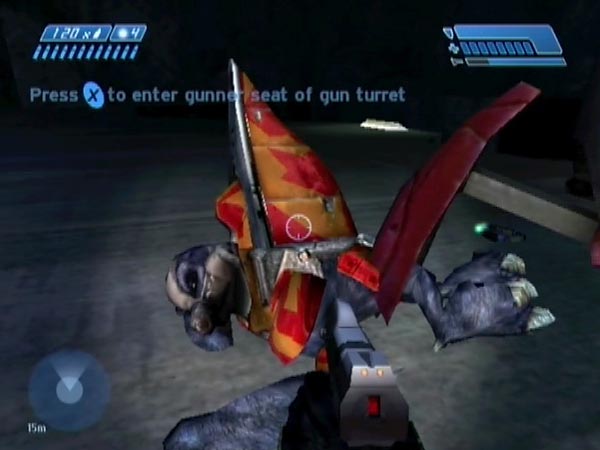
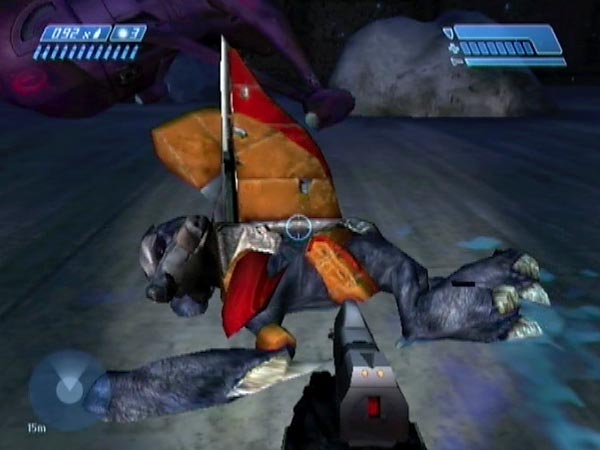
As my related older article Body merging described at the start, in July 2016 I released BCM192 showing what I called a 'harlequin Grunt' (see pic). Seemingly a Grunt whose colouring was an animated jazzy mix of both red and orange, it was actually two gunners I'd shot out of their Shade. Their bodies had settled in the same way, making them look like a single Grunt, albeit with weird and spectacular colouring.
At the time, I didn't get around to investigating how easy it was to get a harlequin Grunt by gunner sniping, because I soon found and focused on an entirely different and more general way of getting bodies merged, as covered in the aforementioned article. Having now made BCM596 however (over nine years later!), I have checked into the matter (on Heroic), I'd say it looks pretty easy to get a harlequin, and likewise to get super-merged Grunts.
This new article now covers the topic of getting such outcomes, with more detail than could be included in the movie. It can be seen as an addendum to that Body merging article, but I thought it best to give the material its own dedicated page.
Setting up for making attempts
If it's harlequins you're after, I especially recommend using Heroic, because with that difficulty level you get a fairly even distribution of red and orange Grunts, which should maximise your chance of getting a suitable pair of gunners to work with, namely having different colours but the same backpack type. There'll be three gunners to the left as you enter, two to the right, and three on the far platform. The gunners in each team are assigned only to their own Shade and won't man the others.
For playing about with getting merging, ideally you should first eliminate any covies who might raise the alarm or who you simply don't want. That's easy with some careful sniping. Then when things are nice and safe, and with the gunners not alert to your presence, set yourself up with a handy checkpoint for making attempts. You can easily delay a tunnel checkpoint until ready to shoot.
Couple of details though. Firstly, maybe avoid having Marines with you, as they could be troublesome. Depends where you'll be stationed though. They might be okay, and could give you some company.
Secondly, if you'll be shooting from quite a long way off, it'll be useful if you have some transport at hand so you'll be able to reach the death scene quickly to see how things turned out. A Banshee would be nice, and can also be used to barge the Shade aside when desired, so you can view your result better.
The shooting
The basic idea is to snipe the first gunner, then wait for the next to board (he'll wake up after a while, though you could always give him a wake-up call with a shot placed nearby), and snipe him too. However, there are multiple details to keep in mind.
Firstly, as already implied, it's certainly best if the gunners aren't alert to your presence. Actually you can work with alerted gunners (an example of which is shown at the end of BCM596), but it's much less convenient. Fortunately it's very easy to have non-alerted gunners, because they're weirdly unobservant. They appear to be somewhat glitched in that regard - unless maybe the hum of the turret has a mesmerizing effect on them! You can go right up to a zoned-out gunner and he still doesn't react. Brush against his turret though, and he'll finally snap out of his trance.
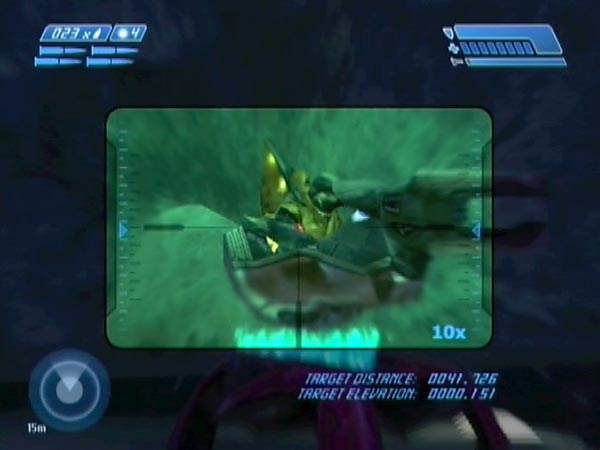
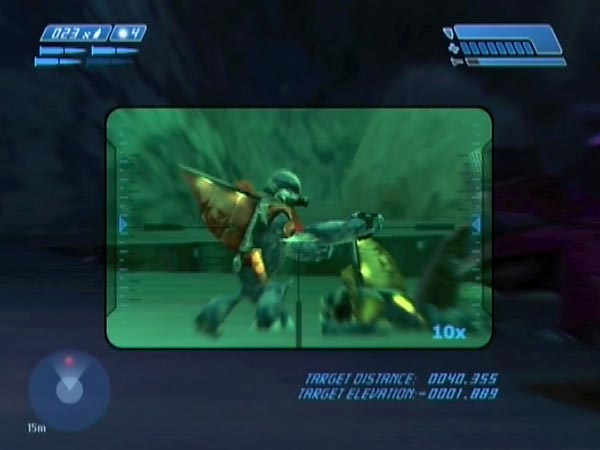
Secondly, notice how the gunners continuously rise and fall. Typically you should fire both shots at the same phase of that cycle. Or at least, that's what I suggest initially trying. For example you could fire when the gunners are at their lowest, like I did in the opening part of my movie. If you were to use significantly different shot timings, you could expect the bodies to be less well aligned, which can mitigate against getting a harlequin (though you might still get some colour animation). For a harlequin the bodies will need to be very closely aligned.
However, if you keep getting super-merged Grunts when using identical timings (I had a pair of Grunts like this in one set-up) but you instead want a harlequin, try giving your second shot slightly different timing to the first. That small difference should cause less precise body alignment, hopefully giving a harlequin. This deliberate difference technique has worked well for me in such cases.
Thirdly, it's best to fire the two shots from the same angle. Using different angles can result in clear body separation, which is no good. That said, I notice that it's still possible to end up with a harlequin (or super-merging) even with quite serious angle differences. I didn't try to analyse the business of angles fully though.
As well as all that, let me also mention that the effects of your shooting can be dependent on the shot angle you're using. From one angle you might be getting a harlequin regularly, while from another you might be getting them significantly less often. I don't have any details on that however; it's just something I noticed towards the end of my testing.
Note: for some details regarding the outcomes I was getting with the two pairs of Grunts used in the movie, see my written commentary for it.
Avoiding the bridge retreat trigger
Here's something I should mention. If you're going to be working with either of the initial two Shades, be wary of going to the far plaform area. There's a large trigger area there which if entered, triggers covies to retreat across the bridge. That would stop any awoken replacement gunner from running to man his Shade. He'd head across the bridge instead, or maybe (strangely) just go back to sleep.
Using other weapons
While the sniper rifle has been the focus here and is certainly the best weapon for the job, I should mention that you can get merging with other weapons too. It's just that they won't give you such easy control. You can be fairly precise if using pistol headshots (the zoomed view can help you with shot timing), but other methods, such as just blasting away with a plasma rifle, are going to be more hit-and-miss.
Bonus info: analysis of wake-up delays
What's the story with wake-up delays for replacement gunners in the cavern? I did a little investigation on this, and here's the picture as I see it.
It's like there are certain set times at which the game checks for whether the next Grunt should wake up. When the first such check time arrives after the turret becomes vacant, the Grunt may be woken up, but it's random (with even or near-even odds I think). If he isn't woken, he'll almost certainly be woken 12 seconds later instead.
But in very rare cases it seems that there could even be a further 12-second delay. That seemed to be the case for me once when I was doing testing, giving an unusually long wake-up delay of about 35 seconds, the longest I recorded.
Wake-up delays will usually be less than that. But note that the typical delays you'll get in your gameplay will actually be dependent on when you shoot, relative to those somewhat mysterious check times I mentioned. If you happen to shoot the existing gunner just before a check-time, his replacement could wake almost instantly if he doesn't get a bonus 12-second sleep-in.
Other places for merging gunners
Just to mention, the cavern isn't the only place where there's a Shade (in this case three Shades) which more than one Grunt can man, and which therefore offers some potential for getting merged gunners via sniping or other shooting. One such place is near the end of the level, where a couple of Grunts are able to man a Shade on the forecourt of the pyramid structure.