Setting up
- Setting up with a large squad
- Setting up without a bridge descent
- Getting the Banshee pilot
- Enemy numbers
Setting up with a large squad
Associated movies
- BCM48 - Normal; Setting up with a large squad (9:58)
The best way to set things up involves a descent from the first bridge so you can get a Banshee and do some advance preparation. So that's what I'll focus on first, giving a plan which will also include getting seven extra Marines, giving you a squad of up to thirteen, though the four Pelican Marines will be invisible to the enemy as usual. Even with a large squad the battle can be somewhat murderous on Heroic, so I suggest using Normal, at least to start with. You can see the set-up work demonstrated in BCM48, but the written account here is independent of that and embodies more information.
UPDATE: Instead of doing a bridge descent and fetching the twin bridges Banshee, there's now also the possibility of grabbing the bridge Banshee, if using Heroic or Legendary. Unless you're used to grabbing though, you'll probably find it much easier to use a descent.
Descend and do some preparation
When you reach the first bridge, descend however you like and destroy the Banshee if any. If you want the arriving Pelican to have a particular sergeant (Stacker or Johnson), you may need to retry from a checkpoint prior to the loading point before the bridge until you get him. It's random each time. If you want the maximum squad of thirteen, you'd probably want Stacker so you don't end up with two Johnsons (there's a sniper Johnson later in the level).
Fetch the twin bridges Banshee from the much later area with twin bridges overhead. In the cavern, preferably topple the two nearside Shades or move them across the bridge. You don't have to, but if you simply leave them as they are, Grunts will man them and be unable to retreat across the bridge later unless ejected. You could do similar with the other Shade if you like, depending on how you want the enemy defence configured. The Shades can be moved where you like, and as long as they're upright, the assigned Grunts will run to man them.
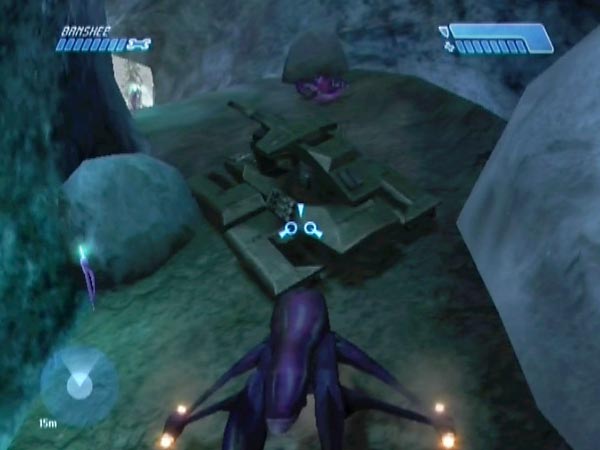
Blast the platform Banshee down. That stops the pilot using it later, and it can also be used as a healthy replacement if desired. Also overturn the two nearby Pelican attack Ghosts to prevent later attack.
In the curving tunnel leading off from the Pelican area, set up a blockade to stop Marines entering the two-Wraith area later. You'll need them out of the way while you get covies retreated to the cavern. The ideal place is at the first rock along the left. Using the Scorpion is easiest, but preferably angle it past the rock so you'll later be able to drive it clear of clustered Marines without much danger of it swinging down the slope and squashing any (give it a go - you'll see what I mean). It can completely block the path, though actually you don't even need to. There can be a man-sized gap on the right and the Marines still won't use it because they're so keen to keep to the left here. You could equally use two Ghosts for the blockade (overturned, in the case of Pelican attack Ghosts), in which case the release of the Marines will be hazard free.
Return and form your squad
Back below the first bridge in your Banshee, overturn the Shade to nullify it, then fly up to the bridge exit. In the short section after the first corner, the post-bridge checkpoint is triggered. Keep it delayed for now by jumping or whatever. Go far enough along the passage to trigger enemies in the second room, then come back out and fly down to the door. At this point let yourself get the delayed checkpoint, and preferably save it. Go through the door (in the hog if you want an extra) to trigger the ground battle, then use the Banshee to keep the ten Marines in good health as detailed in my article on the seven extras trick. Likewise keep the later three Marines healthy as detailed in a separate article, but avoid triggering the Pelican area checkpoint yet (triggered just before where the Ghost was).
That whole passage of play is demonstrated in BCM41 and you can end up with a healthy squad of thirteen, or twelve if you eliminate the sniper. But if things don't go well enough you can return to the checkpoint I mentioned for another try. Along the way, get a sniper rifle and rocket launcher for potential use in the battle later. Keep them with you for now.
Do a bit more killing
Advance but preferably keep the triggered Pelican area checkpoint delayed. Kill any covies in the tunnel or down the hill but avoid triggering the two-Wraith area yet; it's triggered just past the third tunnel light. You may want to top up your sniper rifle after this. If any covies in the tunnel are too hard to target (behind the Scorpion), you can kill them when you fly off shortly instead. Aboard your Banshee, draw the Marines to near the tunnel entrance (so they'll be reasonably close behind when you fly off), get the delayed checkpoint and preferably save it for safety.
Get the two-Wraith area favourably spawned
Fly off past the blockade, triggering the two-Wraith area, but keep the checkpoint delayed initially (a bit of plasma fire will do, and soon enemy threat will keep the delay going). The three Shades are randomly spawned among five spots, and if one is on the left of the hill straight ahead, no Grunt is created for it, so you'll be a Grunt short. If that happens, revert to try the spawning again. Similarly, if you find that a Hunter has been squashed by a Ghost, or a Ghost pilot has been squashed by the Wraith, retry.
Get covies retreated to the cavern entrance
Head into the next tunnel and cross the second hump (reach its peak). That triggers a tunnel checkpoint as you may know, but crucially it also gives the enemies in the last area an instinct to retreat to the cavern when on foot and not too near the start of the battlefield. Enemies in vehicles or Shades will need ejecting to retreat, and you'll need to get the Banshee pilot down from his platform if you want him too; I'll elaborate in a moment. Retreating covies tend to stall near the first hump in the tunnel, but approach (without causing them to open fire and maybe damage themselves) and they'll move on. As for details and how to manage the overall task best, here's my advice.
Fly back out, ascend beyond the range of Shade fire, let any covies on foot depart, then get any remaining Ghost pilots ejected. They often fall out via clumsy driving of course, and the safest thing for all concerned is to just let them cruise around for a while having accidents. If you want to get more direct however (e.g. with the final Ghost), you can eject a pilot with a careful blast to the side of a wing, ideally from a safe height while he's stationary. But on the lower difficulties there's quite a risk of damaging his health with a blast too close. An alternative is to ram his Ghost with your Banshee or a Warthog (e.g. on the slope into the tunnel, to be clear of Shade and Wraith fire). But if the Ghost lands upright he'll run to reboard it, so blast it over quick if you can.
Bear in mind that if a pilot is ejected near the start of the battlefield, he may need advancing before he'll head for the cavern (make him dive repeatedly, something you could do in a Ghost or hog to save your Banshee any damage); so try to avoid that.
Next eject the Shade gunners by pushing over their Shades from the side. This is hazardous for the Grunts, so preferably get another tunnel checkpoint beforehand (after letting stalled covies move on). If there's a Shade above the tunnel entrance, barge it firmly off the edge. You may prefer to eject Shade gunners before doing the Ghosts, but try to do it briskly each time to minimize his chance of taking friendly fire.
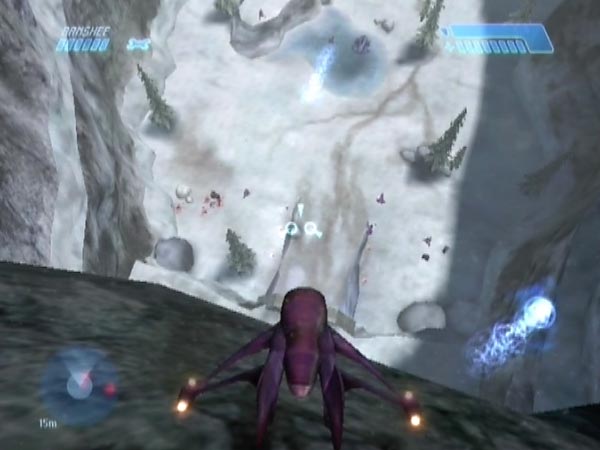
Now for the Wraiths. Wraith flipping isn't all that hard once you've got the knack. Ram the front fast at a low angle to get the nose up, then try and push it up and over, or whatever you can manage (it can become a bit of a tussle). Obviously the Wraith could blast you as you approach, but you could help avoid that by letting it fire a shot before you curve in to make your speedy approach. In view of the danger however (to the pilot too), it's sensible to get a checkpoint beforehand. Sometimes you may get the opportunity to flip the ice patch Wraith from behind as it returns to the patch after a tussle. As for the high Wraith, that should be pushed down to the ground first, which is pretty easy. The pilot might even get ejected in the process, especially if you push the nose as the Wraith angles down over the edge.
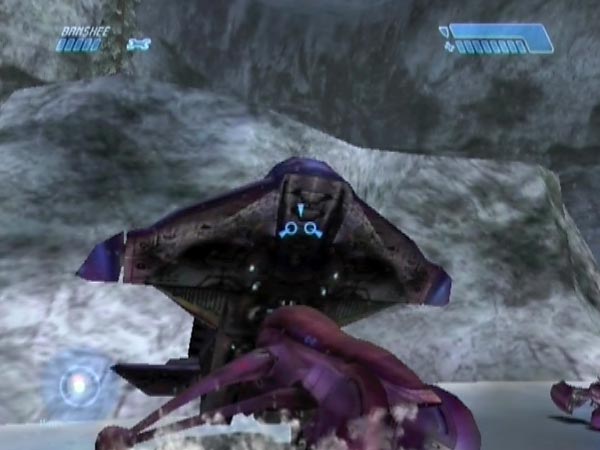
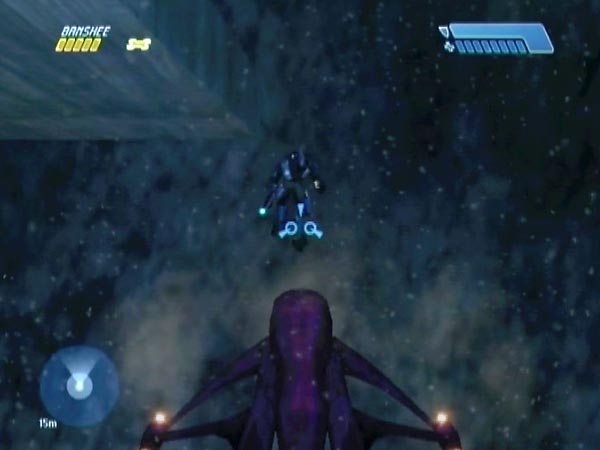
Finally there's the Banshee pilot standing on the platform. The following method works for PAL Xbox on Normal or higher, but see later for discussion of Easy and NTSC/PC. Get a delayed checkpoint not too far away, in readiness for repeat attempts. Basically you want to make him fall from the platform so he bounces off the ledge, down to the ground.
Herd him to one of the back corners by making brief forward motions to make him dive. Preferably the right corner as you look at it, because he'll land on the ground in a more favourable position and according to my testing on Heroic he also tends to lose less health. A sequence of five dives usually does it for me; he's fairly controllable and you just have to send him from point to point. To minimize Banshee damage do it briskly, giving him little or no time to recover and shoot between dives (but it helps if he's blue, as reds are more aggressive). Then ease forward - don't spook him - and gently nudge him over the rim so he bounces off the ledge (though if he stops on it, you could try making him dive off). Actually he may've already been standing on the rim, which is ideal because then he's unlikely to move as you close in, and you can do it faster. You can potentially arrange for that by getting him quite near the rim before his final dive (like I did in BCM48). When he's down you'll probably need to move him up the battlefield before he'll run off.
Clear the cavern entrance
The covies stall near the cavern entrance and you need to make it safe enough to fly through. When you approach they should continue their retreat; watch your tracker. Hunters tend to be hesitant to get over the final hump however, and although it's fairly easy to coax them up over it and dodge swipes to get clear, you could instead just fly over them shortly as they're slow to fire. Strangely the covies head for the supply area to the right. Perhaps Bungie planned that deliberately, thinking that any covies you bypassed might thereby give you a nasty surprise, e.g. meeting you as you leave that area.
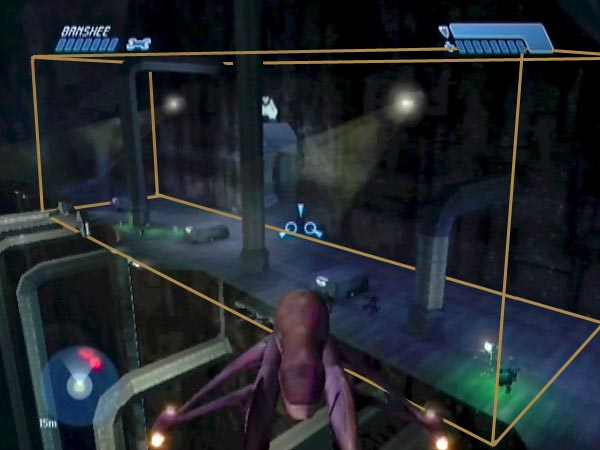
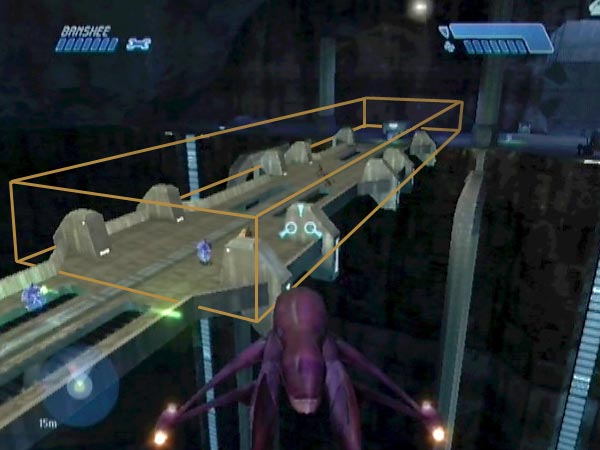
Effect a bridge retreat
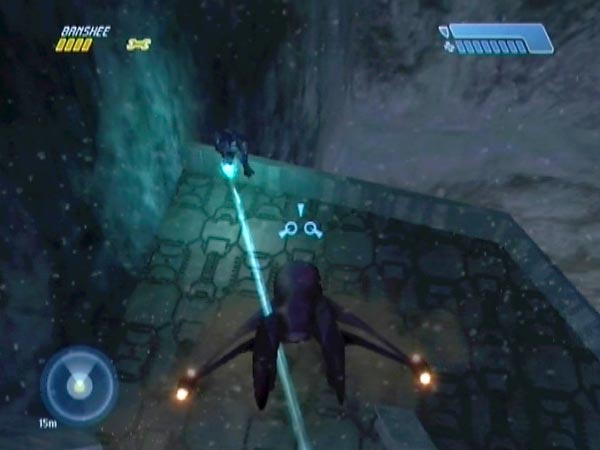
Fly in and trigger all foot troops on this near side to retreat across the bridge. You simply need to enter a certain trigger zone along the far side of the cavern, which I've indicated in the picture (based on some experimentation). It suffices to reach the far side, as long as you're not too far off to the left or right, and no higher than the second-highest pipe. If you enter it somewhere near the final pipe on the right, you should be able to avoid all enemy fire except maybe a bit from the two patrolling Elites on your way in.
Some enemies may need a bit of prompting to retreat, and any dozing Shade Grunts will need waking up. Retreating enemies can go fully over the bridge if you give them enough time, but another option is to leave early, in which case the retreating gets suspended and some tail-enders may be close to the start of the bridge when you start the battle later (as seen in BCM59, in which I toy with a Hunter).
While in the cavern, you might also like to wake any Grunt at the left of the far side. That's just to get him closer to where the fighting will be, otherwise he might snooze through the whole thing!
Tip: When you get a tunnel checkpoint on your way out, it could be worth returning to the cavern to check that nobody got killed by friendly fire (e.g. a stray Hunter shot). If things are ok, revert and continue.
Release the Marines and finish off
At the same moment that you triggered the enemy retreat from the two-Wraith area, the Marines acquired a desire to reach the penultimate corner of the tunnel to the cavern. Release them and they'll finally advance, as long as they're at least a good way past the second light (which they should be if you gathered them at the tunnel entrance beforehand as suggested). They tend to pause just past the exit of the curving tunnel, but you can prompt them to continue by approaching, or if they seem a bit slow, making them dive.
A few details worth mentioning. If Marines are up close to your Scorpion blockade, they can easily get squashed during the release, so it's good to get a delayed checkpoint there before trying. If you didn't angle it well and part of the tank keeps swinging down into the Marines with nasty consequences, you could try making them dive away from it beforehand to reduce the risk. Another idea is to avoid boarding the tank at all and just nudge it down the slope to open a gap, but they can still get squashed. There's always a safe method you can resort to if you like: just use a hog to ferry Marines around to the start of the battlefield, where they'll start running.
Also make any desired preparations in regard to weapons and vehicles - something you could do before or after releasing the Marines (before would probably be better, letting you get things into place without Marines causing trouble). There's more detail on that aspect on my page of additional set-up tips.
Finish off by getting a tunnel checkpoint, to be your battle start checkpoint. You could do that on the penultimate hump before the cavern. The game imposes a time delay between successive tunnel checkpoint triggers, but you only have to wait in the trigger zone and you'll get one in due course.
Note: When the Marines are in that penultimate corner, they'll only advance when you get near the bottom of the next hump; but you can always make them return by going back. Just be careful that a sniper doesn't go up the final hump before you've got your battle start checkpoint, or he may start firing.
Setting up without a bridge descent
If you instead want to set things up without doing a bridge descent (or grabbing the bridge Banshee), that's fine, though you'll only have the usual six Marines and there are a few drawbacks such as only having one Banshee available, and not having it to help you keep Marines healthy. I'll describe how you can adapt the working.
First get to the stage where you've made the crashed Pelican area safe, killed enemies who were in the curving tunnel or down the hill, got your squad of six or whatever, and have saved a checkpoint which you can return to if the two-Wraith area doesn't spawn favourably shortly (an issue covered in the earlier plan).
Without triggering the two-Wraith area yet, rocket the platform Banshee down and move the Scorpion into the curving tunnel. Board a Ghost and draw the Marines back to the start of the Pelican area, then whizz away and board the Banshee. Quickly drop yourself off at the Scorpion and drive it into place as a blockade in the tunnel (see the earlier plan) then dismount. During all this time the Marines should've been safely distant, chasing after you. The only danger is that a Ghost pilot could spot you before you get away on the Banshee, and follow you. To minimize that possibility, it would be good if the Banshee was upright, ready for quick boarding. You could rocket it from distance to get it upright if you like; maybe rocket it closer too. Incidentally, if you'd prefer to use two Ghosts for the blockade, that's workable in a similar sort of way.
Reboard the Banshee. At this point things will be much like they were in the earlier plan and you can continue with the rest of the working as I described there, except that you'll need to open a tunnel door and there are two new issues to take care of in the cavern as follows.
Trigger the bridge checkpoint
In the cavern, trigger the 'bridge checkpoint'. In normal play it's triggered when you get about a metre past the first pair of glass panels on the bridge, but in your Banshee you can enter the trigger zone in some other manner, such as skimming low across the middle of the bridge or thereabouts. It seems to be a long low cuboid about as wide as the bridge, stretching back to the cavern wall as indicated in the picture.
The reason you want to trigger this checkpoint now is so there's no chance of getting it during or after the battle later - something which would prevent you being able to revert for another play. This wasn't a concern with the earlier plan. In that plan you never triggered the checkpoint you'd normally get when heading through the exit passage into the first ground battle, and consequently (because of a strange dependency) the bridge checkpoint never triggers.
Eject nearside Shade gunners as needed
The other cavern issue is that the two nearside Shades will be upright. You may have a chance to blast over the one on the right while it's vacant, but if a Shade gets manned you'll need to eject the gunner if you want him to join in with the bridge retreat. You can do that fairly safely after everyone else has retreated over the bridge, though I'd suggest getting a checkpoint beforehand in case it goes badly. You could use the aforementioned bridge checkpoint instead of a tunnel checkpoint, but you'll need to get well clear of enemies before the game will actually issue it. Easiest thing is to go back into the tunnel a short way.
Getting the Banshee pilot
In the first plan I described my standard method of getting the Banshee pilot down when using Normal or higher on PAL Xbox. On Easy he seems too weak to survive a direct impact with the ground (even if he's a red, which you're unlikely to get anyway), but I was able to get him down two other ways. I'll describe these now, then talk about the situation with NTSC and PC. In all cases, first get a delayed checkpoint not far off, in readiness for repeat attempts.
Cushioning method
If he hits a vehicle you thoughtfully placed on the ground, it can cushion him enough that he survives with good health. I put a spare Banshee in his typical landing spot - his very own Banshee actually - flanked by two Ghosts for extra coverage (though maybe those were ineffective, I don't know), and a couple of times he bounced off the Banshee straight into a Ghost! On another successful occasion he appeared to deflect off the front edge of a Banshee leg. Maybe a Wraith would provide better cushioning if you don't mind shunting one here from the ice patch, but I didn't try that.
To work efficiently when using this method, first do some herding so he ends up on the platform rim, ready to be easily nudged off, then get a new delayed checkpoint. Nudge him off a few times to see where he's likely to land (which will partly depend on how you nudge him off), then revert, position your cushioning, and get a fresh delayed checkpoint for making attempts.
Ledge stop method
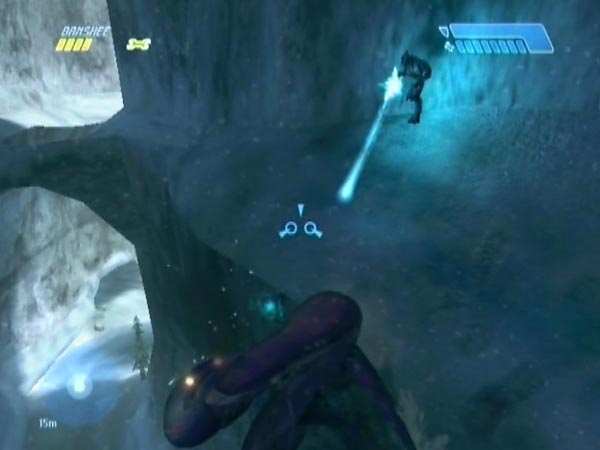
First get him down onto the ledge. Sometimes he stops on the ledge with the standard method, but that's pretty rare I think, so here's a better way. First do some herding so he ends up on the rim, close to the cliff wall. You also want him partly over the edge, looking barely supported. You might be able to effect that by gently pushing with a Banshee leg if needed, though I'd recommend getting a new delayed checkpoint beforehand. When he's suitably precarious, get a new delayed checkpoint for making repeat attempts at the next bit. Hover against the cliff face below him. As he eyes you he tends to keep adjusting his footing and this can soon make him fall, but if it's taking too long you can be more direct and fly up to his feet, nudging them a little, hoping to free him up like that instead. Either way, cushion him with the Banshee and let yourself sink down, giving him support along the way (possibly intermittent, as he may bounce a bit). You may lose him at some point, but with any luck he'll stop on the ledge, thanks to how much you slowed him down. The lower he is on the ledge, the better, because he'll have less remaining distance to fall.
Get yet another delayed checkpoint for repeat attempts at the next bit. Make him dive off the ledge to get cushioned by a relatively high part of the cliff base somewhere, e.g. off to the right corner as you face the cliff. Maybe he'll bounce to the ground or maybe he'll stop, in which case it shouldn't be hard to make him dive off to the ground (though I'd recommend getting a delayed checkpoint for making repeat attempts at that too, just in case you accidentally squash him). Phew!
Using NTSC and PC
With NTSC and PC you can expect the Elite to die just before reaching the ground with the standard method, because of system differences. However, maybe the ledge stop method could work. You could certainly get him onto the ledge without damaging him. If you get him low on the ledge and he hits the cliff base high, that could be a short enough distance that he wouldn't die in mid-air, though whether he'll be strong enough to survive the impact I'm not sure (it may depend on difficulty level). If not, possibly you could get him down the rest of the way in a similar manner to the first fall - though it would probably take a lot of effort.
Enemy numbers
Regardless of difficulty level, these plans potentially give you 35 enemies in the battle, comprising the usual 21 cavern covies plus 14 reinforcements from the two-Wraith area, including the Banshee pilot. In detail:
- Cavern covies: 4 Elites + 5 Jackals + 10 Grunts + 2 Hunters = 21
- Two-Wraith area covies: 6 Elites + 3 Jackals + 3 Grunts + 2 Hunters = 14
- Total: 10 Elites + 8 Jackals + 13 Grunts + 4 Hunters = 35
Getting the Banshee pilot with NTSC/PC may be problematic, but I'm not sure. Enemy numbers can also be augmented by a further two Elites and a Grunt without much trouble, as described on the next page.