More set-up tips
- Spare weapons
- Handy vehicles
- Extra enemies
- Blockades
- Fast-start checkpoints
- Adding Wraiths
- Further options
- Using a base save
Spare weapons
To help keep my plans brief I didn't say much about weapon provision, but I'll cover that now.
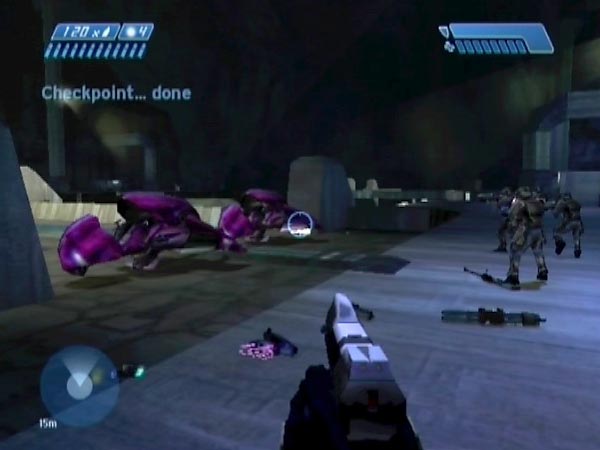
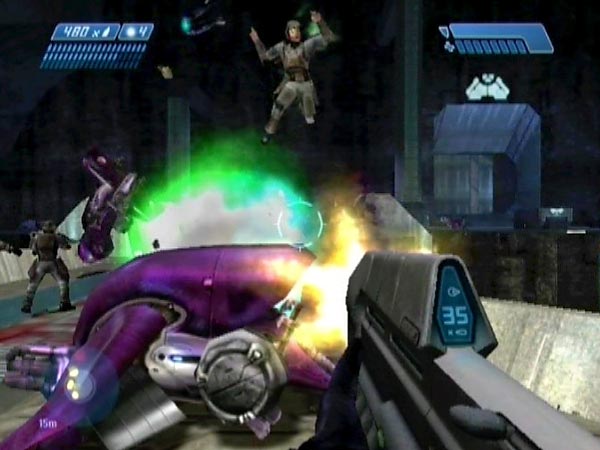
Spares for the start of battle
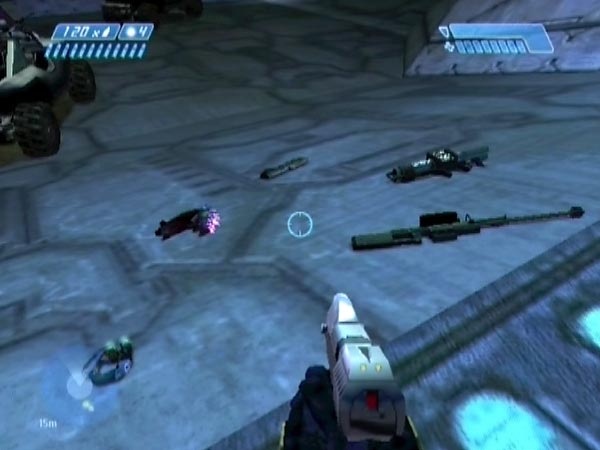
For a good flexible save you should move some spare weapons to where you can conveniently choose from them before getting into battle. You could do that sometime after covies have retreated into the cavern.
Ideally you want to be able to pick any combo (see pic, in which I'm already carrying a pistol and plasma rifle). You should already have carried a full sniper rifle and rocket launcher with you from earlier, and you can get a full pistol, AR and plasma rifle from the supplies in the two-Wraith area. The cavern supplies can give you a pistol and AR too of course. A plasma pistol and full needler can come from earlier areas; just remember to pick up any desired dropped weapon beforehand to try to stop the game removing it. For a plasma pistol on 100%, let a Grunt with a plasma pistol man a Shade on the first bridge before killing him.
It's also possible to move some weapons as part of your advance preparation after descending from the first bridge, if doing so. You can throw them down from the bridge, and on Heroic or higher there's also a plasma rifle on 100% to get from a Banshee pilot. If you care to trigger the second room in advance, which it's ok to do, there are some UNSC supplies you could plunder, but only use those for ammo. When I moved the pistol and AR from there to somewhere near the cavern, they later vanished, so that seems pointless. But you can top up your original pistol and AR to leave those somewhere.
Spares for use during battle
You might also like to move some weapons to various places in the cavern itself, for picking up or getting ammo from during battle. In particular you might want some needlers there, as none of the usual covies will be dropping one. Obviously it's best if there are no covies around when you're doing this, so the natural time to do it is after a bridge descent as just described. You can potentially get several full needlers if you want, by combining needlers from Grunts in the first room and on the first bridge. If you're going to want plenty, make sure the first room spawns without Jackals (it's random), so you'll have more Grunts.
Even after the cavern is teeming with covies, there are still possibilities for placing weapons there. If they've done a bridge retreat you can safely place weapons anywhere along the near side, and also quite a way across the bridge though it'll help if you first draw most enemies away from it. A weapon can also be moved through enemy territory by carefully blasting it along from a safe height, though it would be pretty tricky here due to the high density of enemies.
Rocket launchers
You'll certainly want a rocket launcher handy for the battle, so take heed of this warning. When you trigger the tunnel checkpoint after the two-Wraith enemies spawn, any rocket launcher you're not carrying will get removed from the game, even if it was picked up at some point! So make sure you're carrying a full rocket launcher at that point (I recommend having a full sniper rifle too).
This one-time-only removal event means that you won't be able to have more than one launcher available from earlier in the level. You could add an extra from later in the level (the enemies in the cavern don't seem to get removed while you're gone), but this entails going over a loading point which makes the Marines freeze (or go passive if left in a Marine-retaining hog), so you'd only be doing solo battling. In addition, some of your spare weapons may vanish.
Handy vehicles
As well as spare weapons placed around, you could arrange some vehicles ready for battle use, further increasing your attack options. Some of the vehicle placement could be done after doing a bridge descent, but you'd do the rest after getting the two-Wraith enemies into the cavern.
Having a healthy Banshee would be good - a Ghost too - and you could wreak some major carnage with a Scorpion, though it's rather clumsy. If you're going to have the Scorpion handy, I'd suggest having it somewhere ahead of where your Marines are going to be at the start, otherwise you'll end up having to drive through Marines, which is a recipe for frustration and disaster as they're so idiotic. I'd put it in the cavern.
Warthog considerations
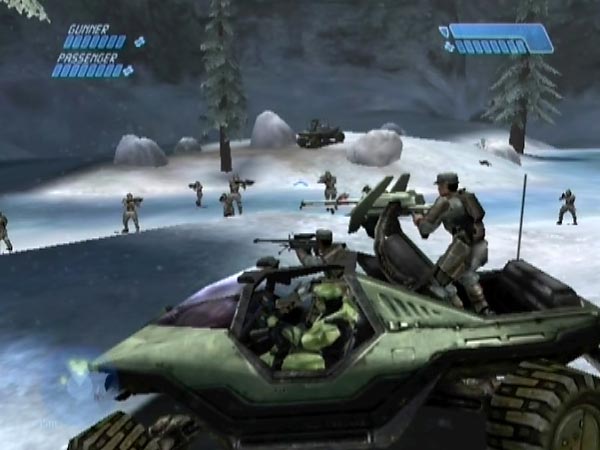
Then there's the Warthog of course, great for charging through enemy territory and doing a lot of squashing. You can moreover get an extra hog at the same time as getting extra Marines, and in that case one of them is very usefully Marine-retaining. I certainly recommend having that one available for battle (if not both), so you can position chain-gun support when you want it, and so you can have a selected gunner already aboard at the start of your save. If you got seven extra Marines, you can use the sergeant. Stacker and Johnson are both rather entertaining on the gun.
Note also that if the hog contains only Pelican Marines invisible to the enemy (as with the usual seven extras trick), it won't even get targeted - which can obviously make a big difference. If you want to make sure to have two Pelican Marines, pick them up as soon as they jump over the step into the Pelican area - before other Marines get close - having moved the hog there beforehand (drive it within a few metres of the step then blast it the rest of the way with the Banshee to avoid triggering the Pelican area before you're ready). You can see such a pickup in BCM48. In case you're wondering, they won't board while running to the step.
Another use of the Marine-retaining hog is to position sniper support, if you're interested in that. With Stacker on the gun and sniper Johnson in the seat, you could have a fully equipped Sargemobile!
However, note this important point about hogs. You may encounter a speech anomaly whereby passengers lack some of their normal speech on most or all plays of the battle. In particular the gunner usually won't shout chain-gunning lines, which is no fun at all (sometimes he may be ok, as if something activated his missing speech early on in the battle). Probably the seated passenger will likewise usually be mute when he kills, though that's harder to notice unless he's a sniper. A further symptom is that when you make a first passenger dismount, there's no dismount line, which again makes things feel rather flat (you can use that as a quick test for the presence of the anomaly I think). The trouble may already be present when you get your battle start checkpoint, or it may start up at a certain fixed time into the battle - maybe even within just a few seconds of your checkpoint. I'm not sure what's going on, but if you get this trouble you should try to fix it then get a new battle start checkpoint. Here's what I suggest (though you might want to check back here later for any update, as I may yet get a better understanding of things).
With Marines aboard, drive clear of any other Marines (go back down the tunnel a way), wait long enough that you know the speech anomaly is present, then get the gunner dismounted (he'll dismount silently) and pick him up again. Then wait with the motor running until you get a belated shout - which could take around 21 minutes based on my experiences so far. Get a new checkpoint and see if things are ok now. If not, revert and see if shooting a standing Marine seems to fix things (no need to kill him). If so, you can do that and get a new checkpoint. If not, one other thing you could try is getting different passengers, as the anomaly sometimes only seems to affect the originals.
Ghost use by Marines and covies
Bear in mind that Marines are able to man certain Ghosts in the cavern. Specifically, any Ghost from earlier in the level except for the one near the crashed Pelican. Personally I'd usually want to avoid that, in the interest of self-preservation! But if you want some bozos cruising around like maniacs, you could arrange things to encourage it. Elites can man those same Ghosts too, and in this case the prospect has rather more appeal because you can enjoy rocketing them spectacularly. So you might like to leave a few in enemy territory.
Extra enemies
When setting things up with advance preparation after a bridge descent, you have the option of adding three extra enemies who can sensibly take part in the battle - which could raise the enemy count to 38.
Early Shade Grunt
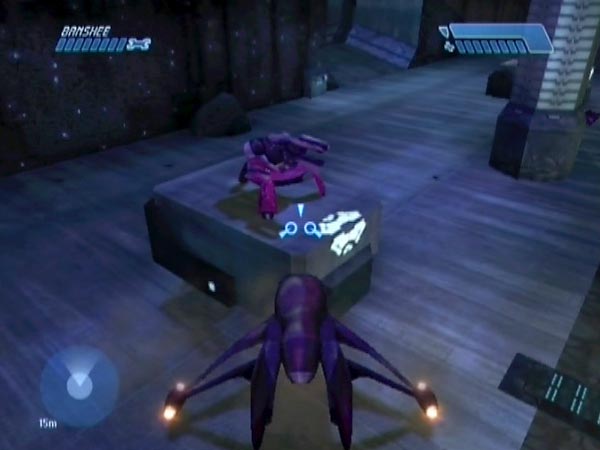
Below the first bridge is a Shade whose future occupant is sometimes known as Herbie - a widely travelled fellow who carries a needler. Move the Shade to the cavern in advance, and you'll later find him manning it there, or standing nearby or on top of it if you left it overturned.
If he's on foot on the ground, he'll have an instinct to run back through the level when you're around. But he can be quite hesitant, so there's a good chance he'll still be standing around near the Shade when you get a battle start checkpoint. It would help to minimize the time you spend in the cavern or near the entrance, during your set-up work.
If he's in his Shade though, or up on one of the large blocks, which you can arrange by having left the Shade overturned on a block, he'll stay put. You can get the Shade onto a block with a Banshee blast and maybe a bit of pushing to help it up, before it falls back from the edge.
Note: All Grunts can run to man Herbie's Shade, even if he's still alive. It's quite amusing to let them run to it one at a time before killing them. In contrast, it seems that a cavern Shade can only be manned by the two or three Grunts originally assigned to it.
Pelican attack Ghost pilots
Just past the crashed Pelican area are two Elites (one in the curving tunnel, one down the hill), who teleport to their Ghosts as you advance. In each case, if you moved the Ghost to the cavern in advance and you avoid killing the Elite before he teleports, you'll later find him manning it there, or standing nearby or on top of it if you left it overturned (note: for advice on controlling where he's standing relative to the Ghost, see here in my article on Elite fireworks).
As with the aforementioned Grunt, if he's on foot on the ground he'll have an instinct to run back through the level when you're on the scene, but he can be quite hesitant so there's a good chance he'll still be in place at the start of battle. If he's aboard the Ghost on the ground, he'll be mobile and can come after you, albeit rather clumsily. If aboard the Ghost on a block however (as seen in BCM215, BCM216, BCM217), he'll stay put, just rotating and firing - and making a lovely target for a rocket launcher. You can get a Ghost onto a block just by driving it up (raise the nose). When on foot on a block, he'll likewise stay put.
If you want to set things up so both Ghosts are manned and mobile, I'll warn you now that it can take quite a bit of perseverance because of their navigational clumsiness. When you fly around in the cavern to effect a bridge retreat, the Ghosts will move about and can soon end up going into the chasm or getting caught up on rim of the bridge, perhaps teetering over the edge. If they're still both ok by the time you've done that though, you're in with a chance of completing the set-up ok.
Other possibilities
As for other candidates, it might be possible to get the gold Elite from the first bridge into the battle. You can certainly get him to the cavern, but I haven't checked into the practicalities of merging this with the other set-up work, nor am I sure what his behaviour would be. He might make a useful addition, though it would obviously require special effort to arrange. The Hunters in the second room (on Heroic or higher) could do with checking too, though I'm not sure I'd even want another two Hunters. Four is already bad enough! There's also potential for getting the level's first Banshee pilot into the battle. I'll try that out sometime.
Blockades
A few words on the uses of blockades now (e.g. lines of Ghosts, though other objects can be used too).
Entrance blockade
Sometime after the enemy reinforcements have retreated into the cavern, you could build a blockade to keep the Marines back from the entrance. A line of Ghosts is ideal, and these can even be ones which Marines are able to man (most of the ones from earlier in the level), as long as the enemy have retreated and are thus too distant to tempt a Marine to hop aboard (though they might do so after you've released them and hostilities have broken out). The blockade will give you added flexibility in various ways.
For starters, any time you fancy doing some solo battling, you can simply cross the blockade to do so, leaving the Marines out of the action. When you want them in battle, you can blast the blockade open (good fun) or drive through it in a hog or whatever. Of course, another way of going solo is to kill all Marines assembled, but that can be time consuming and hazardous, especially with a big squad. Having a blockade is easier.
Another major benefit is that while the Marines stay blocked you can safely adjust the enemy layout by flying around in a Banshee to draw covies to a particular area (e.g. to the bridge or to the right of the far side), then before they have long to disperse, promptly get a fresh checkpoint to let you replay the new situation if you want. The initial enemy layout can have a big effect on how the battle plays, so this type of easy modification is well worth playing about with to reap the full potential of your save. And even if you're not looking for a particular layout, simply getting the enemies jostled around a bit can make the battle significantly different. For example, maybe some of the Hunters will be on the bridge when you attack, rather than all hanging back.
Note: Drawing enemies to certain areas (e.g. the ones I mentioned) can also be done with Marines on the loose, as long as you fly carefully to make sure they don't advance onto the bridge where they'd soon start firing. Plus there mustn't be a sniper running around.
The blockade would also let you selectively cull the enemy to modify the nature of the battle, though this can also be done quite easily without a blockade if the enemy have retreated and no sniper runs forth. For example, maybe you fancy doing some battling without those darned Hunters bombarding you - what a luxury! You can do the culling with a sniper rifle (it's good if you've got a spare so you can still enter battle with a full sniper rifle if you want), then get a fresh checkpoint for replaying.
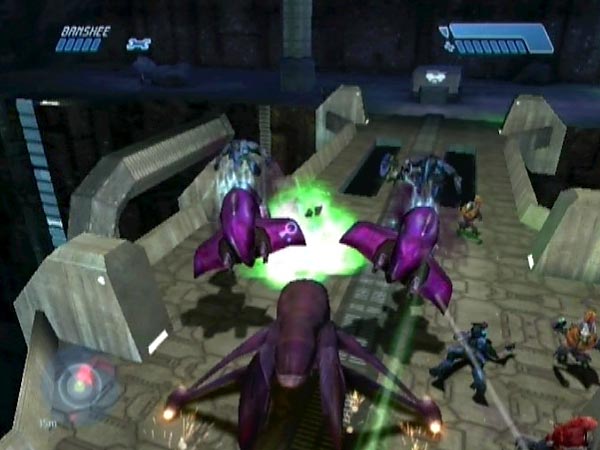
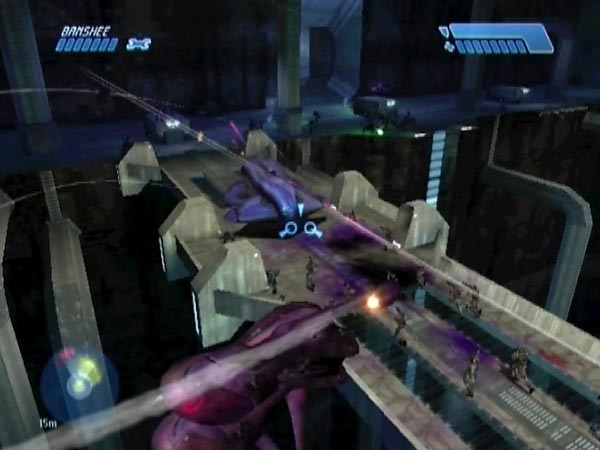
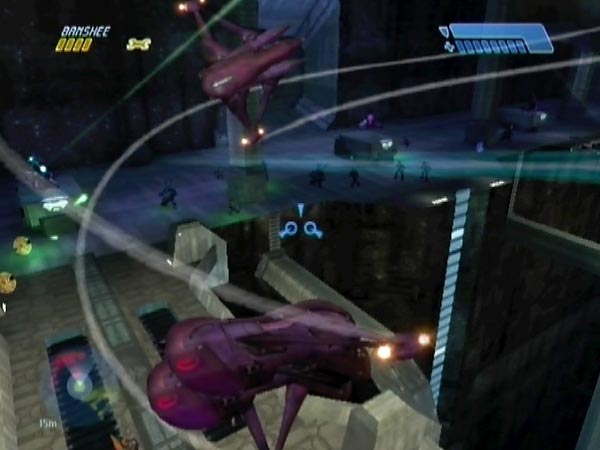
Blockading the enemy
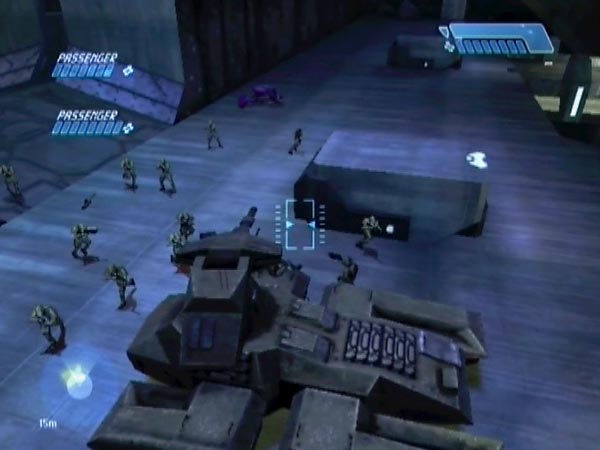
If you place a blockade on the bridge (two Ghosts will do), it'll stop covies retreating any further (and stop certain extra enemies departing if they were on foot), and thus you can end up with a nice mob clustered near it, resulting in something of a two-stage battle. Such a blockade is also good for setting off huge explosions when the ground in front of the blockade is littered with plasma grenades (see pic), plus you can enjoy watching the action with a sniper scope from on top of a pipe on the far side of the cavern as your squad tries to tackle things.
There are other ways you could hinder enemy movement too - blockades or just items left around - so have a think about it. There's lots of material you can use, and most Ghosts can be left upright without any danger of anyone boarding them and ruining your work. As mentioned earlier, the only Ghosts which Elites and Marines seem able to man in the cavern are the ones from earlier in the level, except the Pelican Ghost.
Fast-start checkpoints
At the end of my first plan I showed a picture in which the battle start checkpoint was obtained on the penultimate hump in the tunnel, with Marines gathered behind and vehicles ahead. That's a nice general-purpose arrangement, but another option is to get a delayed checkpoint at some more advanced position (possibly after having got a standard checkpoint), allowing both yourself and Marines to get into the battling sooner. When you're doing battle after battle, that can significantly improve things. You can trigger a tunnel checkpoint and keep it delayed (by jumping if on foot, or firing if you choose to be in a Banshee or Ghost) until you're where you want to be; and as long as the game doesn't consider you under significant enemy threat, you should then be granted the checkpoint.
At the start of the cavern
One simple example is to get a checkpoint just out of the tunnel, with any Marines drawn into the cavern. When doing a bridge assault, you'll be quickly into the action and the Marines won't take as long as usual to catch up with you. You wouldn't want a sniper on the loose, as he'd probably start shooting before you get the checkpoint (this would be a concern for other advanced checkpoints too). But if he was in a hog and you parked it so he was quickly blocked, you could be ok that way (and if it doesn't work out you could just try again).
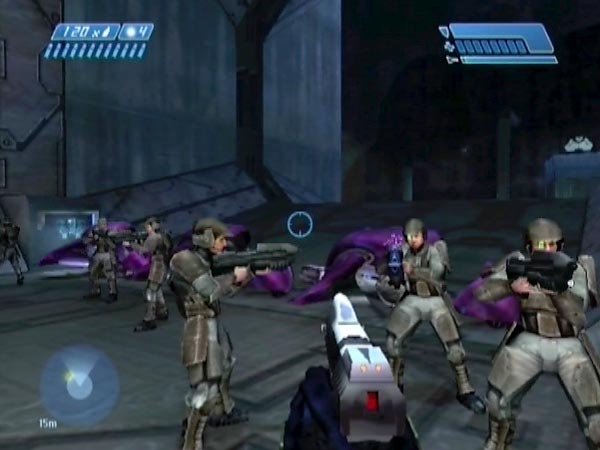
In the picture here I've got weapons handy and a Marine-retaining hog just ahead as usual, ready for me to either board or empty. I put the Banshee and normal hog near the right of the entrance, with the Banshee placed so I can take off without any Marines being in danger of getting squashed. It's good to plan your layout carefully in that sort of way, so things will be as convenient as possible.
At the start of the bridge
If it's the bridge assault you want to focus on though, you can go one better and get a checkpoint at the start of the bridge - again with spare weapons handy and Marines close by. In this case you could be into the battling in just a couple of seconds. To get a checkpoint here though, you may need to be hidden from the enemy (who may have spotted you) so the game doesn't consider you under enemy threat. In the picture here, I hid behind the left bridge stanchion.
Note also that prior to getting the checkpoint, it's possible to've drawn lots of enemies onto the bridge, so you've got a big mob to tackle right away. Nice! You can attract them by flying in with the Banshee (after triggering a checkpoint to delay), getting the attention of distant enemies, and moving back to hover somewhere near the start of the bridge. If Marines are loose, you'll need to've backed off before they reach the bridge, so they don't advance onto it yet. But optionally you could've set up a blockade at the start of the bridge, serving the dual purpose of giving you more freedom in trying to attract enemies, and allowing you to fight solo when you want (assuming the blockade doesn't get blasted by Hunter fire during the battle).
Note: When setting up weapons and stuff so close to the covies, Hunters may send long-range shots at yourself or Marines if you dawdle long, so it may take a few tries before you manage things ok. It's also possible that Shade fire could damage Marines if they're spotted. If Marines are temporarily kept back by an entrance blockade while you set things up at the bridge, that would help.
Special locations
You can also get checkpoints specialized for other battle plans. In particular, if you fancy an extended spell of long-range mischief from a certain location, you can potentially get a checkpoint at that location, already armed with your desired weaponry (e.g. sniper rifle and rocket launcher).
Adding Wraiths
Instead of ejecting the pilot of the high Wraith, you can push the Wraith to the cavern to become part of the battle. It's pretty easy, and you can move it most rapidly by getting under its nose (like in the first stage of flipping it) and carrying it forward a way. Other times you'll be nose to nose and stationary, but if you just back off enough to give it a bit of a ram, you'll be able to get it moving. Just try not to back off so far that it might fire! It doesn't put up any troublesome resistance, so you've got pretty good control. In view of the dangers though, you may want to get a few checkpoints along the way to consolidate progress.
You can potentially get it a good way across the bridge before having to depart due to the danger of enemy fire. I was able to get it almost to the far end after first luring most enemies away to the right (especially the Hunters, who'll pose a danger to it if they open fire). It seems to have no inclination to move, so it should stay where you leave it. When you destroy it later, you get the line you normally would've got outside: "Looks like that armour wasn't so tough after all, let's mop up the rest of 'em".
Another idea is to put it somewhere along the near side ready for an opening skirmish, or to let it bombard you from distance as you make your attack across the bridge (there can be a lot of covie casualties from the bombardment too, which is always good for a laugh). For example you could put it on the broken bridge.
To try out different Wraith locations efficiently, use a base save in which you've already moved it to the cavern entrance or thereabouts (with the other covies retreated). You could also have advanced the Marines to a temporary blockade in the tunnel leading to the cavern, so it won't take so long to finish off the set-up work each time.
The ice patch Wraith too!
The ice patch Wraith can be added to the battle too, but it's quite different because it tries to return to its patch. The hardest part is getting it away from the patch in the first place, something I initially gave up on in frustration but got better at later. My advice is to ram it and get underneath to try and carry it to the slope leading down into the tunnel; and if you only get part way there, try to keep things going with normal pushing and good shepherding.
Things become much easier once on the slope but it still has an instinct to return, and that continues into the cavern. However, if you put it halfway across the bridge or further, it tends to end up with one fin against a bridge stanchion in its effort to return, as if not having enough sense to travel up the centre of the bridge. So with any luck it'll still be around for the battle. I also tried putting it on the broken bridge and there was some indication that an overturned Shade could hinder it from returning, but I didn't persevere with that.
Further options
Here are a few more options or variations of the set-up work to consider.
Using a Banshee less
The plans I gave made heavy use of a Banshee, but if you want to preserve Banshee health (especially if you have no spare you can put aside for the battle) or simply do things differently in places, that's fine. Just modify the working.
In particular, when leaving Marines behind to get blocked in the curving tunnel, you could be in a Ghost or Warthog instead of a Banshee. You can re-do the blockade after moving the vehicle past that point and drawing Marines back (though in the case of a Ghost, there's potentially one just past the blockade which you could use). A hog could be good for getting Ghost pilots ejected too, though you may need to periodically get clear to recharge your shield. With a hog you can also eject a Shade gunner by driving into the Shade from the side.
Marine options
With my first plan, obviously you can modify things to just get two or three extra Marines if you prefer, or no extra Marines at all (you'd park the Banshee at the door below the bridge and go up in the lift to trigger enemies). With PAL Xbox it's also possible to get the seven extras without the four Pelican Marines becoming invisible to the enemy (not that the invisibility tends to notice much in the heat of battle), by completing the trick sufficiently fast. But in all these cases you should also make sure to trigger the bridge checkpoint in the cavern later (as detailed in my second plan), so you won't get it in the megabattle.
With both of my plans you can of course eliminate any Marines you don't want, though you'll need to wait for forgiveness if declared a traitor. In particular, maybe you'd like to eliminate the sniper so he won't be stealing your kills and shooting allies in the back, or so the battle will be harder. Or maybe eliminate all Marines to concentrate on solo battling (but you could always do that after creating a save featuring Marines).
Cover and rocket targets
You could leave some Ghosts or other objects around to potentially use as cover (especially when advancing across the bridge), though things can obviously go flying when Hunter shots sail in, so it's safest to stand back a bit when using them. You can also place objects with the idea of rocketing them later, either to send them tumbling into enemy ranks or to kill enemies using them for cover. Such mischievous 'rocket targets' can be good fun.
If placing Ghosts upright, you'll probably want to use ones which nobody will man. Namely, any from later in the level, plus the Pelican Ghost. The best time for adding objects is during some advance preparation after descending from the first bridge, but they can also be added after enemies have done a bridge retreat, by first drawing most enemies away to minimize the fire you'll take.
Triggering a bridge retreat earlier or not at all
Instead of triggering a bridge retreat after covie reinforcements have reached the cavern, it's perfectly fine to do it beforehand, right after triggering the retreat to the cavern. When done early like this, the reinforcements no longer head for the supply area; they'll go straight for the bridge. That can save time, but if you return to the two-Wraith area and find that a covie has had an accident (causing you to retry things), you would've wasted time triggering the retreat. So I prefer to leave it for later.
Another option is to omit the step of triggering a bridge retreat, so that at the start of your save, there are still lots of covies on the near side of the cavern, including the reinforcements at the supply area. Quite different from having one big concentration. There are various ways you could fight the battle, and you'd still be able to trigger a bridge retreat of course.
Mad Banshee
If you let the platform Banshee get manned, it's possible to lead it into the cavern with a Banshee of your own and then whizz off, so you can eventually face it as part of the battle. It'll have weird behaviour there so it would be a pretty odd addition, but if you're in a Banshee you can enjoy chasing around with it while the battle rages below, and often it gets blown up by covie fire aimed at you! You should lead it into the cavern after the other covies are out of the way. It's extremely good at tailing you, but one way to give it the slip to avoid it following you back out is to fly up to the ceiling then freefall to get distance from it.
Fighting without music
If you want to fight without the usual music, cross the loading point after the cavern to end it. But any Marines will freeze (or go passive if left in a Marine-retaining hog), so this is only really an option for solo battling. Some of your spare weapons may get removed too. Possibly that's fickle and you could try again if you lose anything important, but I haven't checked.
Using an extra Banshee
My first plan used two Banshees but there are three available after you descend from the bridge. One of the later two could be placed at your future battle start location in advance, ready for use in battle, and the platform Banshee (blasted off as usual) could be reserved for getting its pilot down, so you wouldn't need to be quite so worried about taking Banshee damage.
Using a base save
If you want to create multiple battles, perhaps with differing positions of Shades and other stuff in the cavern, you can save time by using a base save in which a lot of the set-up work has already been done, for the range of situations you're interested in. Here's an example of creating a good base save.
Descend from the first bridge and get the following things done. Get the twin bridges Banshee. Move the cavern Shades to more favourable positions for the sort of enemy defences you might want; or if you're never going to want them upright, just disable them. Move the Pelican attack Ghosts and first ground Shade to the cavern, in case you want their occupants in the battle (you could always quickly remove these items if not, e.g. blasting them into the chasm). Move some Ghosts to the cavern, or near it at least, for potential use as blockade material. Preferably include three for an entrance blockade, though don't actually build it yet. Also position a Ghost ready for battle use. Move spare covie weapons to where you'd typically like them for picking up before or during battle. Blast the platform Banshee down. Set up a Marine blockade in the curving tunnel using the Scorpion. Save a tunnel checkpoint to finish off.
In that example the Scorpion was using for the blockade in the curving tunnel, but if you're interested in setting up battles in which the Scorpion is on hand, you could instead place it in the cavern and use two Ghosts for the blockade, or a Ghost and a Banshee.