Bridge Banshee grab

Posted April 8th 2016, updated later

Associated movies

  • BCM175 - Heroic; Bridge Banshee hunt (5:49)
  • BCM176 - Legendary; Segmented PAL speed run in 5:47 using a Banshee grab (6:12)
  • BCM177 - Legendary; PAL speed run in 5:54 using new Banshee grab method (6:19)
  • BCM191 - Legendary; Arch method breakthrough (8:06)
  • BCM199 - Mostly Heroic; Ten amusing episodes (4:24)
  • BCM205 - Mostly Heroic; Ten more amusing episodes (4:22)

But see also BCM190, 241, 329, 413

Introduction

On Heroic and Legendary there's a marauding Banshee encountered at the first bridge - the 'bridge Banshee' as I call it - and remarkably it's possible to get the pilot ejected to grab it for your own use! That discovery was made by Sligfantry, who then mentioned the ejection possibility to me - albeit without saying how it was done - causing me to go feverishly Banshee hunting for myself. And as it turned out, we ended up with different methods - both of which were later greatly improved. So you even have a choice about how you grab your ride! In all cases, ejection occurs when the Banshee tips over too far, a phenomenon already known (e.g. see BCM171).
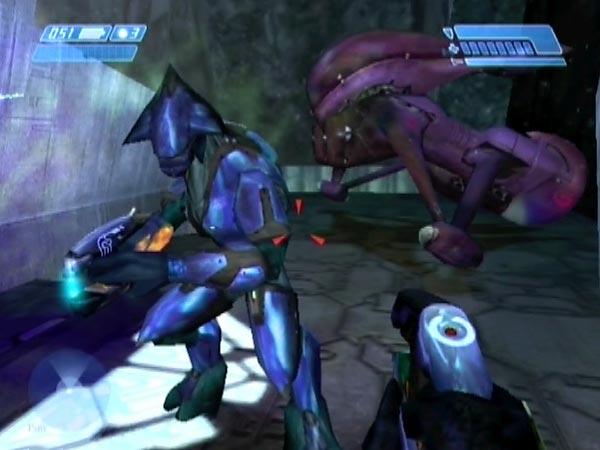
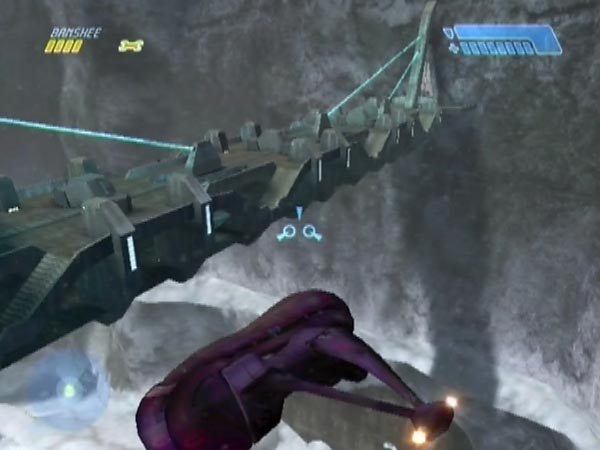
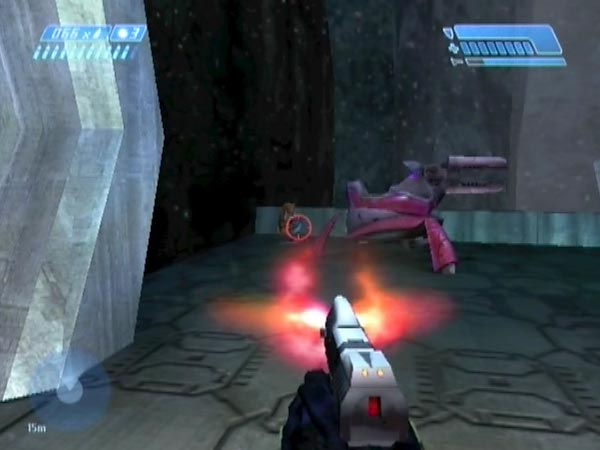
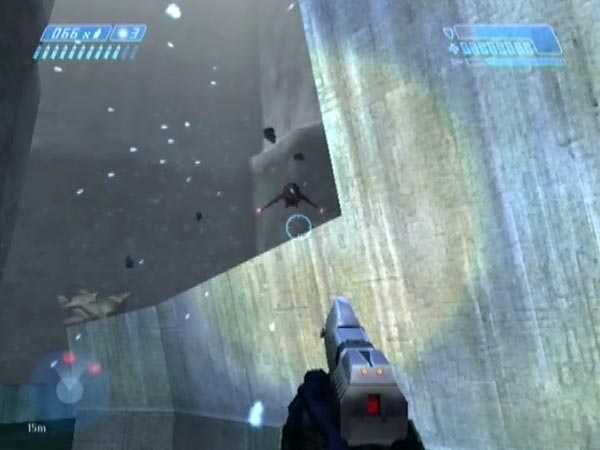
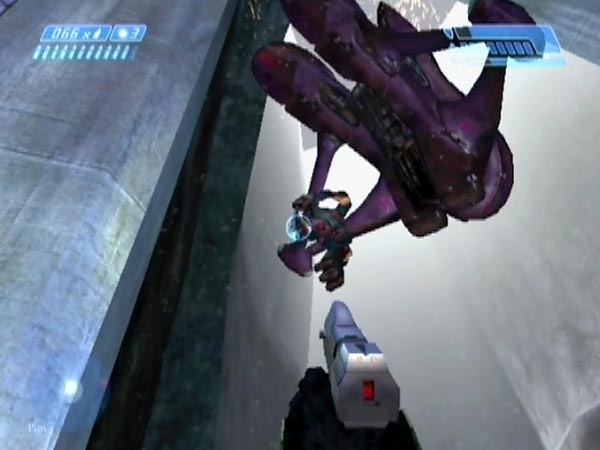
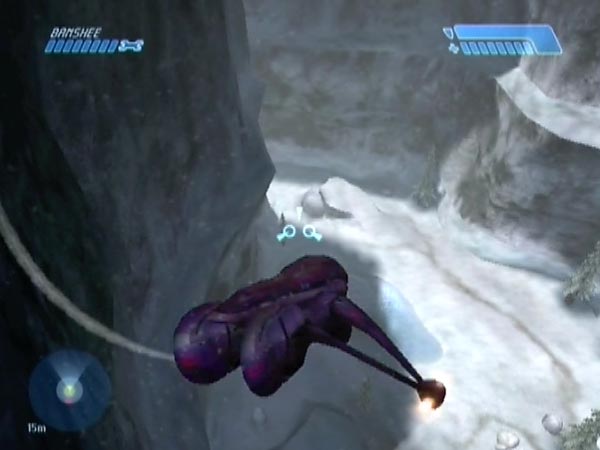
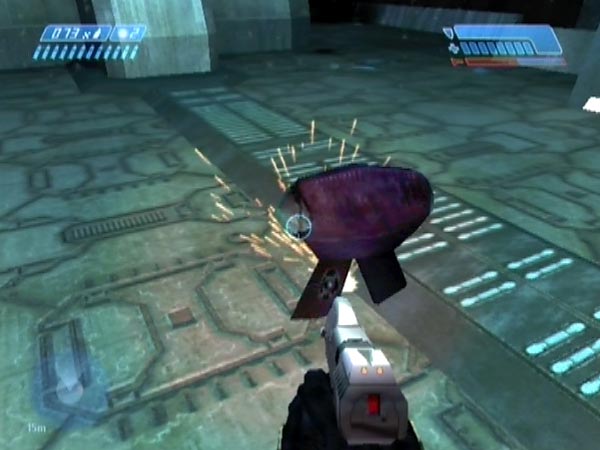
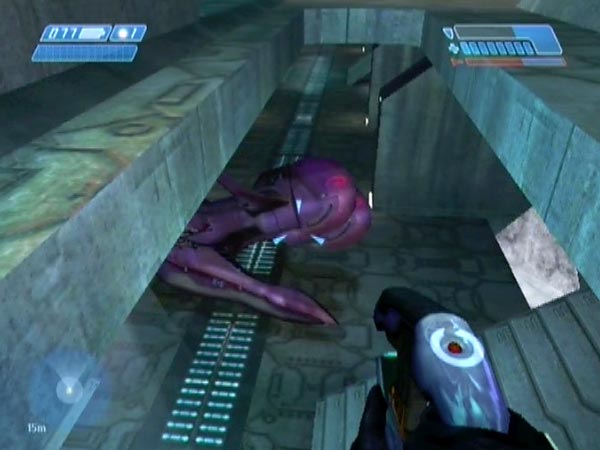
Lost your ride chum?

More on how things developed

After further exploration Sligfantry went public on April 3rd with a tutorial which involves getting the Banshee stuck in the bridge rim on the left. Meanwhile I'd hit on my own way, getting it into difficulty in the arch above the entry door - a possibility which it turns out Sligfantry had likewise encountered, though in a different and rather problematic form, which is what led him to focus on the rim instead. Following his announcement I released BCM175 showing my original Banshee hunt (see my first two pics here), then BCM176 showing the arch method (as it then was) used in a segmented speed run, to demonstrate the potential.

Of course, this topic was highly relevant to speedrunning, because a prompt grab will allow a much faster time - something I highlighted in a forum post, estimating a time-saving of perhaps over 50 seconds. Partly with that in mind, I refined the arch method, bringing better control and making it viable enough for use in an actual speed run, though the odds of success were still quite low. By way of demonstration I released BCM177 on April 13th: the first speed run using a Banshee grab, and presumably a PAL world record - except only an unofficial one as the speedrunning world sadly doesn't maintain a PAL table - an omission which has effectively marginalized a whole swathe of players over the years.

Banshee grabbed, wahoo!

Meanwhile however, on April 12th Sligfantry had posted a video showing a stunning improvement of his rim method, having found an amazing way to board fast, though success was fickle. That seemed like it would give the fastest possible grab, beating the arch method by maybe 2-3 seconds.

By then the speedrunners were on the trail, and on April 15th ColdGrunter used the improved rim method to set a new world record of 4:50 for NTSC/PC, then got down to 4:42 the next day - 51 seconds faster than the original record. More importantly for the long-term though, he'd also found a more consistent way to get the pilot out, though the overall grabbing success rate remained low. As far as Legendary runs go, the classic 'bridge fall' technique for NTSC/PC became henceforth redundant. Strange to think that would ever happen!

But wait, we're not done yet! When I eventually got around to doing some more investigation on the arch method, I made a breakthrough which rocketed my success rate as high as 85%! The relatively high reliability was obviously appealing to speedrunners, and has made it popular I think. Update: At the very end of 2017, GarishGoblin used it in setting a new world record of 4:41, and also a full-game record of 1:14:45.

Using their own toys against them!

Uses of a grabbed Banshee

A grabbed Banshee can be used in various ways, but for starters you could have some novel fun killing the bridge troops, though you'll need to do a bit of low flying to trigger the ones in the second half of the bridge. You could also drop yourself off on the Pelican to have fun trying to ride it down!

Give 'em hell boys!

Of course, the Banshee can be used for tackling ground troops later too. But also, you can make use of the grab to easily get seven extra Marines, as seen in BCM241, and then (see pic) you can enjoy fighting the first ground battle with a squad of ten Marines instead of the usual three! See BCM315 for further examples of such battles.

Grabbing the Banshee also lets you descend from the bridge of course, so it gives a rather novel bridge descent method, should you wish to use it like that. But unlike all other methods of getting off the bridge, you have complete freedom of movement, so you might not even need to go down to the ground. In the past, many uses of descent methods have been to enable you to then fetch a Banshee and do some novel stuff. But nowadays you have the option of simply grabbing the bridge Banshee!

One other application of the grab is in getting the Banshee for a vehicle collection. Actually there's another way of doing it anyway, but doing a grab would be much easier.

Note: Some of my site articles need updating to take the Banshee grab possibility into account, as an alternative way of doing things. It's going to take a while before I work through them all.

Arch method

The basic idea for the arch method is to make the Banshee circle around into the gap at the top of the arch after its first attack run, and then when it squeezes in, tempt it into angling down and coming after you, in such a way that the pilot gets ejected. With sufficient finesse you can get a high success rate. I've managed as much as 85%, measured over 20 tries from a checkpoint prior to the loading point. You can see the method demoed in my tutorial BCM191, but here I'll describe the method in detail, step by step.

Incidentally, things seem to work the same on NTSC/PC as they do on PAL Xbox (my own system). I'm judging that partly from feedback in a HaloRuns thread, and partly on seeing the method used in speed runs.

Positioning via down-aim

Get positioned

Preferably have a pistol and at least one grenade. Also a plasma weapon if you might be wanting to kill the pilot before boarding.

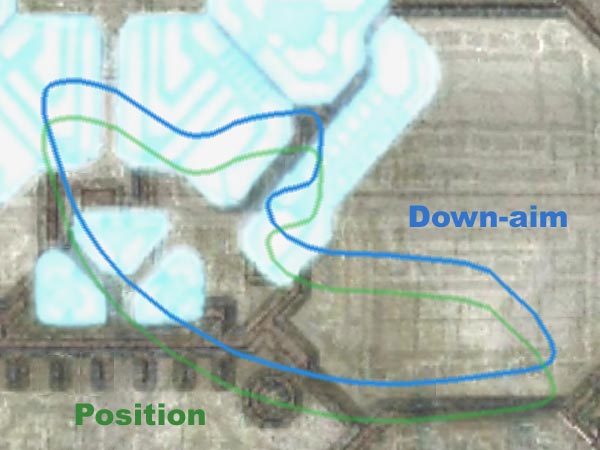
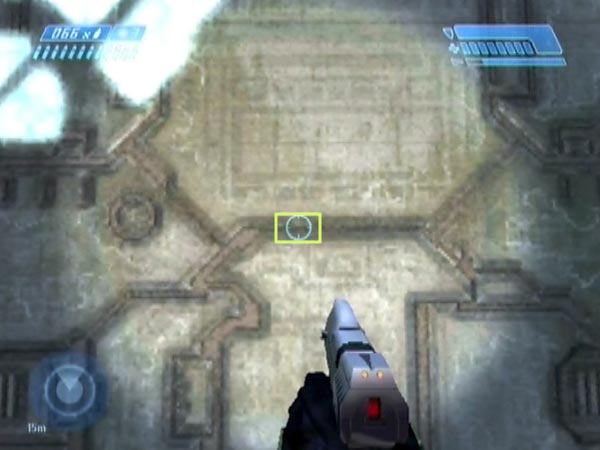
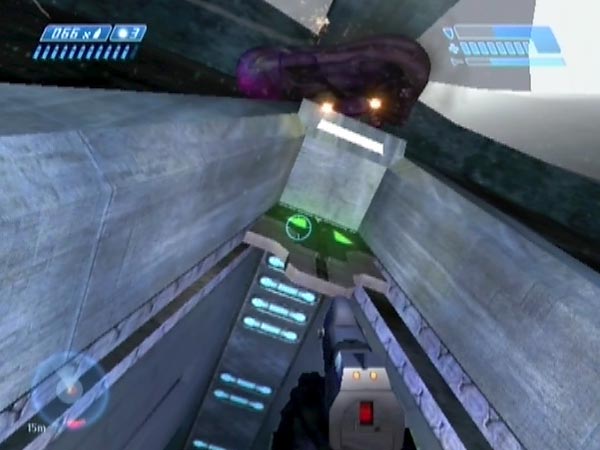
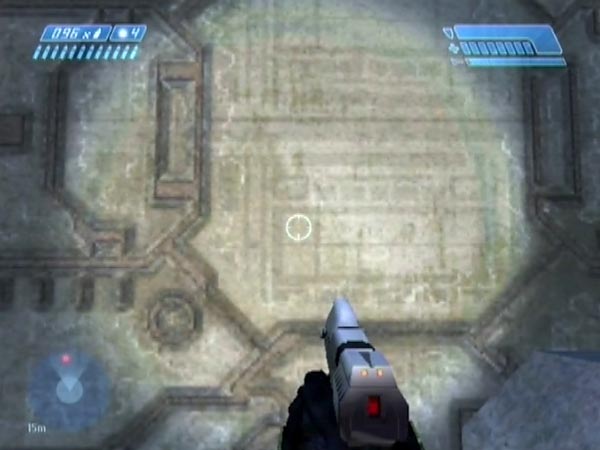
When you arrive at the bridge, advance a few steps beyond the door and position yourself using down-aim as shown in the picture. Facing the wall, target the small indicated area - part of a thick line below a faint 5 x 2 grid pattern to the right of the bright arrow. You don't have to be dead centre, but consider the centre optimal and try to at least have most of the pistol reticle inside the target.

You're outta here grunty

Kill any Grunts

Next, you'll normally want to kill any Grunts by the Shades, ideally with pistol headshots. If you're playing with headphones, you can know the situation without looking, because when you come through the loading point you can potentially hear them spawn, plus you'll usually hear them subsequently while getting positioned. If there are two, I recommend dealing with the guy on the right of the bridge first, because then after swivelling to deal the other, you only have to swivel a little to focus on the Banshee. It's just an efficiency thing. That said, there's plenty of time to do the killing, as long as you didn't take too long getting into position. Typically the Grunts on the other side of the wall panic after your pistol fire and won't immediately bother you. But sometimes one might arrive to man the left Shade, and may need dealing with. I'll elaborate on that in a moment.

Crouching now

Crouch at the right time

Reserve your main focus for the Banshee because there's some critical timing needed. You need to do a brief crouch to make it veer off at the right moment, to try and make it circle into the arch gap. It veers off because you've become too obscured. Crouch as the tip of the Banshee's right wing is reaching the vertical shadow-line seen on the distant cliff. You have to get the timing just right, but with practice you can get arch entries with high success rate.

Arriving Grunts

In regard to Grunts arriving, it's worth glancing at your tracker when time permits, to get warning; and if one turns up, try to kill him if you think he can't just be ignored.

Heading for trouble

If he's arriving early enough, you can potentially do it before switching your attention to the Banshee, but don't end up compromising your crouch timing. It's usually best to wait until after the crouch. At that point you've got a good few seconds for a possible headshot - which is particularly easy if he's hopped onto the Shade but hasn't rotated it yet. Alternatively you could throw a quick grenade, being careful not to blast the Shade your way. Be sure to turn your attention back to the Banshee in time for its arrival at the arch though.

Just after crouching is a good time to glance at your tracker if you haven't already got a Grunt on the scene. If you see an approaching dot, make a decision about handling then focus on the Banshee.

Banshee starts to angle down

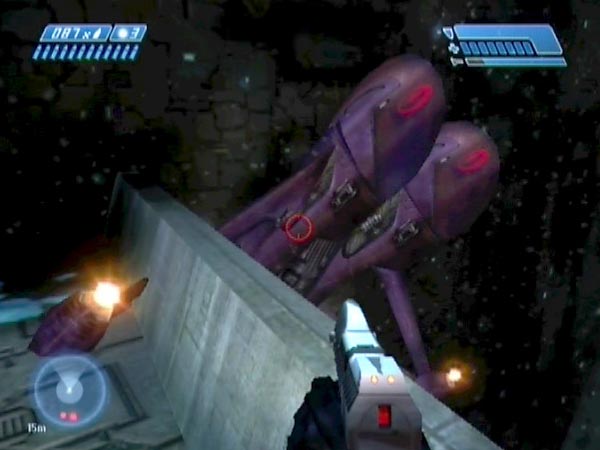
Arch entry and ejection

Remain in position and wait for the Banshee to hopefully circle around to the arch. If you see it enter the gap at the top as desired, move in towards the door opening, on the left; no further than the front of the frame. At this point you should be nearly underneath the Banshee, but slightly to its right, and behind the nose (be careful not to move in ahead of the nose or the Banshee is liable to back out).

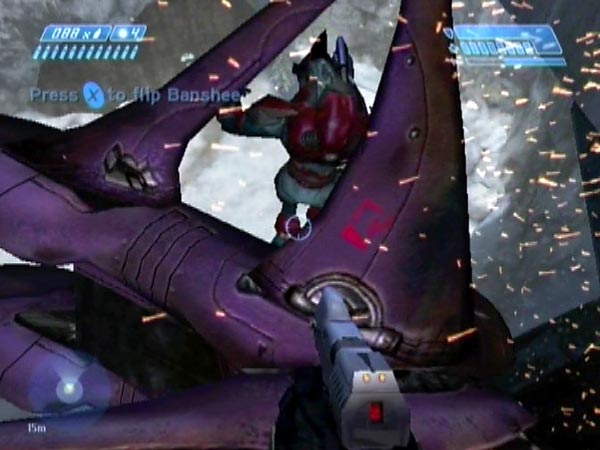
It tends to pause for a moment, but then starts to angle right and downwards to come down after you. When you see this starting, move across towards the other side of the door frame (you can even go beyond, though there's no need) to try and strain the Banshee, making it turn more. Done well, this countermove should get the pilot ejected. The ejection happens early if at all, and I think it relates to the sloping beam of the arch contacting the Banshee, helping to tip it over as it turns.

Countermove causes ejection

A few critical things in this regard. Firstly, don't start moving across before the Banshee starts moving. If you get ahead of the nose, it'll instantly stop then back out of the situation, and your chance will be lost. Because of this, it's probably a bad idea to try and anticipate its movement (though there is a certain approximate rhythm to how it pauses then restarts). Better to wait for it to start moving, then react. Your reaction needs to be very prompt though, because once it's away from the top area, the ejection possibility is lost.

Overall, this countermove is quite like a martial arts technique in which you move in a synchronous way with the opponent, deftly causing him to become unbalanced of his own accord. Once you get the knack, it can work with high success rate, allowing you to convert most arch entries into ejections. On rare occasions the Banshee actually gets stuck in the arch. There's still a chance of ejection in a few seconds if it frees up (you may still be able to do your countermove business), but it's obviously not ideal if you were on a speed run.

Ejection without arch entry

Ejection without entry

Sometimes when the Banshee arrives at the arch gap, it doesn't quite enter. However, it may wobble about and an ejection can follow. You can potentially raise the chance of that by moving to the left of the door (as you face it) to try and encourage the Banshee to angle down after you (it's analagous to the usual countermove), though you'll need to react fast to have much effect.

Early boarding

When the empty Banshee falls, be careful about being underneath. It's certainly possible to board before it hits the ground by mashing the X button, and you can even jump up to try and intercept it, but there's a risk of being squashed, because it'll hit the ground regardless. If you're speedrunning though, such early boarding can save you time. According to my testing, the jumping up method saves about half a second on average, and I think the risk of being squashed is quite small. If you instead wait on the ground underneath, the average saving is only around a quarter of a second and I think the risk of getting squashed is more significant.

Let's give him a warm welcome

Handling the ejected pilot

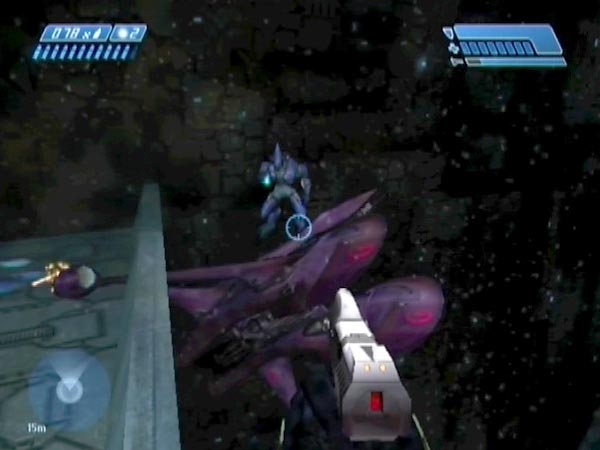
The ejected pilot can potentially open fire quite quickly if he doesn't get squashed by his own Banshee or go over the edge. If you're not planning to board immediately and get him with the Banshee (splattering is often quite easy), you may like to have a plasma pistol ready to stun him then finish him off. A plasma weapon is certainly a better option than a pistol, especially on Legendary. You could switch to it as the Banshee is circling to the arch. Be cautious about using a grenade as there's a danger the Banshee could get blasted off the bridge. However, that's mostly only a danger if there are any dropped plasmas which could get detonated. I tag the pilot quite often actually, as it's good fun.

If you want to keep the Banshee in tip-top condition, obviously you should kill all nearby covies before boarding. Don't forget about the patrolling Elite either, who could zap you as you fly off.

Checkpoint before the loading point, for varied configurations

Using a checkpoint

If you're not on a speed run, or if you want to set things up for some practice, the thing to do is get a handy delayed checkpoint for making tries. The entry passage checkpoint is triggered in the second section of the passage leading to the bridge, and that's the one you'll be delaying. If you want varied enemy configurations (I'm especially thinking of the Grunts), delay it until just before the loading point, so no enemies have spawned yet. The loading point is near the end of the long middle section of the passage, as you probably know.

Late checkpoint for faster tries

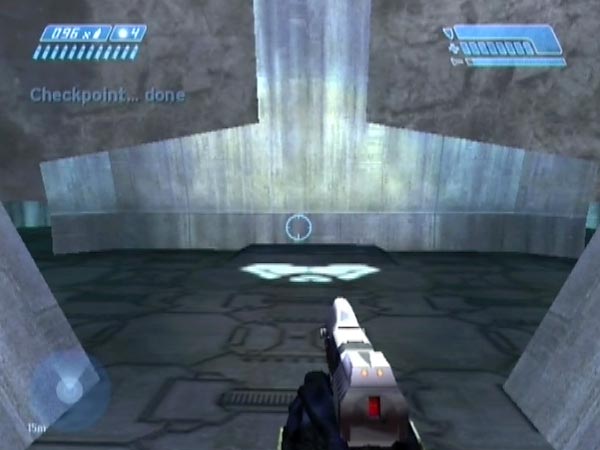
To instead have the same enemy configuration every time, delay the checkpoint until past the loading point; e.g. standing at the door. To also minimize the amount of time per try and avoid hearing Cortana's long "Interesting…" line on retries, get the checkpoint just after she's started. If you do a jump on the spot when you reach the door, that'll probably be enough, bearing in mind that the delay will continue a little after you land. With a late checkpoint like this, failed tries typically won't take more than about 15 seconds - about 7 seconds less than when using a checkpoint before the loading point. You'll need to get into position promptly though, because you'll have a few seconds less. Indeed, you're cutting things quite fine.

Let me warn you of a few dangers when going for a late checkpoint. The checkpoint mustn't get delayed too long, or the Banshee will have progressed too far along its scripted flight path for the method to work (the Banshee needs to still be a long way off when it spots you). Also, if you delay too long or get too far forward, you might not get the checkpoint at all, because the game considers you under enemy threat.

More on the arch method

Here are some addition remarks on aspects of the arch method, including some talk about earlier versions and the breakthrough.

Wider positioning viable

In regard to your positioning, I specified a very small down-aim target. The plan can actually work with a wider area, but I did a lot of testing and I've chosen the part which was giving the best rate of getting the Banshee to enter the arch gap - which is the critical thing.

No close Grunts

If all the Grunts are on the far side of the wall when you arrive, it may be a good idea to fire a shot before the Banshee gets close, to panic them. The hope is that they'll panic long enough to never bother you. I haven't done a proper test to try and verify that this is statistically the best plan (actually, there would also be the issue of what's the best time to fire), but I suspect it is.

Time for a fast-working frag!

Arriving Grunts

On Legendary, arriving Grunts are significantly more dangerous than on Heroic, so it's more important to avoid having them shoot at you for long. If you decide to use a grenade, a frag can be preferable to a plasma because it goes off sooner. If I know the Grunt is going to be pointing his turret my way before I have time to deal with him, I'll have a frag ready.

With a post-loading-point set-up, sometimes you get to learn that an arriving Grunt can just be ignored. I've had at least one such set-up in which an arriving Grunt would just watch me for quite a while (you can see him in BCM190 around 2:56), and then he'd board the Shade and usually focus on the Pelican!

Grenading a Shade clear

In my accounts of earlier versions of the method, I mentioned the option of grenading a Shade clear (the one on the right of the bridge) so it can't get in the way when the empty Banshee falls. Actually, I eventually came to the conclusion that it wasn't really worth the bother. But with the new method it's even less worth the bother, because the Banshee almost always lands away from that Shade. I don't do it any more.

Dang, crouched too late

Crouching

If you crouch too early the Banshee tends to arc away (often low). If you're slightly too late, the Banshee may start to circle towards the arch but almost immediately change its mind and veer away. If you're repeatedly seeing either of those behaviours, both of which are shown in BCM191, try to do your crouching slightly later or slightly earlier respectively. There are also times when the Banshee circles into the arch but doesn't hit or enter the gap. Instead it collides with the underside of the sloping beam of the arch. This too is likely to be because your crouch timing was slightly off, albeit not by much.

Make sure your crouch movement is straight down. If you depress the crouch thumbstick in an off-centre way it may cause you to shift position slightly, which can affect the Banshee's course.

Rotated view

Alternative body angling

When the Banshee is arriving at the arch, traditionally I've been facing the cliff wall (looking up), usually after having watched the Banshee circle around. But in the course of making BCM191 I tried out an alternative style, with body facing the left side of the bridge (again looking up). You can adopt that posture as soon as you've done the crouching and dealt with any Grunt arrivals. Now when the Banshee enters the arch, you'll move left to get nearer the door frame, and then your countermove will be forwards. You may find the countermove easier to do like this.

One-move variation

Talking of different styles, I've also tried causing ejections without first moving in towards the door. In other words, you remain where you are until the Banshee starts angling down, then you do a countermove to try and strain it. It's certainly viable but my conversion rate wasn't as high, so I do think moving in is best. You might like to try it though.

Minimal randomness

Contrary to my early impressions when I got into this arch business, I think there's very little randomness in the Banshee's flight decisions, in regard to its flight after you crouch. Possibly even none at all. That's good because it mean your success rate is largely down to your skill.

Earlier versions, and making the breakthrough

Here I'll talk a bit about earlier versions of the arch method, and the breakthrough.

In my segmented PAL speed run BCM176, I killed the Grunts then quickly positioned myself at a certain spot behind the wall, then made the Banshee veer off at the right moment by making a short forward movement to briefly obscure myself. However, it took a great many tries to work, and it was quite a busy routine to manage. I subsequently honed a more controlled routine designed to minimize random elements, to try and get the best possible control over the Banshee; and as a bonus, Grunt handling became easier too.

Pilot emerges, in BCM177

The result felt viable enough for use in an actual speed run, so I went ahead and did one, shown in BCM177. In neither of these movies did the Banshee fully enter the arch gap however. The nose went in, but then the Banshee wiggled about and the pilot popped out. Indeed, I hadn't yet put an emphasis on getting the Banshee to fully enter the gap. The goal was less specific, and in my description I merely talked of the Banshee having 'trouble' at the arch, and wanting it to go "at least part way into the gap".

Success after success, wahoo!

I never did make a tutorial for that more controlled routine, because there were aspects I still needed to check into. In particular, I needed to test whether there was actually any point in doing weapon fire when below the Banshee (I thought it was helping to get the pilot's attention). Towards the end of making my Pelican descent ride movie BCM190, I did that and concluded that there wasn't. In fact I seemed to do better without firing - probably because I was paying more attention to my movement and positioning. It became clear that the pilot was very aware of me down below, and was highly responsive in some regards, which encouraged me to experiment. That's what led to the breakthrough. I hit on a movement pattern and it was giving me success after success. I was in control at last. In retrospect I'm sure a lot of the ejections I'd got previously were because I was doing something akin to that movement, but without realizing what exactly was happening. If I hadn't been distracting myself by firing up, perhaps I would've made the breakthrough a lot sooner!

Compared to the previous version, the new method has three key differences. Firstly, slightly different initial positioning, making it more likely for the Banshee to fully enter the arch. Secondly, no pointless firing when the Banshee is in the vicinity of the arch. And thirdly, a far higher rate of converting arch entries into ejections, thanks to a specific response designed to strain the Banshee.

Never happened before?

What surprises me is that apparently nobody happened to get the Banshee via arch trouble before - or at least nobody reported it, as far as I know. Surprising because, any time you're holding back behind that wall at the start, there's a chance the Banshee could end up having trouble at the arch, and the pilot could pop out. Probably most players don't hang back much, but still, think of the huge number of times the level must've been played!

Rim method

Stuck in the bridge rim

The rim method involves getting the Banshee stuck in the left bridge rim on its first attack run. Specifically, the left wing ends up stuck through the rim.

Sligfantry showed the original routine in his tutorial 'Halo - AOTCR - Bridge Banshee Grab', which is accompanied by written details and an account of how the whole thing came about. Unfortunately though, getting the pilot out was problematic and very unlikely to occur fast. Also the subsequent boarding was a slow procedure, requiring the Banshee to be moved until it fell to the lower deck.

Fortunately, things were transformed a week later when he found a way to eject the pilot and board fast, though it was fickle. That made it the choice method for speedrunners, though the new potentially high success rate for the arch method may gain the arch method some favour now. It's this improved fast-working method (incorporating a refinement by ColdGrunter) which I'll cover here. However, let me mention in advance that the boarding technique only works with red Elites, not blues. On Heroic you get about 50% blues, but on Legendary mostly reds.

The routine

On arrival at the bridge, the initial task is to get the Banshee stuck. For PC and probably also NTSC, the current method goes like this. Kill any Grunt by the left Shade, and wait at the bridge rim in that corner. Optionally you can also kill some other Grunts, either before or after; but get to the corner without much delay. As the Banshee opens fire, jump backwards to bump into the door frame behind, then jump forwards and land on the rim, and jump. Your movements influence the Banshee, and if you're lucky (something like a 10-20% chance?) it'll end up stuck in the rim. It's quite an odd sequence of movements though and I suspect there's a better way just waiting to be found. That could really do with some investigation. As for how to influence the Banshee if you instead have PAL Xbox, I'll talk about that separately later.

Watch out for the drop fella!

Now comes the task of boarding. What Sligfantry did was to jump diagonally across the Banshee towards the nose, then mash the action button to flip and board it when the pilot shifted the Banshee and - hopefully - fell out.

But when ColdGrunter got involved in connection with speedrunning, he found a way to get the pilot out more consistently (with the same underlying mechanism). Namely, stand on the Banshee between the nose and wing, getting there without aiming at the Banshee, then look at it and mash the action button to flip and board it if the pilot falls out. He did a tutorial on it, and also pointed out that it only works if the pilot is red. Blue Elites don't exhibit the necessary reaction.

Elaboration on boarding

At this point I'll elaborate about what's going on in regard to boarding, and give my own recommendation. If you're close enough and the pilot is aware of you (and he's red), he tries to move the Banshee around when you look his way sufficiently well. You don't have to be looking directly his way - and actually it can happen even when the Banshee isn't in your field of view at all, if you look in certain directions. It seems like an escape attempt, but maybe he's just trying to get a better view of you. His reaction is usually rather prompt, which is why it's important to try and avert your sight from most of the Banshee as you jump into position. You don't want him to react until you're in place, ready to flip and board. The nature of the Banshee movement depends on your location, which means you have some control over it.

Boarding complete!

What I'd recommend is to jump onto the Banshee facing the wall, landing between the nose and left wing, then rotate left sharply to bring some of the Banshee into view; or alternatively do the left rotation during the jump, for extra snappiness. After that, it's down to chance whether the Banshee moves in a way which happens to eject the pilot (though there won't be a reaction at all if the pilot's blue - which you'll be able to see). I don't think there's any point in crouching or trying to really get deep into the gap between the wing and nose (like ColdGrunter seemed to do in his 4:50 run). I've tried those things and found no benefit.

In regard to mashing the action button, you don't need to start doing that until the Banshee twitches. But if you prefer to start mashing as soon as you're on the Banshee, it certainly won't hurt. If the pilot is ejected, the mashing will first cause a flip, then a boarding.

Incidentally, it's also possible to cause ejection by jumping onto the tail. In fact, when I tested that in one particular situation, the pilot got ejected considerably more often when I used the tail. It didn't help however, because when you flip the Banshee, it tends to go away from you, making boarding relatively unlikely (though certainly possible).

Getting the Banshee stuck with PAL

Sligfantry mentioned that his PC method for getting the Banshee stuck in the rim doesn't work with PAL Xbox, and I agree. He described a slightly different method for PAL but it hasn't worked for me at all. Indeed, it's become clear that a method which works for one checkpoint situation may not work for others; so things need testing quite widely.

Positioning via down-aim

For PAL I found a simple method which in most checkpoint situations gives a success rate of maybe 40-60%, though I've also had situations where the rate seemed much lower or even zero (even with a checkpoint prior to the loading point). On arrival at the bridge, position yourself with down-aim as shown, just past the door frame. The large octagonal tile features a faint rectangle forming a 5 x 2 grid and I'm targeting the top left element. You don't have to have target it dead centre, but consider that optimal (there's a larger area where you'd still get a decent success rate for sticking, but I got the highest rate here).

Next, kill any Shade guys, ideally with pistol headshots. Don't grenade the left Shade - because if you do, that adversely affects the Banshee's flight decisions. The other Grunts will hopefully panic and not bother you for a while; but if one turns up later (it always seems to be a guy going for the left Shade), kill him. Simply remain standing where you are as the Banshee approaches. Usually it'll dip to towards the rim; and if you're lucky it'll get caught. It should be ok to start moving (if you want) once it's well into a dip. By that time your movements aren't going to have much influence on its course I think.

Trouble is, this sticking method has provided me with almost no pilot ejections! What typically happens when I get onto the Banshee is that it quickly escapes - often killing me in the process. The way it tends to get stuck just doesn't seem suitable for fast boarding. So at present, PAL is problematic.

Handy checkpoint for retries

Using a checkpoint

If you're not on a speed run, there are a couple of ways you can help yourself by delaying the entry passage checkpoint, which is triggered in the second section of the passage leading to the bridge. One way is to get it before stepping onto the bridge, to allow faster retries at getting the Banshee stuck. You could delay it until either just before the loading point - in which case you'll get different enemy configurations - or until you're at the door. In the latter case you can optionally delay it until just after Cortana starts talking. That would save a few seconds per try, and also has the benefit that you won't keep hearing her line.

Alternatively you could get the checkpoint soon after the Banshee is stuck, so you'll then be able to repeatedly make boarding attempts (but note: don't get near the Banshee prior to the checkpoint, else the pilot may react and shift the Banshee too early). If you fancy that idea, prepare as follows. There's a checkpoint triggered in the middle section of the passage after the landing zone. Keep that delayed until just before the trigger line for the aforementioned checkpoint; then get it and save it. When you now advance, keeping your newly triggered checkpoint delayed, you'll be able to reload from that save point if you fail to get the Banshee stuck. That'll save you having to restart the level.

Alternative boarding with the rim method

Sligfantry's original version of the rim method involved a different and much slower strategy for ejecting the pilot and boarding, and I'll cover that here (with a few contributions from personal experience) because it's still potentially useful. For one thing, the quick boarding way doesn't work with blue Elites at all. For another, maybe on average it could give you the Banshee faster, in terms of time spent working on it.

To start with, it'll be helpful to save a checkpoint before stepping onto the bridge. That way, if you end up with a stuck Banshee whose pilot refuses to budge, you won't need to restart the level. You can reload the saved checkpoint to start from there.

Woo-hoo! Got him out

Ejecting the pilot

After getting the Banshee stuck, multiple tries are likely to be needed at getting the pilot out, so it's good to get a delayed checkpoint. You can use the bridge checkpoint (triggered towards the far end of the bridge). When you get back to the Banshee, the game will grant you the checkpoint as long as you're not too close.

Various things can be tried to cause a Banshee shift which ejects the pilot. Going near it is one thing, but be careful about standing close, because if it twitches you can get mangled! The other main thing to try is try throwing grenades at it or near it (make sure you were well stocked). I especially recommend tagging it on the tip of the right wing. You could try the other wing tip too, though I don't recall having any success with that. You can actually tag it like that quite a few times, because the blast seems to cause relatively little damage.

You can also try going back over the loading point and returning; I found that this can sometimes cause ejection. But I think it depends on the angling. Like, perhaps it needs be really out of whack. When it happens, he's out by the time you see the Banshee again (and probably you heard some clattering while still in the passage - though not always).

Pilot ejection is a troublesome and fickle business though, doubtless partly dependent on the exact angling of the Banshee, and eventually you may feel obliged to just give up and start over. Have to say, I've ended up doing that in the majority of cases.

Moving the Banshee to a hole

Boarding

Let's suppose you get the pilot out though. The Banshee can't yet be boarded, but Sligfantry hit on an ingenious and rather amusing solution. By repeatedly flipping it, you can potentially get it moved to one of the deck holes for glass. When the glass is smashed, or if it was already smashed, the Banshee will drop down to the lower deck where you can board it - though it may need some final flipping, and you better be careful not to flip it off the deck! Actually, you could always get another delayed checkpoint before the final flipping, to safeguard against loss if you want. You can use the exit passage checkpoint.

The prize awaits

Moving the Banshee looks easy in Sligfantry's tutorial, but it may not go so smoothly in practice. To begin with I found it very hard to get the Banshee moved because it seemed jammed, or went back and forth unproductively. Turned out there was a deck support wall in the way, but I eventually realized what to do. You can use melee to shift the Banshee clear. Based on my later experience, I'd say you'll quite often need a bit of melee actually. Use a plasma pistol or AR, as those have the highest whacking rates.

Incidentally, you don't have to do all the shifting work from the upper deck. You can potentially do some work from below too, once the Banshee is made accessible.

Playing the waiting game

In view of how easy the arch method now is, probably nobody will be interested in the slow variation described here (stemming from my early investigation), but I've kept it in the article anyway.

The arch can also be used to get the Banshee in a leisurely fashion if you're not in a hurry. You can simply wait around for attack runs, hoping for eventual success. Typically the Banshee gets stuck, and then when it tries to get free the pilot can fall out. This is a bit different to the case of using the arch on the Banshee's first attack run. It tends to enter the arch at a more level angle, which seems to make it more inclined to get stuck.

Area for encouraging arch entry

In regard to the waiting, naturally it makes a big difference where you stand or move, because those things affect how the Banshee approaches, and its subsequent course. I can give you some pretty good information for PAL Xbox, though I can't be sure things work the same on NTSC/PC.

I tested a lot of spots to try to get an overall picture of where it's good to stand, to make the Banshee circle around into the arch fairly often (often enough to hold good promise for an ejection). The result is shown in the picture here. The green outline shows the approximate 'good area' to stand in. It's pretty small as you can see. Outside it, you could be standing all day without seeing any arch entries. Within it, undoubtedly some places are better than others, but I don't have any detail on that.

Needed evasive action there!

The blue outline shows where you should down-aim (while facing the arch wall) if you want to be in the required area. It's just a slight offsetting of the positional area, bearing in mind that when you down-aim, you're looking at a spot slightly ahead of your position (by almost exactly 3 pistol reticle radii).

Using a checkpoint

For playing this waiting game, it's a good idea to eliminate the four Grunts and get a delayed checkpoint, so you can always revert to full health if necessary. You could use the entry passage checkpoint, or the bridge checkpoint triggered towards the far end of the bridge. That said, standing around in that area seems completely viable health-wise. Even on Legendary you're unlikely to get quickly killed, and need only move from your spot when evasive action is necessary (the Banshee may come behind the wall occasionally).

Other possibilities

In this section I'll cover some other possibilities or ideas for grabbing.

Direct entry into the arch

Direct entry into the arch

In regard to using the arch, I've focused on what I call 'circle entry', where the Banshee circles around to enter from the bridge's right hand side. However, it's also possible for it to enter from the other side - which I call 'direct entry' because the Banshee is already coming in from that side, making its attack run.

Direct entry actually provided Sligfantry's first Banshee grab, after the Banshee got fortuitously stuck. He got a checkpoint and eventually found he was able to get the pilot out by spooking him with a grenade. But he was never able to find a way to get the Banshee stuck again, so ultimately gave up on it, switching attention to the rim instead.

I looked into the possibility myself and focused on getting it to the arch on its first attack run (see pic). I found a method and hoped it might lead to some fast grabbing, but alas it never did. The way the Banshee arrives at the arch just doesn't seem to give the right potential; and even when it got stuck rather than just bumping around a bit, I don't recall much success getting the pilot out when doing the sort of thing Sligfantry did, throwing a grenade from distance. For the record though, my method of getting it to the arch was as follows. Earlier I described a PAL method for getting it stuck in the bridge rim. Do the same as that, except crouch after it's been firing for a while. On Heroic I was crouching after two volleys, or thereabouts. When the Banshee breaks off, it seems random as to which of various courses it takes, but there's a significant chance it'll rise up into the arch. That happened about 25% of the time, in a test comprising 50 tries from a checkpoint at the door.

Having trouble down here?

Further ideas

The arch and the left bridge rim corner aren't the only places the Banshee can end up stuck. I've seen it stuck in lots of places, including between decks. In fact I'd been planning to explore that idea and do a movie on it even before this grabbing business turned up. It's possible that the pilot might get ejected in some such cases. In particular, if you've got a stuck Banshee you could use grenades to try and get the pilot out - ideally after getting a handy delayed checkpoint nearby so you can make multiple attempts.

That blast got him out

You'll see plenty of that in BCM178, in which the Banshee got stuck in the rim in an unusual place. As you'll see from that movie, you can potentially also have a lot of fun playing around with ejecting the pilot and killing him. You don't need to be restricted to your current weapons either; you could fetch others and get a new delayed checkpoint for additional fun. I'm especially thinking of a rocket launcher and sniper rifle there. But also, you may be able to have an awful lot of fun with a Banshee of your own, ramming and blasting the ejected pilot in mid-air, as seen in BCM184. Scoring fuel rod hits is quite a challenge though.

However, for any of this to be useful you'd need a method for trying to cause a particular situation. At present I have nothing to offer there, other than directing you to how the Banshee got stuck in BCM178 (I hadn't been intending for that situation though).

One other remark. I've spent some time at the far end of the bridge, seeing if I could get the Banshee into trouble at the arch there. However, the situation isn't a mirror image of the near side, and I don't think it's going to work. The Banshee just doesn't seem to have the right flight behaviour over there.

Measuring success rates

This is a bit of a technical section, but if you're interested in investigating some new methodology in regard to Banshee grabbing, you'd be well advised to read it, to be sure you appreciate some key issues.

In regard to any particular methodology you employ on the bridge, naturally you'll be interested in the success rate. For example, in regard to the rim method you'll be interested in the success rate for getting the Banshee stuck in the rim. However, there's an issue here about how you measure things, and it gets quite problematic. Let's suppose you get a delayed checkpoint at the door to the bridge, and repeatedly try your methodology from there, to get an approximate success rate. All well and good, but you need to realize that you've got a particular checkpoint situation, involving a particular enemy configuration. If you were to set things up again with a new checkpoint, things might be different enough that the Banshee tends to react somewhat differently, leading to a very different success rate.

To take that into account, you might instead test the success rate from a checkpoint obtained just prior to the loading point, so enemy randomization has yet to occur, and so you'll encounter a fuller range of situations on the bridge. It's a definite improvement, but now here's the problematic bit. Surprisingly, your checkpoint situation may already be quite 'specialized' in some way, even though you haven't hit the loading point yet! To give an example, I was doing this for testing a method of getting the Banshee stuck in the rim, and typically I was getting success rates upwards of 40%, but then I got a checkpoint which gave not a single success in 50 tries! Also, I've had situations where I get nothing but red pilots.

In subsequent testing I found that even if you get the entry passage checkpoint well back from the loading point - specifically at the start of the long section of passage - you may still have a specialized situation. That's as far back as I've checked.

In this section I'll note any links to relevant material. Anyone who posts something (e.g. using a bridge Banshee grab in a speed run), do feel free to alert me with an email or whatever.

Check out my Pelican descent ride article for some fun to enjoy after grabbing the Banshee.

See Banshee stuck in the first bridge for the general topic of the Banshee getting stuck in the bridge. The associated movies use a lot of footage which came from the business of Banshee grabbing.

At Halo Runs, Monopoli started a Banshee grab thread. Later I started a thread focused on two developments which really opened things up for speedrunners. Within that thread, ColdGrunter reported his first successful run using the rim method, and explained his more consistent way of getting the pilot out. Later still, I started a thread on my arch method breakthrough, and RedMage08 used it on PC.

March 2019: Burnt Scythe has done a long PC-based tutorial on the rim method, after using the method in setting a new world record.