Rear attack
Associated movies
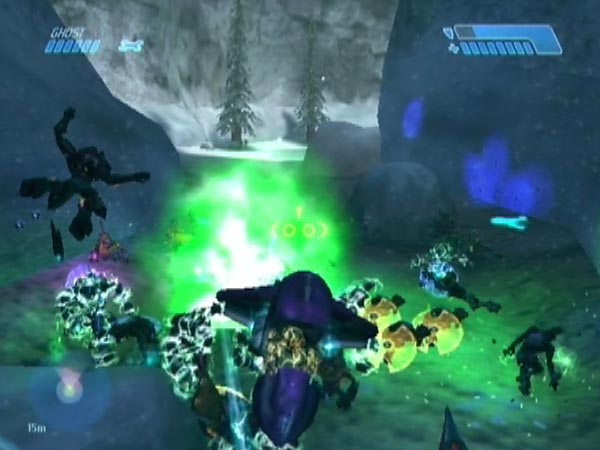
Waving a temporary goodbye to the Marines if any, get back past the covies to attack them from the rear - which effectively puts them in a sandwich if you do have Marines. Getting back past the mob is easily done with a Banshee of course, but another option is to speed through them in a Ghost, possibly doing some splattering along the way! One other possibility is to use the camo to make it through on foot, but that's obviously going to be quite slow.
Once the covies in the pass are dealt with, you can head on through to tackle the rest of the enemy, potentially bringing relief to any Marines who are still alive.
The likelihood of any Marines surviving depends partly on how far back they started when you left them, but there's also a technical issue involved. Namely, when you're distant from them, doing your main attack work, they may be effectively frozen or paused (a basic game mechanic), and only unfrozen when you get nearer to them again. As such, when you emerge from the pass, you may find that they're a good way off, perhaps even fighting covies near the top of the spiral path. I've found that to often be the case with Marines starting down on the ice at the bottom of the path.
Pass blockade recommended
This battle plan is particularly well suited to the case where you've set up a pass blockade. If you leave the blockade intact when getting back past the covies, the mob in the pass will remain blocked, at least for a while, which not only obliges them to face your merciless attack (you are going to be merciless, right?), but may also help the Marines, because the covies there can't close in on them.
Great for rocketing and grenades
This battle plan is excellent for rocketing, especially if the covies are confined by a pass blockade. You can enjoy sending in rocket after rocket, creating a right old mess. It's great for grenades too, and you can get some spectacular chain reactions. But don't just focus on the rockets; you can also have a lot of fun with other weaponry. Try a needler for example! There's also good scope for enjoying mischief with the active camo.
Deadly Hunters
On Heroic, which is how I've normally been playing this battle plan, Hunters are a massive threat when you're standing a good way back, working on the mob. Their shots sail your way with what often seems like unreasonable accuracy, and sometimes arrive in pairs, one from each beast. I can't tell you how many times I got killed by them in the course of making BCM591 and its sequel.
Killing a first Hunter will significantly reduce this threat, so you might like to give that some priority, but it can take a while if you're not using rockets. If you're out of cover, at least keep moving aorund. Standing still is just inviting them to deliver a double whammy.
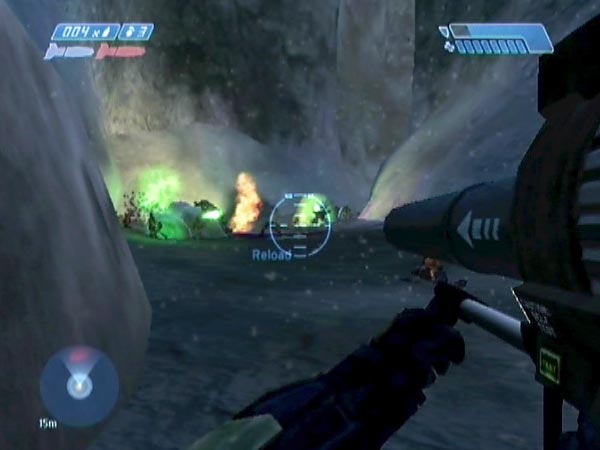
Up on the pass entrance rock
Just at the start of the pass on the left, there's a large rock which is often climbable, such as seen in BCM591. But even if it's not, you could always drop yourself off on top with a Banshee of course. From up there you can have fun peeking your head over and whittling down the enemy at relatively close range. Watch out for Hunter shots though (see pic). They can do serious damage even if they only hit on the other side.
If you're particularly interested in rear attacks, it's worth specifically making sure the rock is climbable. See my rock geometry advice for that. The best rock can be seen in my various movies.
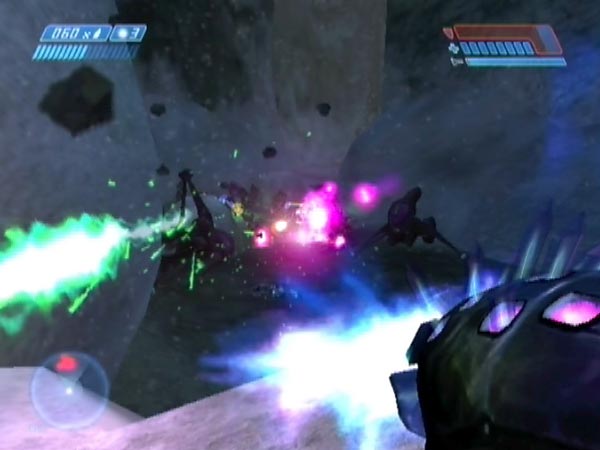
Scorpion carnage
You can even attack with the Scorpion, which you could've left nearby in advance (see my advice on rearranging), or which you could simply go and fetch.
The tank is somewhat of a death trap due to how easily you take damage, but it can be very satisfying if used with a bit of care (or if you take a gung-ho approach and get lucky, I suppose). The huge blasts make a fine old mess in that crowded pass. It's nice also if there's some clutter to blast. Vehicles or Shades.
You can see a few tank plays in my movies. There's one in BCM593, and a clutter-enhanced episode in BCM595.
Setting up for intensive playing
If you want a long spell of rear attack fun, you can fly back past the underground bridge to trigger a tunnel checkpoint, but delay it with Banshee fire until back near the pass entrance (e.g. behind the entrance rock). You'll then be able to keep reverting to that checkpoint for enjoying some rear battling. Unlike before, you won't need to fly or drive into starting position each time.
Of course, I'm implicitly talking there about the case where you're starting with a standard sort of save, where you checkpointed in the spiral path area. If you really want to focus on rear attacks, there's nothing to stop you creating a dedicated save, which would ideally have spare weapons available at your chosen starting spot. I recommend also having some clutter in the pass, which can add to the fun and provide useful cover. Having clutter there is something I focused on in some of my movies.